Zoom is an online meeting platform that can be used for holding classes online. Here, you will learn how to set up your Zoom classroom link as well as how to access the session. To view the guide in PDF format, please click here.
This blog article covers the items below:
– Schedule a Zoom class meeting link
– Start a meeting
– Manage participants
– Share screen
– Breakout groups
Schedule a Zoom class meeting link (for faculty)
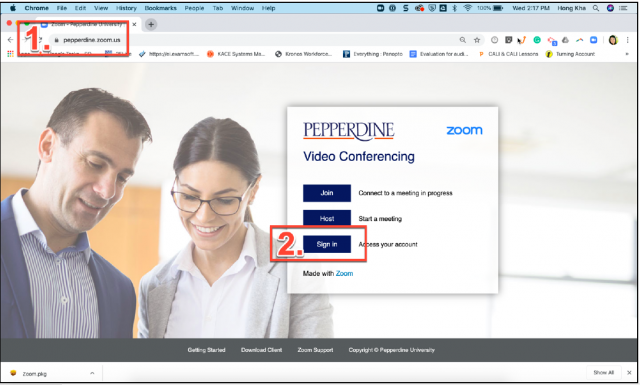
1. Go to the Zoom website at http://pepperdine.zoom.us
2. Click “Sign In.”
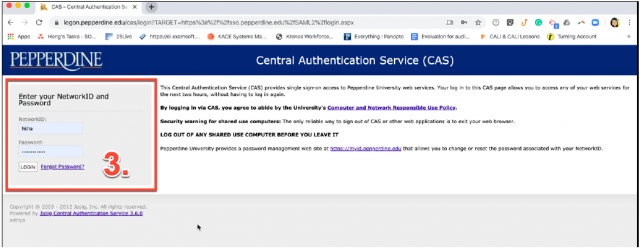
You will then be directed to the Pepperdine Central Authentication Page.
3. Login using your WaveNet username and password. (The same credentials you use for getting your Pepperdine email and WaveNet)
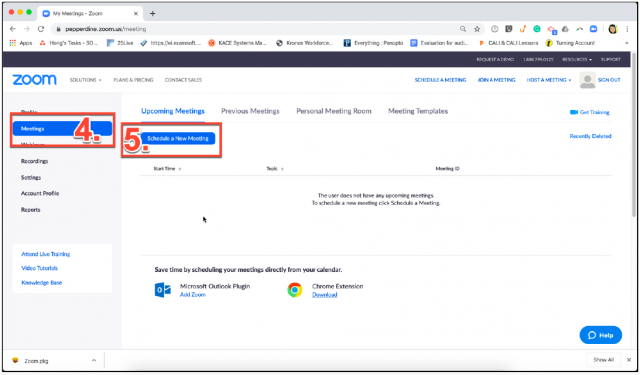
4. Once logged in, click on “Meetings” on the lefthand menu.
5. Select “Schedule a New Meeting.”
Now, you may proceed to fill out the information for your meeting.
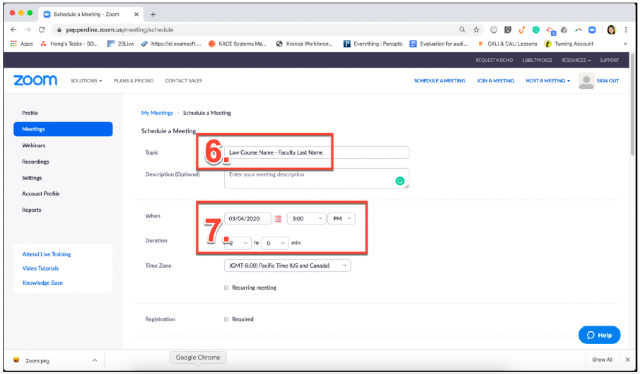
6. To the right of “Topic,” fill out your course name. (It is important to include your own last name and your section, if applicable; this information will allow students to easily find your course).
7. At the middle of the page, find “When” and select or type in the date and start time of your class. If your start time isn’t in the drop down, pick an earlier time.
For duration, select the estimated duration of your class. Note that it is better to go a few minutes over your estimated class time than under… Zoom also gives you a 40 minute grace period beyond your stated duration to ensure that you will have plenty of time before the session ends.
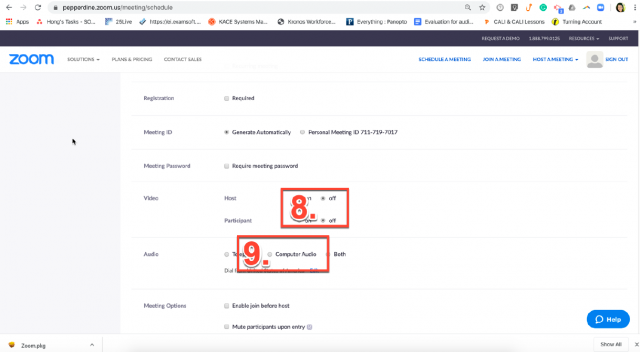
8. Find the “Video” section. Set your “Host” and your “Participants” video settings to “Off.”
9. Just below the Video section, locate the “Audio” settings. Set to “Computer Audio.”
10. Scrolling down further, you will find “Meeting Options.”
– Select: Mute Participants upon entry,
– Enable waiting room
– Only authenticated users can join
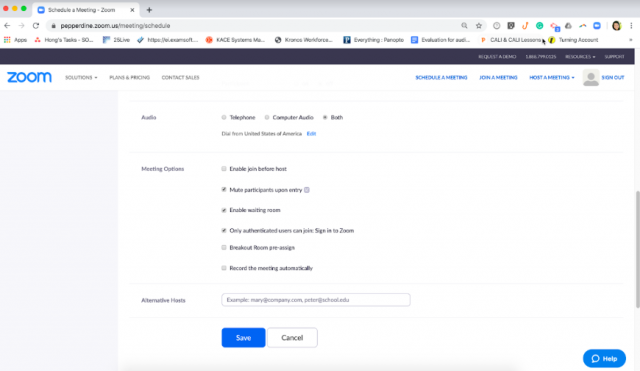
11. Click “Save” at the bottom of the screen.
12. At this point, copy the meeting link and paste it in an email along with the course name. Please send to this email lawtech@pepperdine.edu.
Starting your meeting:
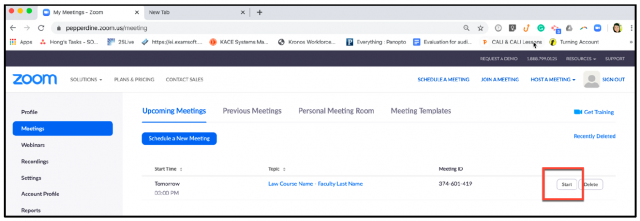
1. To join your meeting when the time and date comes, simply browse to “pepperdine.zoom.us”.
2. On this page, login as before (see step 1).

3. Lastly, click on “Start” to begin the class.
Additional Information:
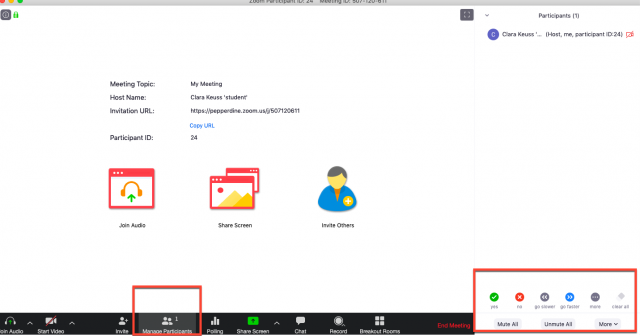
Manage Participants
To manage participants and access their settings, the host may click the “participants” icon on the bottom toolbar.
Here, the host can access audio/visual and control settings for the other participants in the meeting. You may manage the settings for audio, and send messages from the manage participants feature.
Share Screen
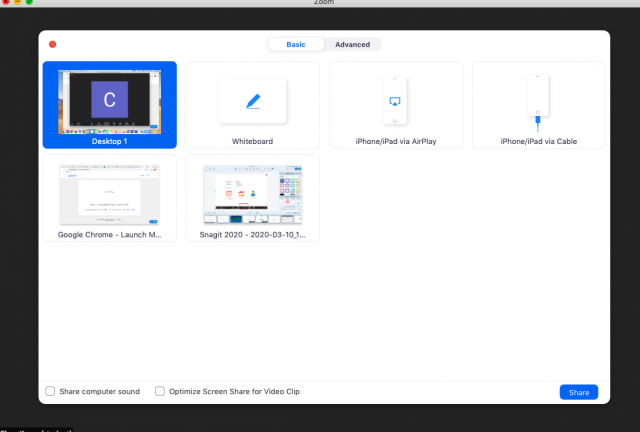
To share your screen in zoom, click the “share screen” icon. Then you will need to wait for the student(s) you are sharing your screen with to accept; with the sharing feature, they will be able to see your screen.
This feature will allow you to share PowerPoints or other media with the students, mirrored on their own screen.
You do not need to grant access to participants during screen share, and you may block participants from accessing the screen share if necessary.

After clicking “share screen”, you will have the option to choose which screen the students can view. You may choose to have them view your entire desktop, just a browser or PowerPoint, or a different web page.
See a quick video to better understand how to share your screen.
Breakout Groups
One helpful feature on Zoom allows you to split your Zoom class into sub-meetings, called breakout rooms. The feature enables the host to split participants up into groups, where they can interact with each other in their own meeting space.
Breakout rooms are separate chat rooms with full audio, screen share and visual settings. The meeting host has the ability to split the members of the class into these separate sessions automatically or manually, and can switch between sessions at any time. Up to 50 breakout rooms can be created and a room will hold 200 participants maximum.
It is important to note that the host will need to monitor the breakout rooms and have full control of the meeting, by responding to participants’ questions and giving assistance when needed.
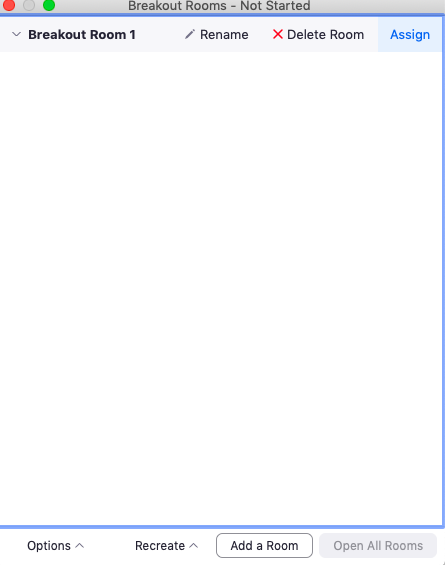
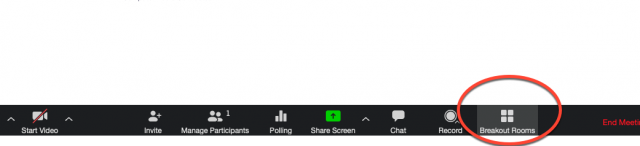
To create separate breakout rooms for the participants of your meeting, click “breakout room” in the bottom tool bar.
This will prompt you to format the room for participant number and assignment. When customized, click “create breakout rooms” to enable access to the participants of your meeting.
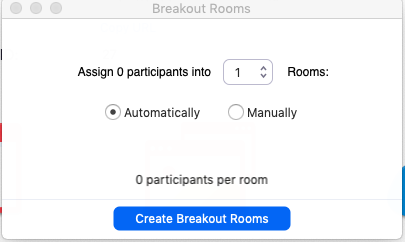
There, you will be able to view the breakout room you have created, and manually assign/rename/delete the room. At the bottom of the breakout room box, you may also add rooms.