

This blog will walk you through creating personal Zoom Meetings. By creating your meetings personally (not through the Canvas Zoom Pro link), recordings of your class will be completely private and unavailable to students unless you choose to send a link via email.
Create your meeting:
- Instead of using Zoom Pro, you will need to schedule your meeting on the website, zoom.pepperdine.edu.
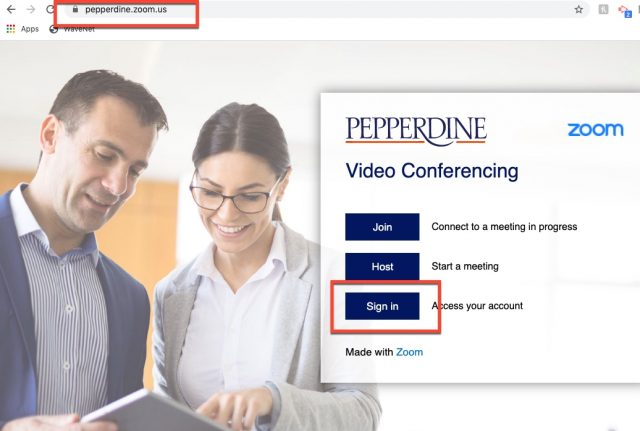
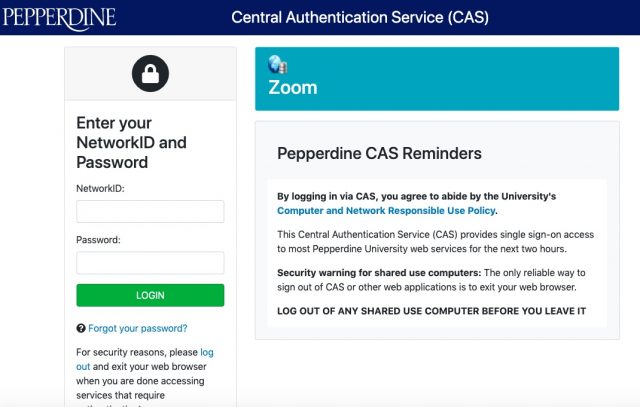
- Sign in using your Wavenet username and password.
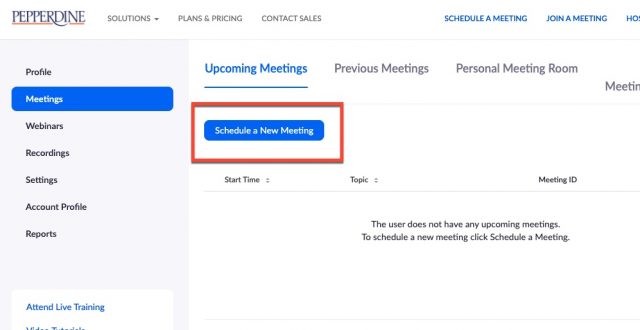
- Next, select schedule a meeting and fill out the meeting information.
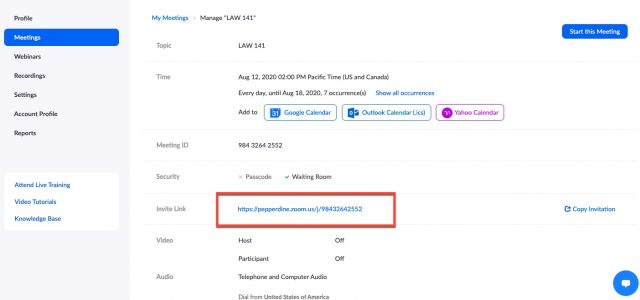
- Under the time zone section, you may select make reoccurring meeting– this way you can use the same link for each meeting. This also means you only have to post one Zoom link for your students in Canvas.
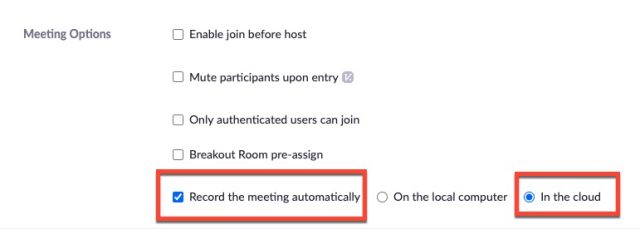
- Under meeting options, select record the meeting automatically, and then select in the cloud.
- Finally, save the meeting link.
- Once you have saved your meeting, navigate down to the invite link section and copy the meeting link. Make sure you copy the URL itself and do not hit “copy invitation”. You will need the link on its own to paste into Canvas later.
Publish meeting link for students:
- Next, you will need to create a space to house your personalized links. First, navigate to your Canvas homepage, then click into a course.
- In the course that you would like to paste these meeting links, select Pages from the lefthand toolbar.

- Click the +Page button to add a page

- Select continue, which will bring you to a page where you can customize your Web Content link. This is where you can paste your Zoom meeting link you previously made on pepperdine.zoom.edu! Title the page Zoom Link and in the URL section, paste your link.

- Finally, notify students that they should check the Pages tab to find meeting links before each class. By clicking on the new tool in your course labeled “Zoom Link”, students will be immediately directed to your Zoom meeting. Your meetings will be recorded to your personal cloud only, and you are free to distribute those recordings as/if you see fit!
Re-Order Tools in Canvas
To make the Zoom Meeting Link more obvious to your students, you may want to consider moving it to the top of the left navigation. Follow these steps to do so:
- First, navigate to your Settings tool from the lefthand toolbar, and select Navigation.

- Then, simply click on the small dots icon drag the tool to the top of your list.

- Click Save, and you will see your Pages tab at the top of your toolbar.

Distributing your recordings to specified students only:
After your recording is complete and your video has been processed, you will receive an email with a link to watch the recording. You can forward this email to students who have been granted permission to watch the recording.
If you have any questions, please feel free to reach out directly to our Technology Services support team at lawtech@pepperdine.edu or at extension x7425.