

Caruso Classroom C
Classroom Tech
Student View
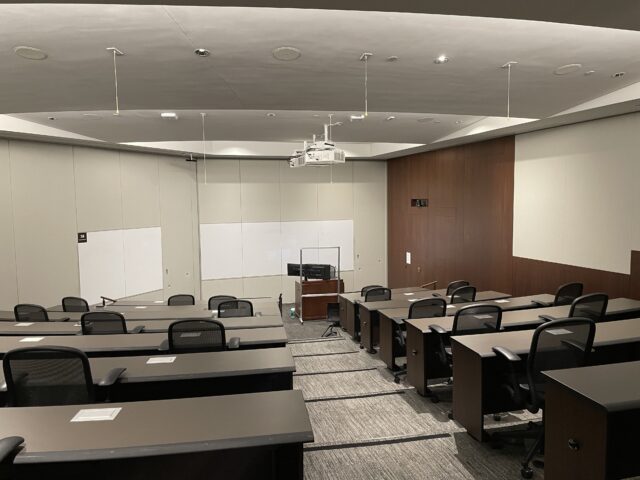
This is the student view of the classroom if they were seated in the back, where the student is able to see the three whiteboards, the professor and lectern.
Note: the pictures below were taken when the classroom walls that separate classes C, D, and E were down, so the pictures have other classrooms in the background. Regardless, the projector set-up is the same.
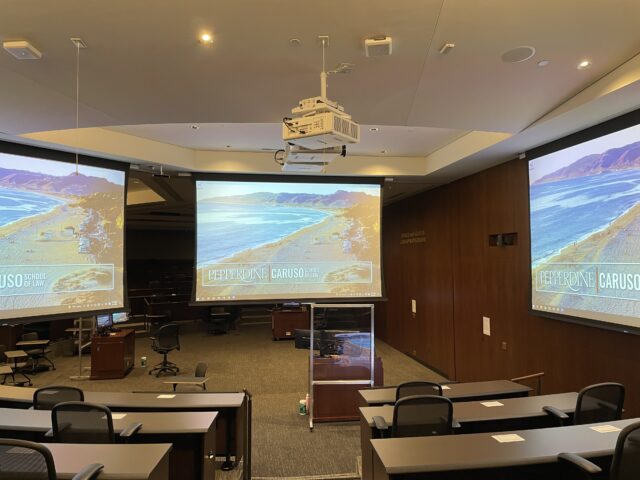
Professor View

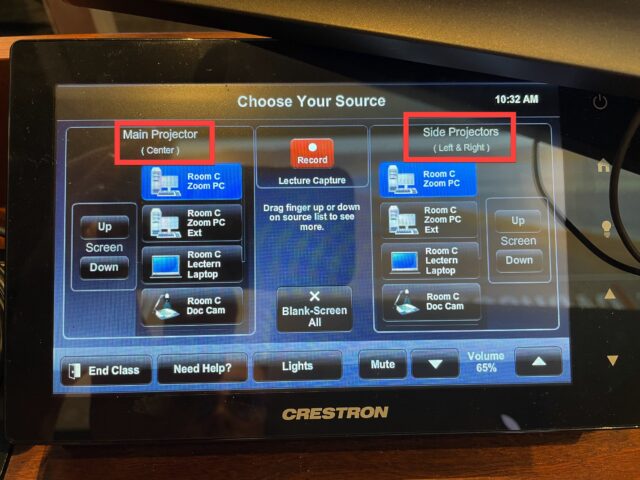
This is the professor’s lectern, which holds the PC monitors, smart control panel, microphones, and HDMI port. For the smart control panel, tap the screen once to wake it up and then tap again. You will be directed to the source page where you may select your source.
The center projector (directly behind the professor) is controlled by the left-hand control system, while the left and right projectors are controlled by the right-hand buttons. The Zoom PC setting will reflect the monitor while the Zoom PC Ext. will reflect the extended desktop.
Microphone
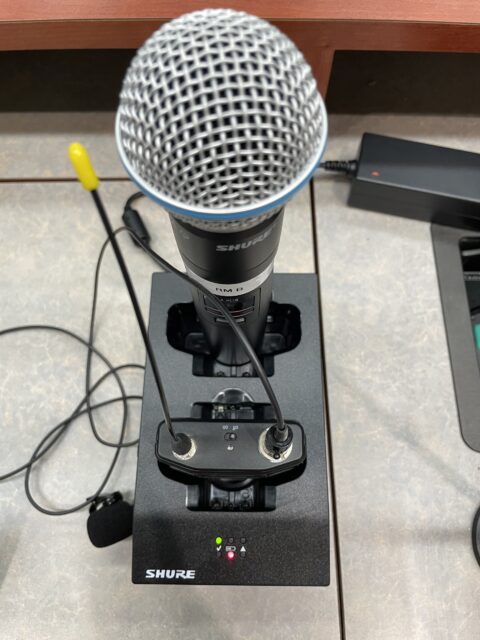

There are two microphone options in the room: lapel mic and handheld. The microphones can be found in the charging console next to the HDMI port. Always return the microphones to the charging port after class.
For the handheld mic, simply remove it from the charging port and power “on” by flipping the switch in the middle of the handle up. When you speak, speak clearly into the head of the mic (gray section) and not anywhere else on the body, or your sound will not be projected. This mic can be passed around the room to students if needed.
For the lapel mic, turn on by switching the “on” switch located at the top of the mic. Clip the mic that is on the end of the cord to your collar or jacket, where it will be close enough to your mouth that you can project your speech to the class.
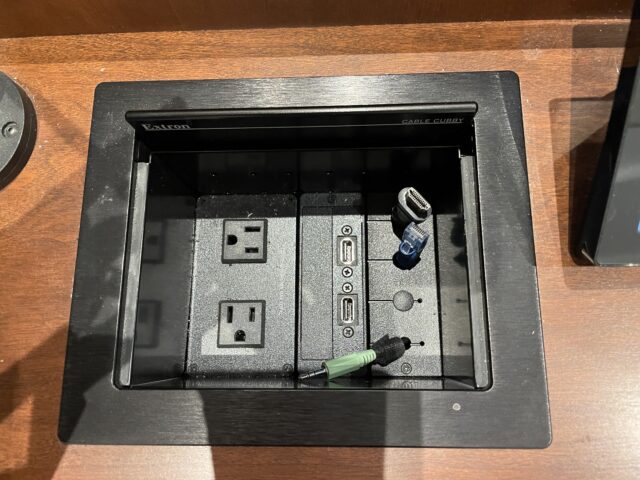
Phone and HDMI

This top-down view of the lectern shows the phone that can be used to call tech services, under the right monitor. In the middle is the pointer used to control the monitors, and to the left is the smart control panel.
Shown here are the HDMI, plugs, and VGA cord inputs.
Audio Visual in Zoom
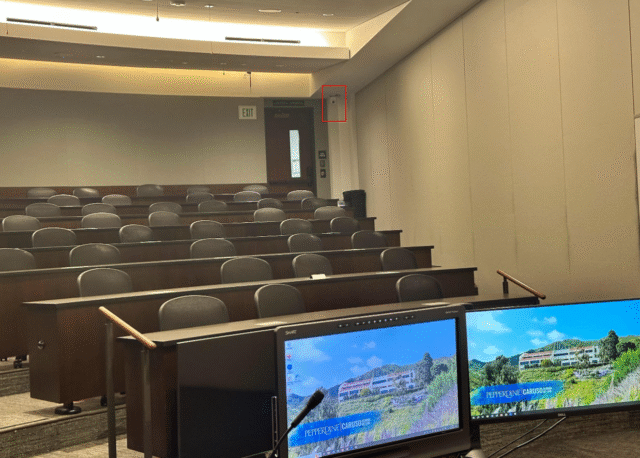
The AV Bridge CONFERENCE Camera is located in the top right corner of the classroom, shown above
For visual in Zoom in classroom C, choose the AV Bridge Conference setting. The setting will show the classroom and professor. The Video Pro Capture setting does not work for classrooms.
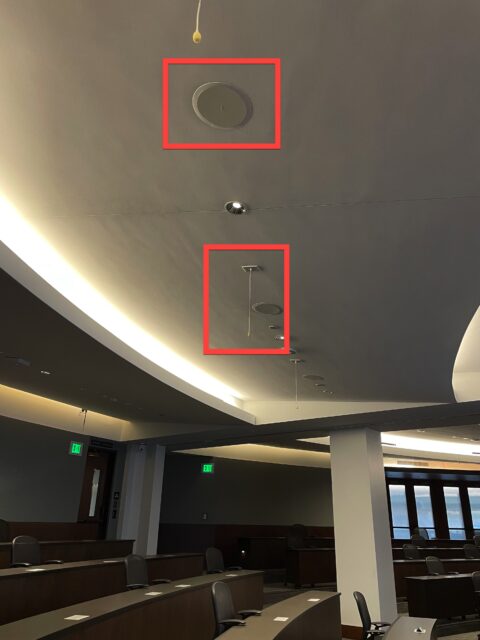
The ceiling microphones are the small round mics hanging from the ceiling at intervals, while the white circular ones set into the ceiling are the speakers. It is recommended that if there is a quieter student in the class, they sit under the microphones directly so their voice may be better projected.
Power Outlets
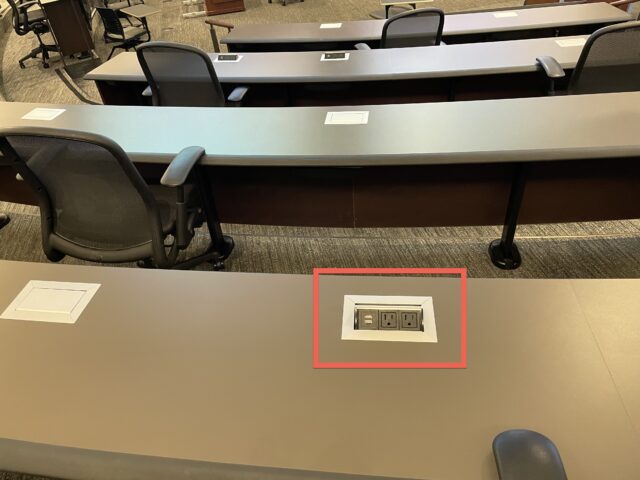
The charging outlets for students are located on top of the desks. Students can access the outlets by pressing down on the square to pop open the console.
If you have any questions, please feel free to contact Technology Services at lawtech@pepperdine.edu or (310) 506-7425.