

Category: Pedagogy Tips
-
Caruso Auditorium
Posted :
by :
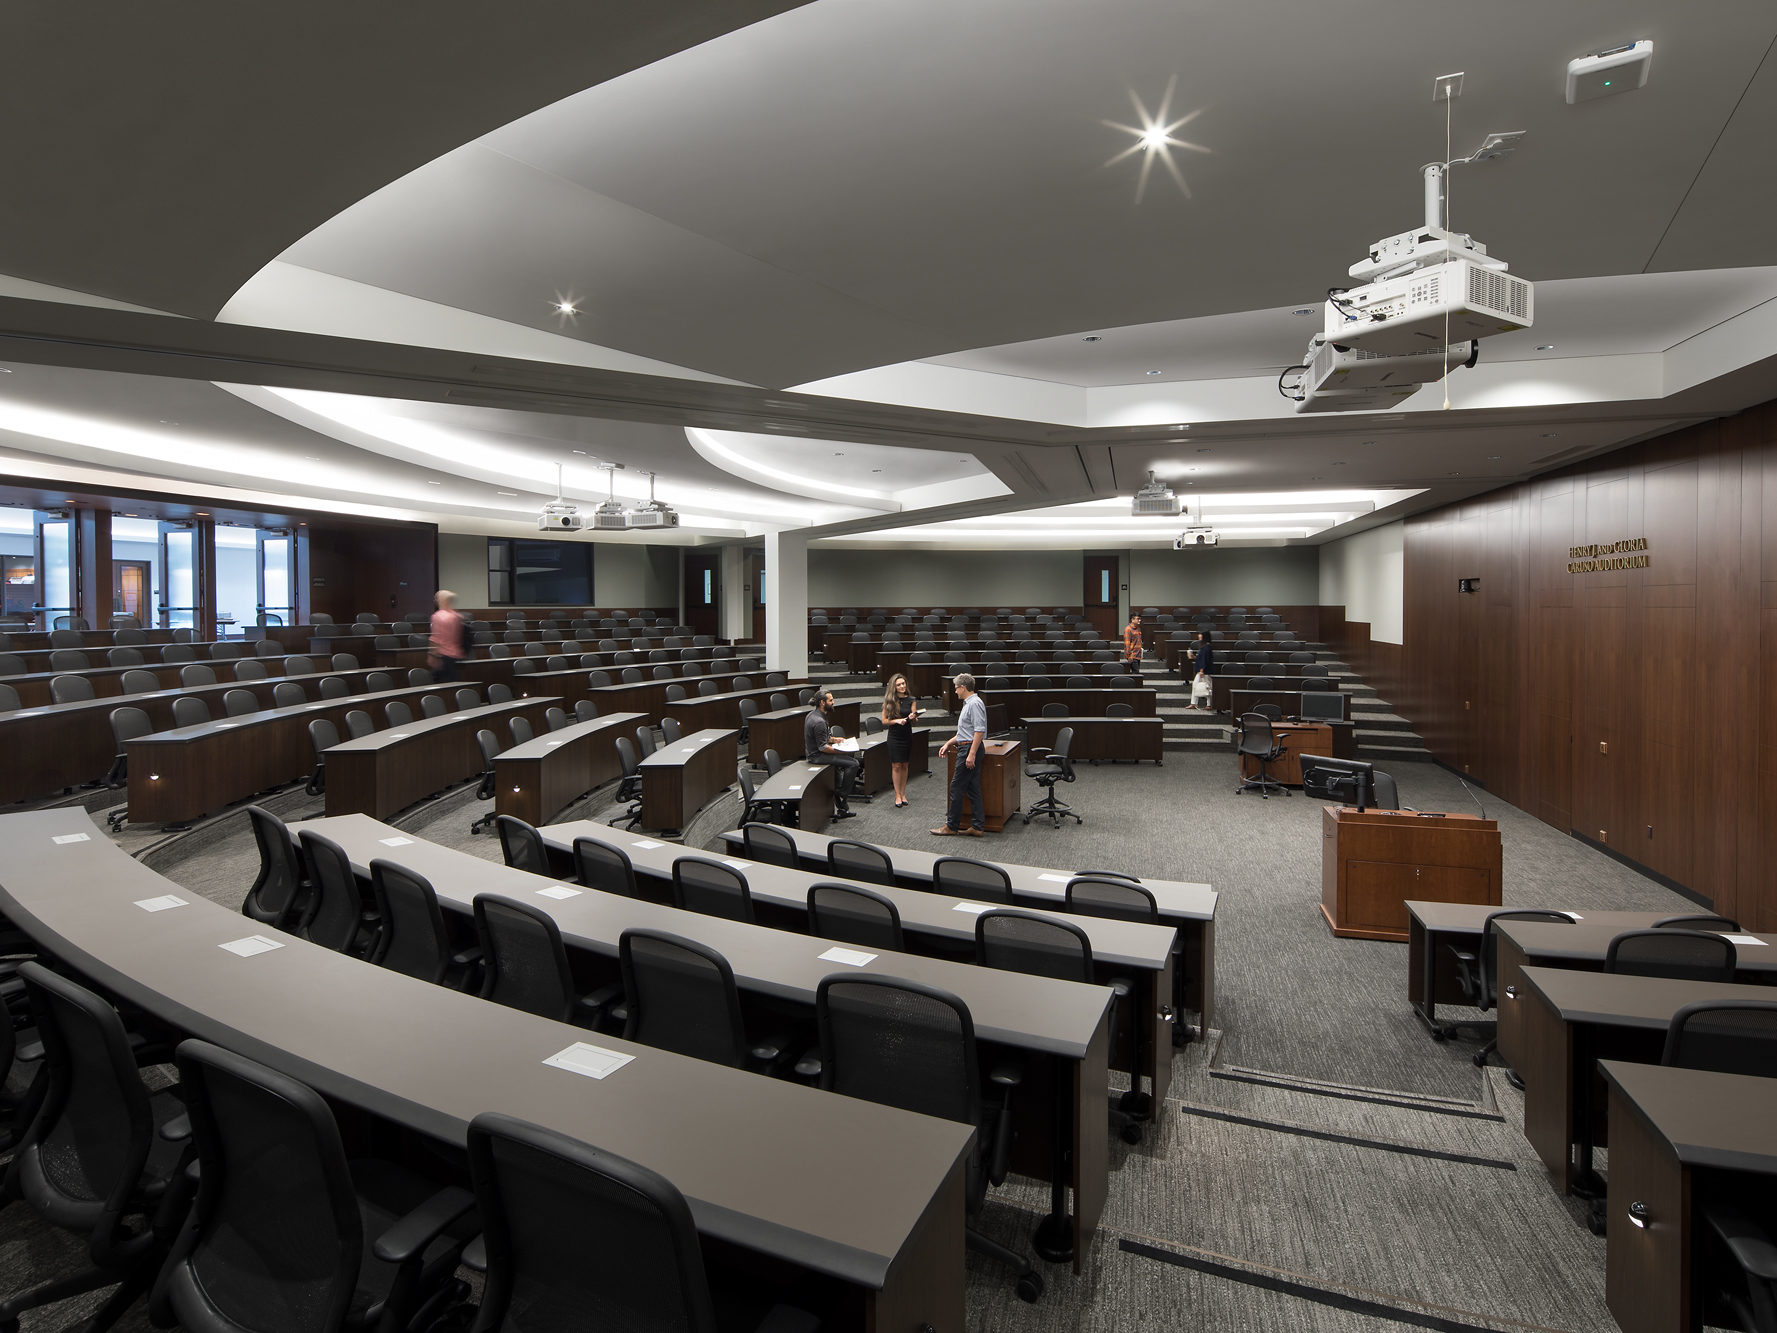
Caruso Auditorium The Caruso Auditorium is located on the first floor of the law school, the main entrance is located in the atrium of the building. The full auditorium divides into three parts to create Classroom C, Classroom D, and Classroom E. The Caruso Auditorium serves as the event space for the Caruso School of…
-
Hosting School of Law Events
Posted :
by :
Hosting and Organizing Caruso School of Law Events Pepperdine Caruso School of Law hosts a wide range of events that strengthen and support our community. These include panel discussions, dinners, continuing education courses, and additional meaningful opportunities for connection and professional development. To host an event contact Caruso School of Law Events Karmen Herring, Events…
-
Troubleshooting Tips
Troubleshooting Tips Having issues accessing WaveNet, Canvas, or other Pepperdine websites? Before contacting CSOL Technology Services, there are a few things you can do to troubleshoot common issues we see at the law school. Many Pepperdine websites can have issues concerning full cache or browser bugs. It is recommended that you either switch to another…
-
Choosing Zoom Mic/Camera, Troubleshooting, and Add-Ons
Choosing your Zoom Microphone + Camera, Troubleshooting Tips, & Add-Ons Logging in Click the Zoom application, and click Sign in with SSO (accompanied by a key symbol). This will take you to the CAS Pepperdine Login page where you will login with your Pepperdine credentials. Then, Zoom will open back up and you are able…
-
Tech Help
Posted :
by :
There are two places to get technology support here at Pepperdine: the University Help Desk and the Technology Services Support Desk, located at the Public Services Desk in the School of Law Library. University Help Desk (HELP)The Pepperdine University Information Technology (University IT) department provides direct technical support for students via the University’s ‘Anytime’ Help…
-
Extended Desktops
Posted :
by :
Each classroom with dual monitors contains one desktop and an extension of that desktop. Below this is a video explaining the use of our extended desktop system.
-
Basics for Pepperdine Law Students
The Basics for Pepperdine Law Students WELCOME TO THE BASICS!This page contains a list of the best posts for getting started. Security Pages Browser Check University IT Security Homepage Security Tips Network Password Management Technology Services Pepperdine Google Suite Turnitin WaveNet ExamSoft Examplify CALI Lessons Zoom Contact IS Tech Support Contact the University IT Help Desk Law Library Resources…
-
Color Printing and Copies in the Harnish Law Library
Posted :
by :
The Harnish Law Library maintains two copiers that will print in either color or black and white. This service is for Pepperdine users only. The price per color impression is $0.35. This means that if you print a color document that is duplexed (printed on both sides), you will be charged $0.70 for that piece of paper (if…
-
Law Library
Posted :
by :
The Law Library can be one of the most valuable assets to you during your time in law school. Its value goes beyond your law education, as it can be a great tool for activities such as Law Review and Moot Court, as well as preparing for your careers as a whole. The catalog system…
-
Tips for Incoming Faculty
Welcome to Pepperdine School of Law! On behalf of the Pepperdine School of Law Technology Services Department, we want to welcome you to the Pepperdine family and let you know we are here to help with all your technology needs. A few helpful hints: If you are new, or simply returning to Pepperdine, welcome back…
-
Microsoft 365 for Education
Posted :
by :
The Microsoft Office suite is a family of software that delivers almost any tool imaginable to assist users at home and in business. Here, Pepperdine Caruso Law TS helps break down the different applications available. NOTE: We always recommend that you INSTALL and USE the local copy of MS Word (actually install it on your…
-
Register for Wireless Network Access
Pepperdine University has wireless networking capabilities throughout the Malibu campus as well as at the other campus locations. Students can conduct research, download research projects, and check their e-mail within the accessible area. For those students considering a new laptop purchase, please review our recommendations page here. You can easily access the WiFi network on…
-
How to Not Miss Important E-Mail Messages!
As a student at Caruso Law, you will find that there are a number of essential, critical, and/or otherwise consequential messages that are sent to your Pepperdine student email account by members of the Caruso Law administration team over the course of the school year. Also note that your Pepperdine email will also often contain…
-
Installing Printers (Windows and Apple)
A quick step by step instruction guide for installing on a Windows computer: 1. Open a new explorer window (not Internet Explorer).a. Type (Windows Button)+(R) 2. Enter the following in the address bar. \\walnut3. Locate and open the folder PCCLIENT. 4. Open the WIN folder and double-click on the CLIENT-LOCAL-INSTALL installer. 5. Accept the…
-
Kronos: Timekeeping at Pepperdine
Have you figured out how to use Kronos yet? Perhaps you’re still struggling with the basics of getting around and entering your information correctly. Here are a few resources that you might find helpful! First, an introduction to Kronos: Support for Kronos is provided by the Payroll Department at (310) 506-4636, or you can refer to…
-
WebEx Setup Guide
As of 2025, Pepperdine University has transitioned from Jabber to WebEx. Click here for our page on Jabber. Before referring to this documentation, download WebEx onto your device from the WebEx website and sign in using your Pepperdine email. Please note, if you have Jabber running and phone services registered, you will be asked if…
-
iClicker
Posted :
by :
iClicker iClicker is a responsive teaching and learning tool that incorporates clickers, mobile phone clicker usage, GPS attendance, polling/quizzing, and study guides. iClicker provides real-time feedback from students, and promotes active learning. To create an account, visit the iClicker website and select “create an account” in the upper right of the page. With iClicker, a…
-
Security: Protect Your Laptop and Yourself!
Viruses, worms, ad-ware and spyware, and theft, are examples of SEVERE risks to your computer in a public, networked environment. You MUST PERFORM THE STEPS LISTED BELOW if you wish to use your computer at Pepperdine or you could face repercussions including loss of network access, data loss, and system failure.
-
Print and Copy Services at Caruso Law
Posted :
by :
Tags :copy, copy services, faculty, print, print services, print.pepperdine, Printing, Staff, studentsTo send a print job start here: print.pepperdine.edu To setup your printing go here for complete instructions. Color Printing is $0.35 per side of a page Black and White Printing is $0.06 per side of a page. Print accounting and print charges are managed by the University. Charges go to your Pepperdine ID cards linked Waves…
