VPN: Accessing on-campus-only databases from home (for faculty)

This page contains instructions to help users install and launch the Virtual Private Network (VPN) on Windows and Mac computers. VPN allows Pepperdine employees to connect to the Pepperdine network from any Internet connection in the world.

  • NOTE: For VPN, you will need to install the Cisco VPN client (if you don’t have it already) and then connect that way.
  • Faculty will need to apply their windows updates using VPN.

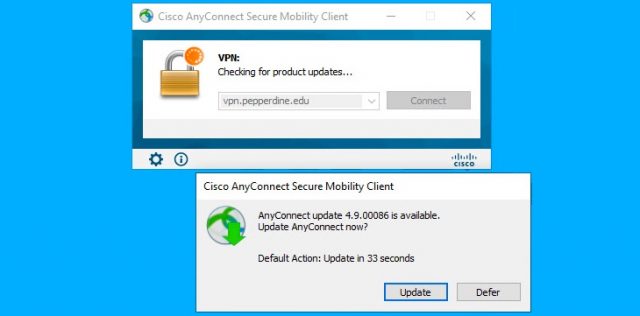
Update: the latest VPN version is now available for installation. Please follow the instructions below to accept and install the new version:

Mac or Windows VPN Client Update Instillation

  • For MAC/Windows computers, VPN clients/users will connect as usual by entering their credentials and completing their dual factor authentication.  
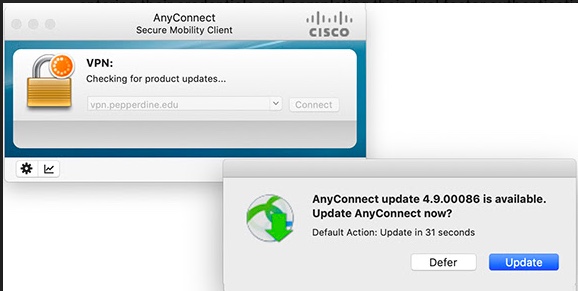
  • Next, you will receive the Acceptable Use Policy message and, once accepted, the auto update prompt–active on August 14–will be provided.
Windows View
Mac View
  • Users may choose to “Update” within 60 seconds or “Defer” for a later time.  We recommend that you update.
  • If you do choose to “Defer,” you will connect as normal.  However, you will be prompted again at your next login attempt.

NOTE: After August 18, 2020, MAC/Windows users will not have a “Defer” option. For additional support, please contact the IT Service Desk at 310.506.4357 (HELP).

To learn more and view a step-by-step installation guide for both Mac and Windows devices, please click here.

All authorized Pepperdine employees have the ability to run VPN software. To request authorization or for more help, please call the IT Service Desk at (310) 506-HELP (4357).
How to clean your screen (without damaging it!)

When cleaning your electronic screens, it is very important to use the correct solutions to avoid damaging the screen.

No ammonia based cleaners should be used on electronics. This includes general purpose cleaners, glass/window cleaners, multipurpose cleaners, etc. These sprays are too abrasive and will wear down the protective coating on your screen.

  1. Turn off your monitor completely.
  2. Wipe down your screen with a microfiber cloth.
  3. If needed, spray your cloth with screen-cleaner fluid (there is cleaner made specifically for this purpose) or a gentle solution of distilled water and distilled white vinegar, then wipe down the screen.

Never spray the electronics/screen directly. Always apply cleaning agent to soft/microfiber cloth and then wipe the surface with the cloth.

See this article on ways to clean your electronics using household items.

Cleaning the LCD Panel:
CAUTION: Isopropyl alcohol is a flammable liquid. Never spray or pour any liquid directly on the LCD panel.

  1. Apply the cleaning solution to the microfiber cloth (DO NOT spray the cleaning solution directly on the LCD panel).
  2. Wipe the LCD screen gently with a soft, dry cloth.

If you have any questions, please feel free to contact Information Services at [email protected] or (310) 506-7425.

How to Remove Security Settings from Zoom Recordings

If students cannot open a Zoom recording, you may need to change your permission settings and update the security settings on that file. Below is a guide on how to accomplish this task by examining both the security settings. To view a video on how to remove the permission, please click here.

The last step will also cover share settings, for the event that you may want to make the recording public, or restrict it with further detail, such as a unique password for access, as so forth.

1. First, log into the https://pepperdine.zoom.us site and sign in with your Pepperdine NetworkID and password.

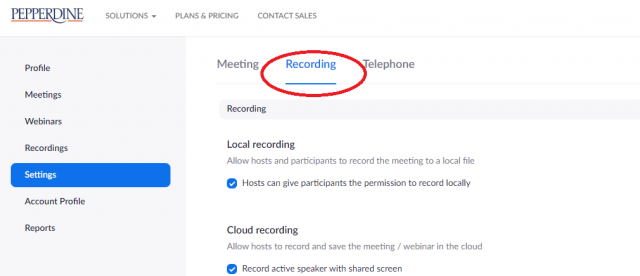
2. On the left menu go to “Settings”.

3. In “Settings”, look at the main part of the screen. Near the top, there are a few choices tabs. Select the tab called “Recordings”.

4. From there scroll down the recordings settings to where the security settings are. Make sure that you have those set to “off” and that they appear “gray” in color. If they are “blue” and switched to the right, they are mistakenly “on”. Click the button to select them off. This should allow student access to the file.

5. Now, to ensure student access, or to otherwise manage permissions for a recording that is already existing, you can check the share settings for a file by navigating to the recordings button. From there, you can find recordings of your meetings and edit their permissions individually. To do this, click the “Share” button next to the recording you shared with your students. Make sure that the permission is “blue”/”on” and set to “Publicly”. Your students should then be able to view the recording.

More for Faculty Zoom users

If you have any questions, please feel free to contact Information Services at [email protected] or (310) 506-7425.

Updating your Voicemail Pin

Below is a quick tutorial on how to reset your voicemail pin for the Pepperdine telephone system.

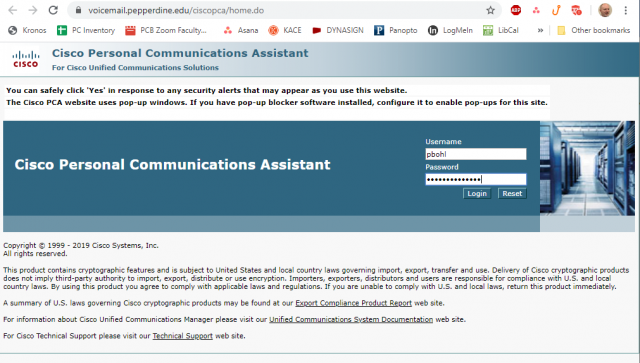
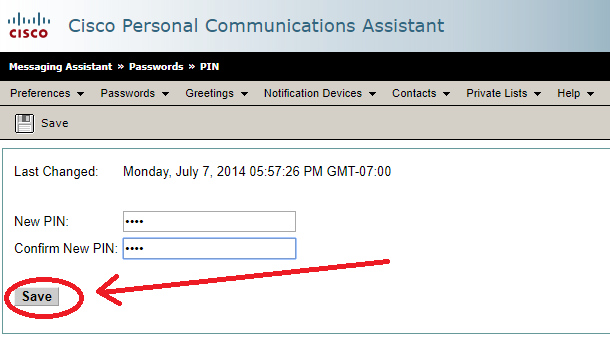
1. To update your pin on a Cisco telephone, first visit the following link: https://voicemail.pepperdine.edu/ciscopca/home.do. Enter your NetworkID and password to login.

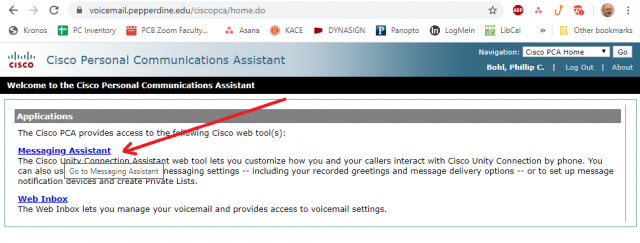
2. Click on Messaging Assistant.

3. On the navigation tool bar, navigate to Passwords.

4. Then, select Change Pin.

5. Click the Save button at the bottom of the screen.

6. Click the Log Out button on the upper right hand corner of the screen to log out of the software. Your pin should now be updated accordingly.

If you have any questions, please feel free to contact Information Services at [email protected] or (310) 506-7425.

Disabling the Waiting Room feature in Zoom

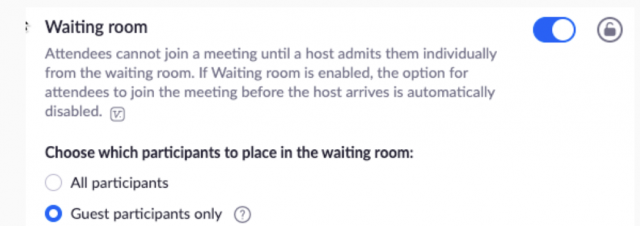
The Waiting Room feature allows the host to control when a participant joins the meeting. However, if the Waiting Room option is enabled, re-admitting student who lose connection or enter the session late may be a hassle, and join before host will not work for that meeting.

Please follow these instructions to disable the Waiting Room feature for your sessions:

1. Sign in to your account at pepperdine.zoom.us

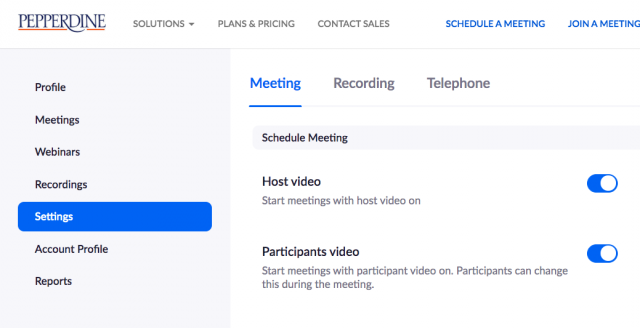
2. Click Settings on the lefthand side, and then select the Meeting tab.

3. Navigate to the Waiting Room option under the Meetings tab and verify that it is not selected. To deselect, click the blue button until it shifts positions and turns grey to show that you have deselected the setting.

More for Faculty Zoom users

For more information and/or assistance, please contact [email protected] or call Pepperdine University IT support at 310-506-HELP (4357).
Where to find Zoom recordings

After setting up your meeting, you may choose to record your class for saving or distribution purposes after the session is completed. For a guide on how to record in zoom, check out: Two Ways to Record in Zoom (PDF)

Furthermore, see Pepperdine’s Zoom Guide for more information on Zoom meetings.

  • Recordings on the Cloud are saved in your Zoom account.
  • Recordings on your computer are saved in your Documents folder in the Zoom subfolder.
  • Recording folders are named for the date and time of recording, the meeting number, and the meeting name. 

To view a recording in the Cloud

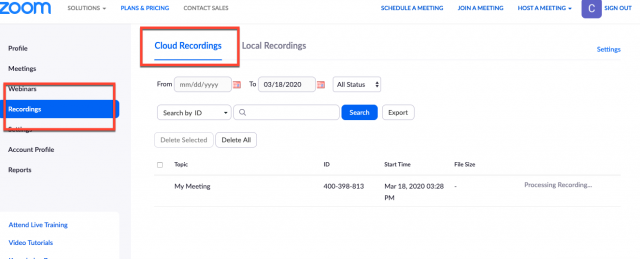
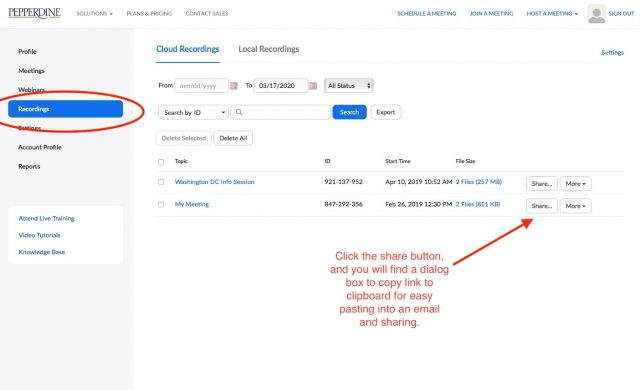
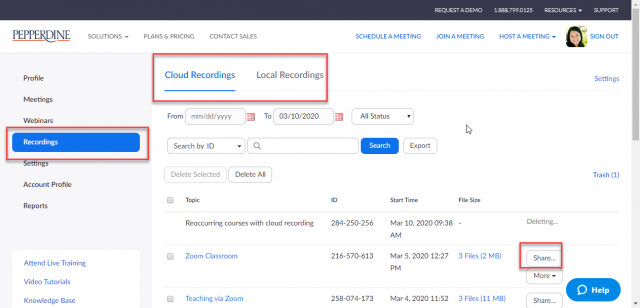
  1. Go to the zoom web portal and click on the “Recordings” tab in your left tool bar.
  2. Your recordings will be listed under the Cloud Recordings tab.

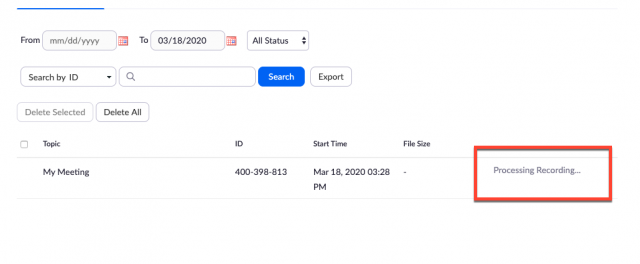
If your meeting has just finished, the recording may still be processing, and you will need to wait for the “processing recording” signal to disappear before viewing and sharing.

  • By clicking on the title of your class, you will receive three recording options to download/share: Audio and video, just audio, or a transcript.
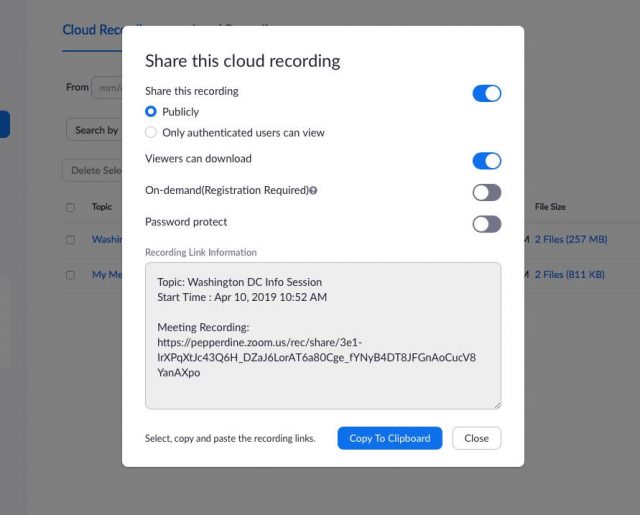
  • By clicking on the “share” icon on the right of the page, you can copy the link to your clipboard, meaning you can paste the link directly into an email or other distributive platform.

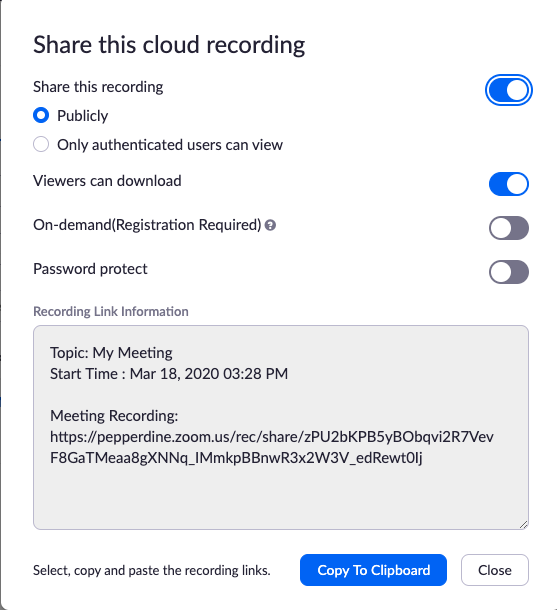
You will receive a dialogue box that will allow you to change sharing settings:

To view a recording on your computer

  1. Navigate to your computer’s Documents folder and open the Zoom folder
  2. find the meeting you would like to view; the meeting title will be “double-click-to-convert-01”
  3. Double click the file and zoom will convert the file.
  4. When conversion is done, the double_click_to_convert_0X file will be replaced by three files:
    • audio_only – an M4A file
    • playback – an M3U file with video and audio
    • zoom_0 – an MP4 file with video and audio
  5. Play the files in a media player. 
  6. If you want to share the recording, you’ll have to save the file and share it manually. 

For more about accessing your local recordings and changing the recording location, see Local Recording in the Zoom Help Center.

If you have any questions, please feel free to contact Information Services at [email protected] or (310) 506-7425.

Two ways to record during a Zoom session

Please note that you can start recording your meeting/class after you start the session. If you want to setup recording as an automated feature you can do that as well, even after you have setup the meeting link.

Below is the information on how to start a recording DURING your class session. There are two options. One is for the professor/host and one is for the attendee/student.

Recording a Zoom session: Downloadable PDF

Host (professor) manages recordings

  1. As the faculty member hosting the meeting you have the option to record your Zoom session to the
    cloud or locally to your computer.
  2. We recommend you record to the cloud as it is easier to track and manage through Zoom’s web
    interface.
  3. There are two ways to access your recordings.
    • The first way is to use the link Zoom emails you after your session has ended.
    • The second way is to log back into your Zoom profile at http://pepperdine.zoom.us and click on Recordings menu on the left as shown in the image below.
    i. Then click on Cloud Recordings
    ii. Locate the session you want to share and click on the share button.

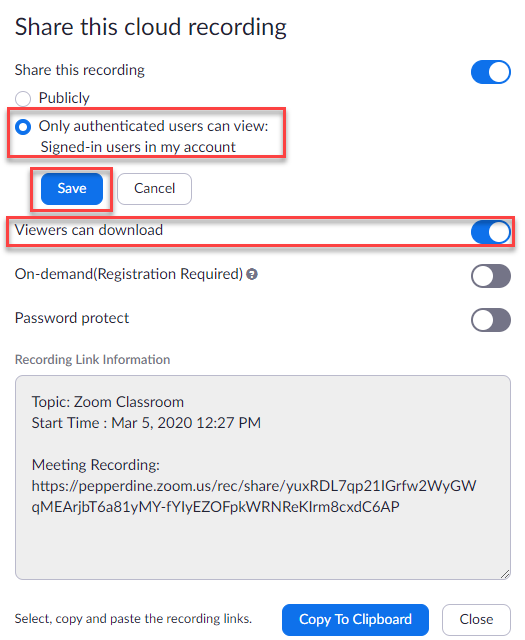
4. Select “Only authenticated users can view; Signed-in users in my account” and then “save”

5. You can choose if you would like to allow viewers to download the link by clicking the slider to blue for yes or gray for no.

6. Click on the Copy To Clipboard button will copy the information that is the grey box labeled “Recording Link Information”. You can then copy all of that information into an email for students.

Students manage their own recordings

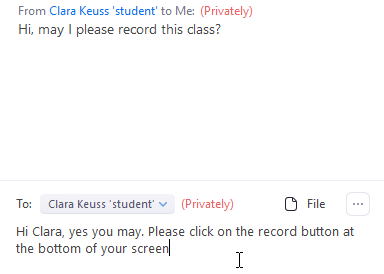
  1. Student participants should request for their professor’s permission to record the session either via email prior to the Zoom sessions or privately to the professor in the Zoom Chat feature.

2. As the host you need to allow for each student individually to record the session. Participants have the option to save to their Zoom cloud account or on their computer. 

From the Chat tool move your mouse to the right of a student’s name and you will see the Mute and More button appear. Click on More.

3. Then click on the Allow Record button

4. You will now notice the red record dot appear at the top left of the screen. Please note that this will appear for everyone in the session.

If you have any questions, please feel free to contact Information Services at [email protected] or (310) 506-7425.

Taking Attendance in Zoom

For your Zoom class, you may take attendance any way that you would like. There are two ways we would recommend:

Screenshot

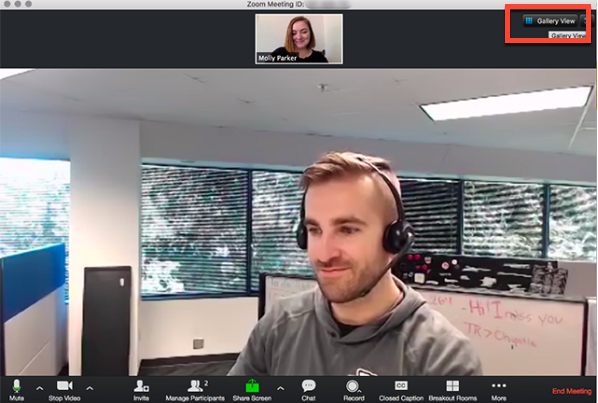
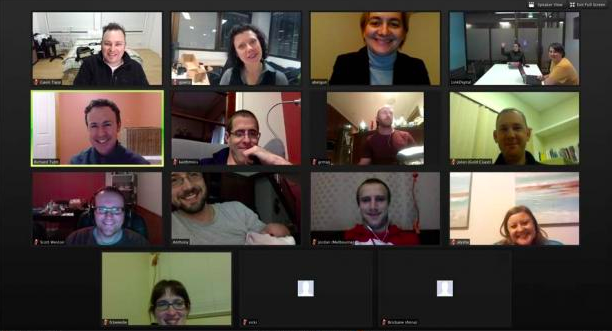
Ensure that you meeting view is in “gallery view” by clicking the gallery view icon in the top right corner of your screen.

This will switch you from speaker view, and allow you to see all participants in the class at once.

On the gallery view page, simply take a screenshot of your computer screen.

For Macs: press Command+Shift+4 and drag your cursor to encompass the entire screen.

For PC: hit the PrtScn (Print Screen) button on your keyboard, which will automatically take a picture fo your current screen.

The photo will save to your computer and you may check it later when noting attendance.

Name List in Chat Box

Alternatively, you can ask students to type their names into the chat box.

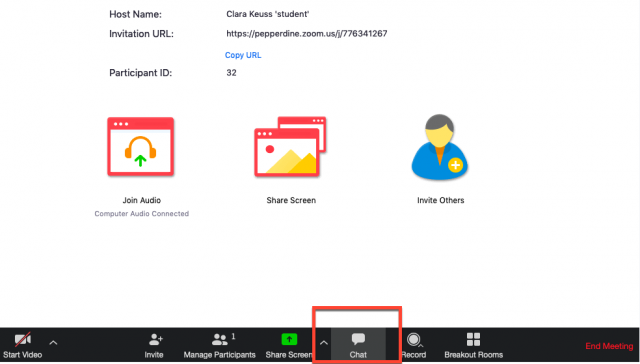
Instruct students to locate the “Chat” icon in the bottom toolbar to bring up the chat box and type their name in the box.

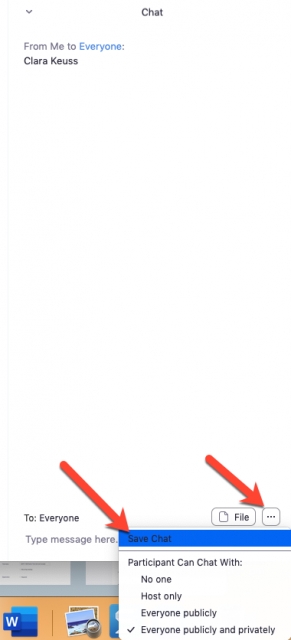
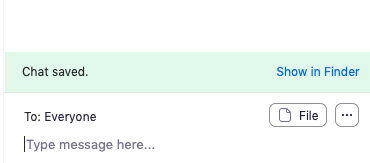
Once everyone has typed in their names, click the three dots beside the file icon, and click “save chat” to save the list of names for your records.

You will be able to access the record in your files later.

If you have any questions, please feel free to contact Information Services at [email protected] or (310) 506-7425.

Office hours in Zoom

To hold office hours in Zoom, please follow the directions below.

Scheduling Office Hours via Waiting Room

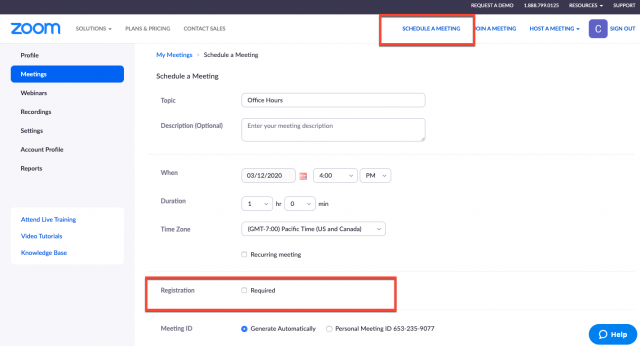
  1. Begin scheduling a meeting through Zoom like you would for a class. Log in to your Zoom account, select “schedule meeting” and proceed to fill out the date and duration of your regular office hours. Ensure that registration is unchecked.

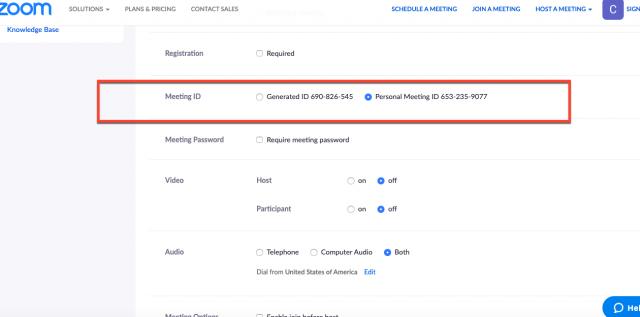
By selecting “Personal Meeting ID”, you can access a personal meeting room permanently reserved for you. This link will never change, and you can edit it to personalize the URL. Once a participant has access to your PMI, they may join in at any time the link is being used. For Office Hours, the Waiting Room feature will require those with access to your PMI to wait until individually admitted to your meeting room.

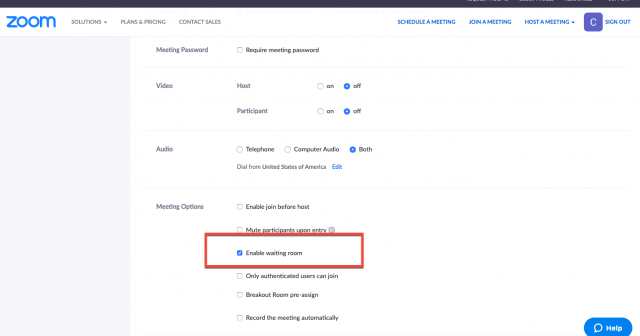
2. Under meeting options, ensure that “Enable waiting room” is checked.

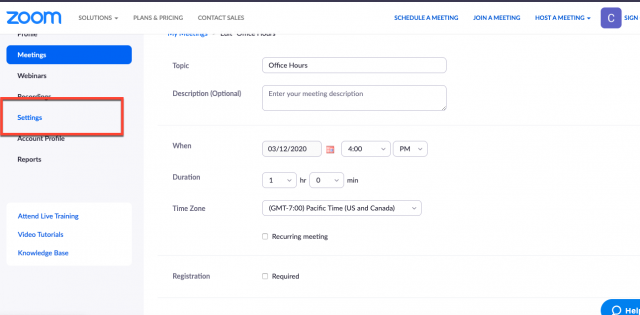
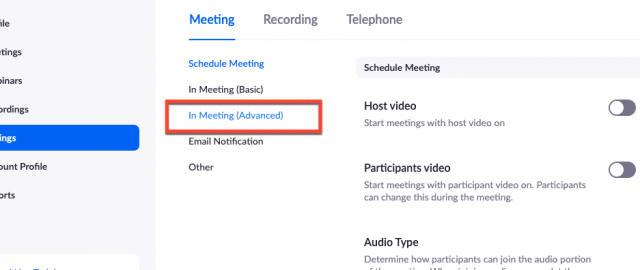
3. On the left-hand side, click “settings” and then “In Meeting (Advanced)”

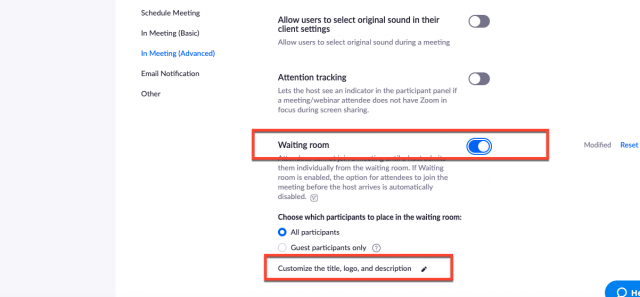
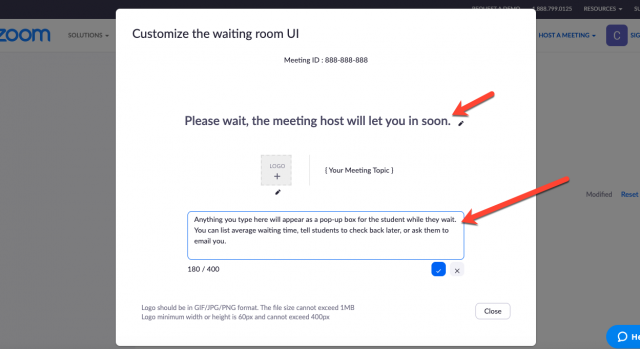
4. Scroll down and enable Waiting Room. If you would like, click the pencil icon to customize the waiting room message. This will allow you to customize the message students in a waiting room will see when they join.

Moving forward, you will need to admit “waiting” participants into your room so that they may participate.

Admitting students into your waiting room

To manage the waiting room, click “Manage Participants.”

In the “Participants” window, click the corresponding option adjacent to the participant’s name to admit or remove participants on a single basis.

Alternatively, to admit all participants currently in the waiting room, click “Admit all.”

Finally, to message all users who are currently in the waiting room, click “Message.” 

Linking Office Hours to Google Calendar

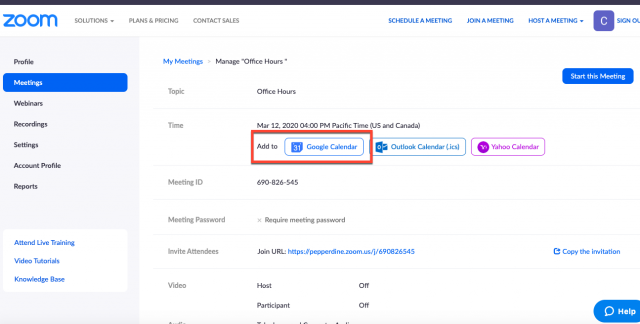
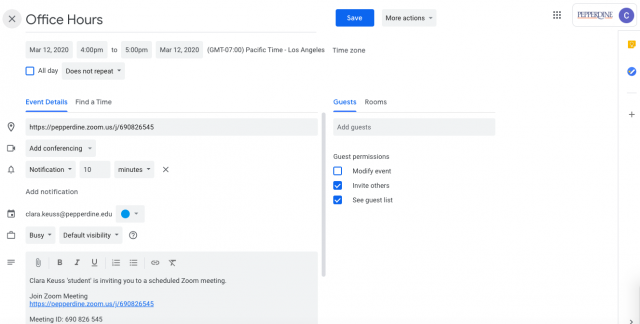
  1. Save your scheduled office hours meeting, and click the Google Calendar icon that pops up after saving.

2. This will allow you to save the office hours to your own calendar, and also share the link to students via email, which can add directly to their google calendars as well.

If you have any questions, please feel free to contact Information Services at [email protected] or (310) 506-7425.

Zoom Student Basics: Compatible Equipment and Connection Requirements

Zoom is a video conferencing product that all Pepperdine students and faculty are licensed to use. This site is great for joining or hosting meetings, workspaces and webinars–whether it be for attending a remote class lecture or creating a personal audio/video chat.

To access Zoom, enter the URL https://pepperdine.zoom.us/ or click on the link provided.

In terms of compatible equipment, Zoom is compatible with basic i3 Windows 10 and Mac OS X with Mac OS 10.10 and higher. You may use Zoom with an integrated web cam and built-in audio system, or with any mid-range webcam and USB headset. A good approach is to standardize using a USB headset as this will avoid a number of variables that can cause problems for your audio functionality. There is no need to spend a lot of money for very good functionality. We have had great success with Logitech, Sennheiser, and Plantronics brands that range from around $20 up to around $50.

A minimum link of 2 mb (download) is recommended for Zoom usage, yet 600k is a functional minimum. To test your link speed, please visit speedtest.net or click on the link provided.

For tips on how to maximize your remote internet experience, please click here.

TEST your Zoom setup using Zoom’s test meeting.

To view a quick infographic guide for Zoom Meetings, please click here.

Please click here for more on Zoom for Students.