

Students have the ability to record their online classes through zoom, if granted permission by the professor.
Alternatively, the student may email the professor before the class begins to obtain approval ahead of time.
A video with these instructions can be found at the bottom of this page.
Obtaining recording access:
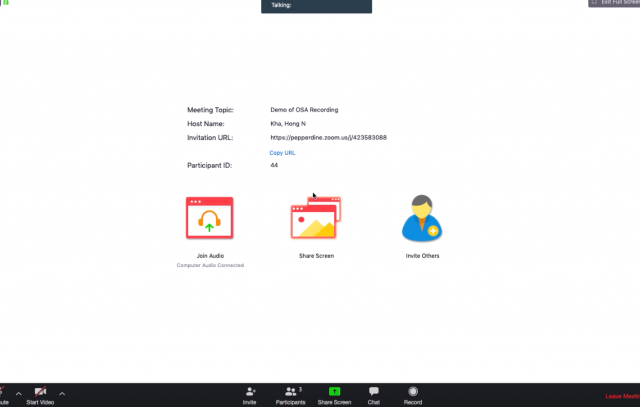
Step 1: Join your class session and ensure your audio and visual settings are set up correctly for the class.
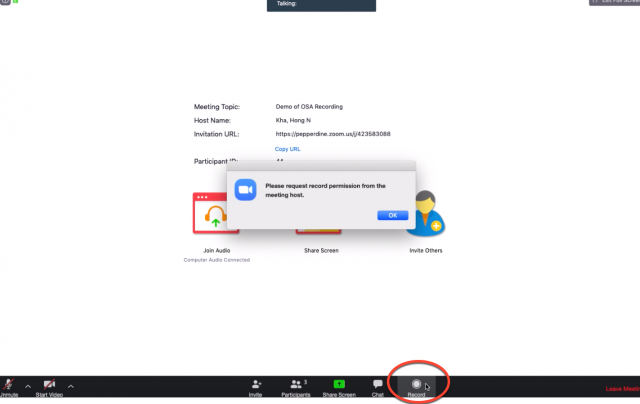
Step 2: If you click on the recording icon in the bottom toolbar, a dialogue box will appear that indicates that you must request permission from the host (your professor) before you can record.
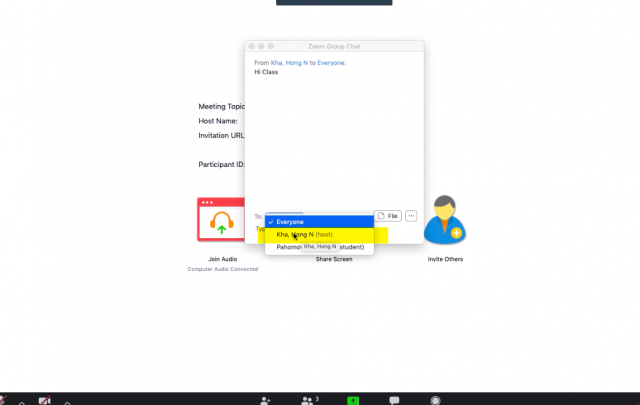
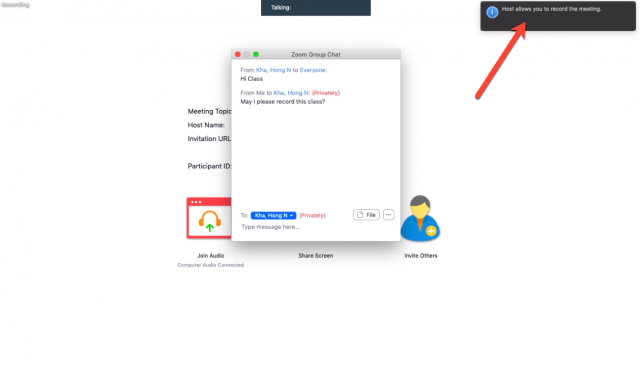
Step 3: To obtain permission, locate the chat box on the bottom toolbar.

Step 4: Make sure to format the “To” section to a direct message to your professor. This way you may send the request privately in the chat room.
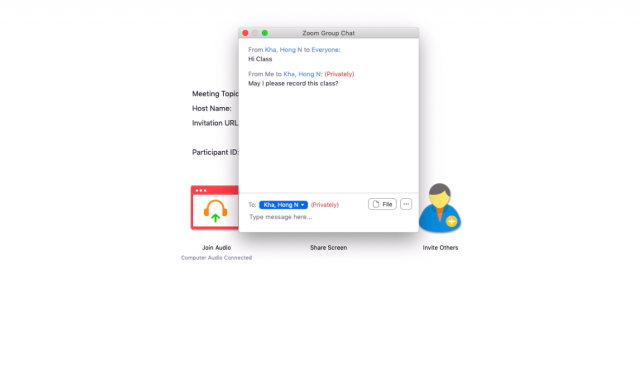
Step 5: Request the recording by sending a private message.
Step 6: Once recording access has been approved by the host, you will receive a notification bar in the top right corner informing you that you may begin recording.
Starting and saving your class recording:
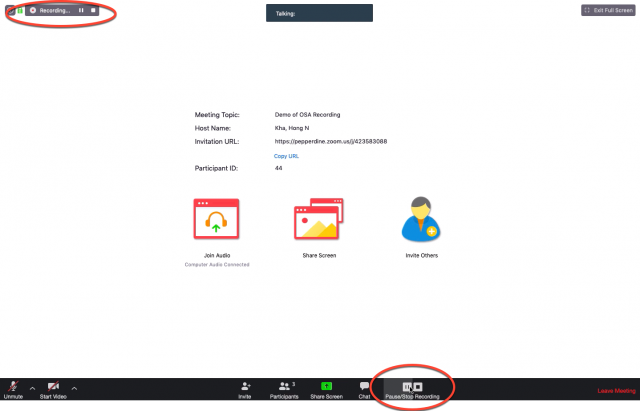
Step 1: Once you have obtained permission, click the recording icon in the bottom toolbar. This will begin recording, and you have “pause” and “stop” recording options in the bottom toolbar and top left toolbar.
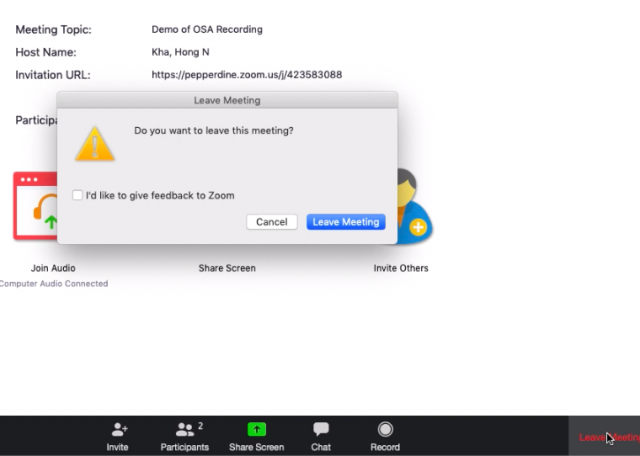
Step 2: Once the class is finished, stop the recording and leave the meeting via the “leave meeting” box in the bottom right corner.
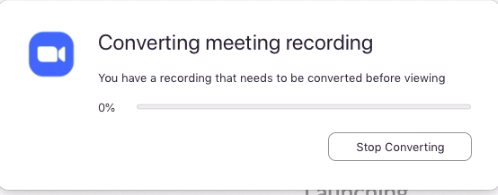
Step 3: Once you leave the meeting, a box will pop up notifying you that the zoom recording is being converted into viewable format.
Step 4: Once the recording has been converted, a “save recording” box will appear. Choose “choose a new location” from the drop-down menu.

Step 5: Save the recording in a folder you can access again later. It may be helpful to create a zoom folder specifically for zoom class recordings.
