You can learn how to create transcripts in Zoom in our Turn on Zoom Transcripts page. After these transcripts have been created, they can be edited and updated. Please see these instructions on how to edit transcripts.
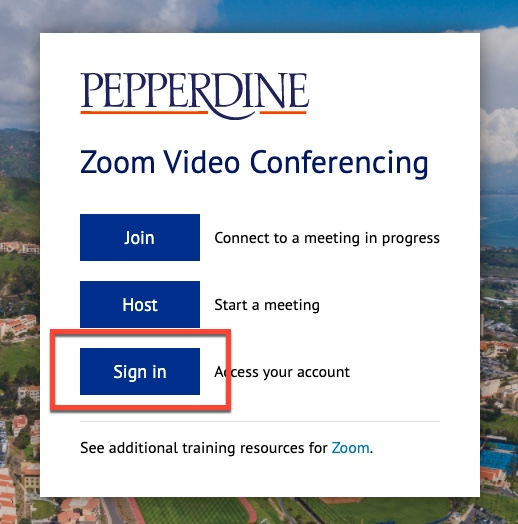
Sign in to zoom.pepperdine.edu
Go to zoom.pepperdine.edu then click “Sign In.” You will be directed to Pepperdine’s CAS, where you can log in using your Pepperdine credentials.
Click Recordings
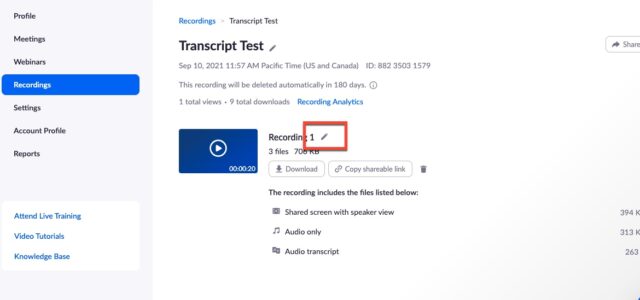
On the left-hand navigation menu, click “recordings.” Click the name of the recording you would like to edit. You will see a list of recording files.
To edit the name of the recording, click the pencil icon next to the name, which will allow you to type in a new name.
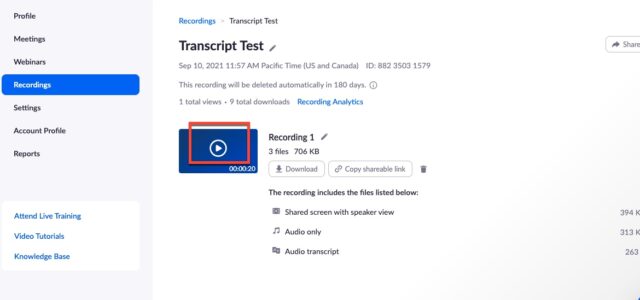
Click the “play” icon on the recording.
Click the “play” icon in the middle of the recording. This will open up the recording in a diagnostics screen, where you may edit phrases.
Edit your Transcript
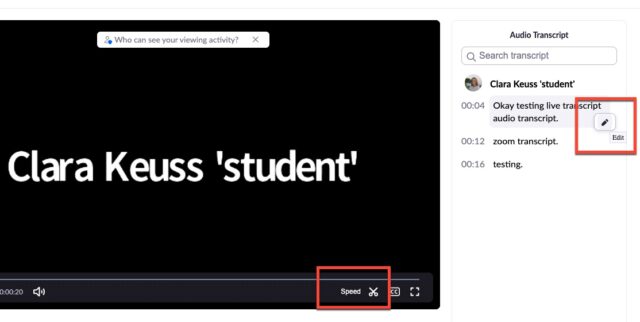
There should be a running transcript bar on the side of your video. You can hover over a phrase with your mouse and click edit, allowing you to change the wording of the written transcript.
On the video itself, you can click the “scissors” icon to clip sections of the video.
Note that editing will not affect the original recording, but when students download a recording it will be the full-length version.
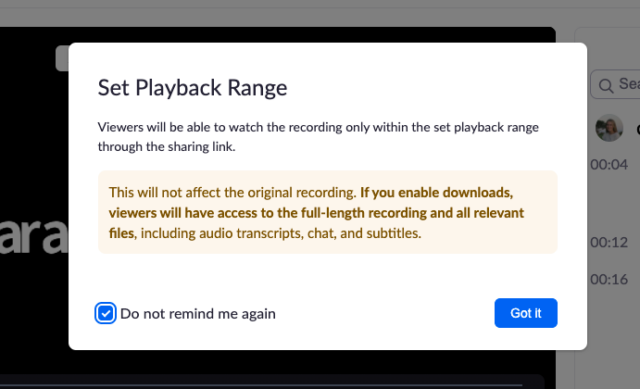
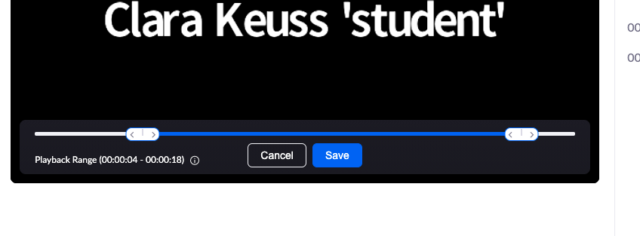
To edit, once you have clicked the “scissors” icon shown above, click on the arrows on either end of the video playback range to move them closer or further away. When you click save, the blue section will be set as the new payback range.
IF YOU NEED ANY TECHNOLOGY ASSISTANCE, PLEASE FEEL FREE TO REACH OUT TO INFORMATION SERVICES AT (310) 506-7425 OR SUPPORT@LAW.PEPPERDINE.EDU. GOOD LUCK!
