
To turn on Zoom transcripts for your Cloud recordings, please view the instructions below.
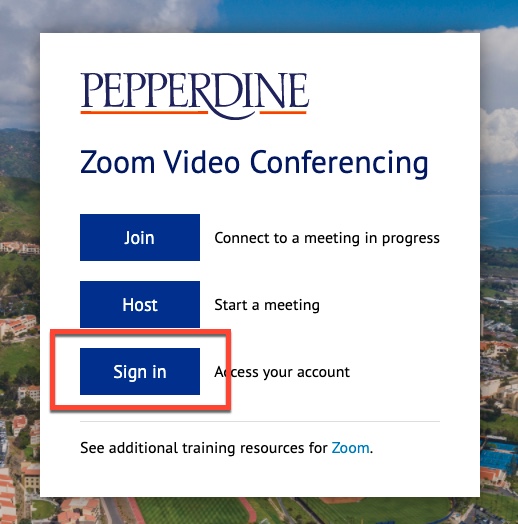
1. Log in to zoom.pepperdine.edu (or click this link)
Click the Sign In button, which will take you to the SSO page.
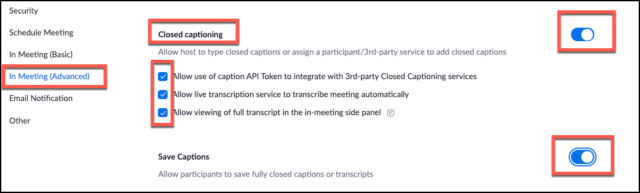
Then, navigate to the far left panel and choose the “In Meeting (Advanced)” tab to open the settings options.
2. Select All of the Options Below
Ensure that you click all of the boxes, namely:
1. Allow use of caption API Token to integrate with 3rd-party Closed Captioning services,
2. Allow live trascription service to transcribe meeting automatically, and
3. Allow viewing of full transcript in the in-meeting side panel.
Also ensure that both the Closed Captioning and Save Captions tabs at the far right are turned on, as shown below.
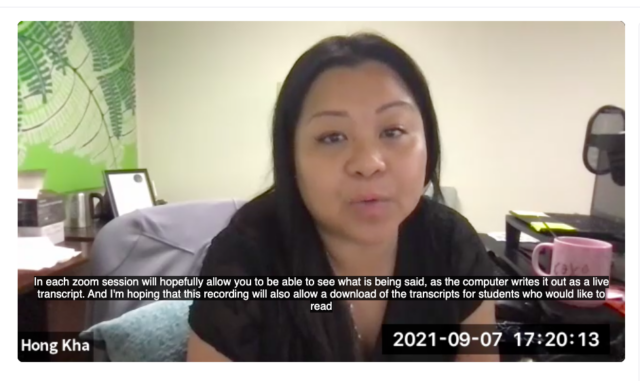
During the live recording session, you should now also have the option to “enable live transcripts”, which will insert live, automatically generated closed captions during your class.
3. Do a test Zoom Pro recording
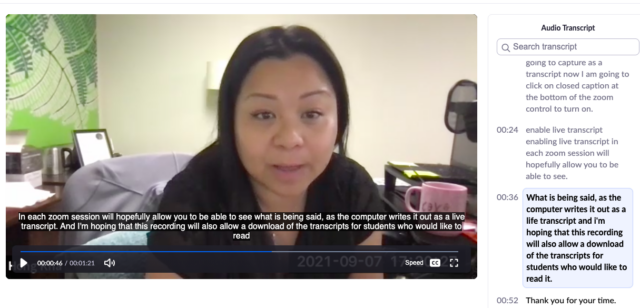
Finally, do a test Zoom Pro recording in Courses to see if the transcripts show up in the Cloud Recording.
You should ideally see the transcript available on the side of the document once the recording is finished uploading.
If you require any technology assistance, please feel free to reach out to Technology Services at (310) 506-6417 or Support@Law.Pepperdine.edu