Please note that you can start recording your meeting/class after you start the session. If you want to setup recording as an automated feature you can do that as well, even after you have setup the meeting link.
Below is the information on how to start a recording DURING your class session. There are two options. One is for the professor/host and one is for the attendee/student.
Recording a Zoom session: Downloadable PDF
Host (professor) manages recordings
- As the faculty member hosting the meeting you have the option to record your Zoom session to the
cloud or locally to your computer. - We recommend you record to the cloud as it is easier to track and manage through Zoom’s web
interface. - There are two ways to access your recordings.
• The first way is to use the link Zoom emails you after your session has ended.
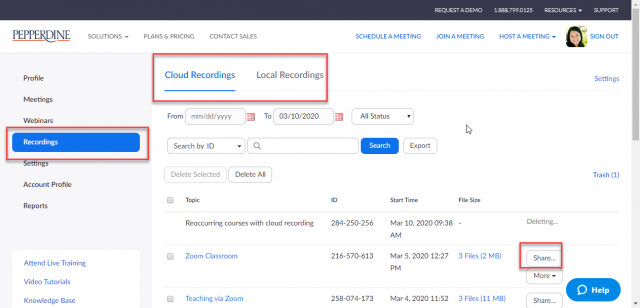
• The second way is to log back into your Zoom profile at http://pepperdine.zoom.us and click on Recordings menu on the left as shown in the image below.
i. Then click on Cloud Recordings
ii. Locate the session you want to share and click on the share button.


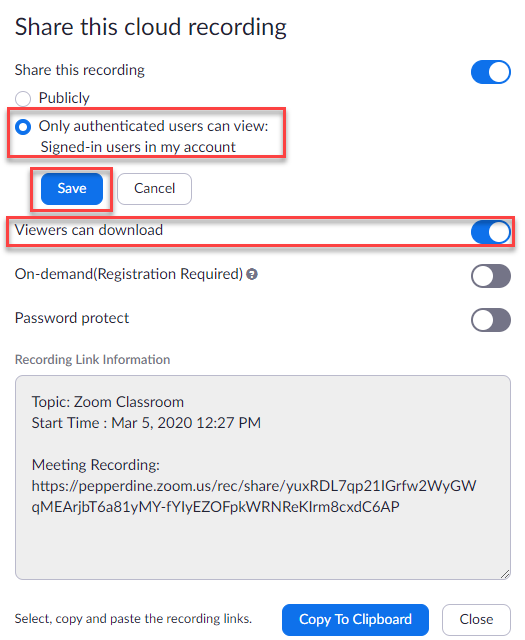
4. Select “Only authenticated users can view; Signed-in users in my account” and then “save”
5. You can choose if you would like to allow viewers to download the link by clicking the slider to blue for yes or gray for no.
6. Click on the Copy To Clipboard button will copy the information that is the grey box labeled “Recording Link Information”. You can then copy all of that information into an email for students.
Students manage their own recordings
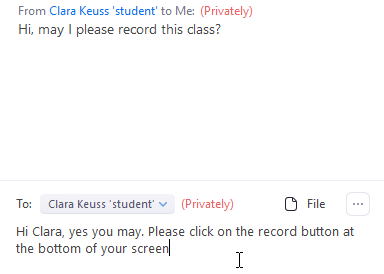
- Student participants should request for their professor’s permission to record the session either via email prior to the Zoom sessions or privately to the professor in the Zoom Chat feature.

2. As the host you need to allow for each student individually to record the session. Participants have the option to save to their Zoom cloud account or on their computer.
From the Chat tool move your mouse to the right of a student’s name and you will see the Mute and More button appear. Click on More.
3. Then click on the Allow Record button
4. You will now notice the red record dot appear at the top left of the screen. Please note that this will appear for everyone in the session.
If you have any questions, please feel free to contact Information Services at support@law.pepperdine.edu or (310) 506-7425.
