The Roster tool displays the names and pictures of site participants, in this case, your class section students. The Roster tool is a helpful way to learn students names, take attendance, and verify identities during class assignments and assessments.
Please keep in mind that you do not need to add officially enrolled students to a class site; all registered students are automatically enrolled each business day.
Also, please note that the Roster tool does not allow an instructor to add or remove participants from a site; therefore, faculty must use Site Info to do this. For detailed steps and more information, read under the coinciding subheading in this article.
If you would like to know how to merge or combine course sections, please click here to be redirected to Community Pepperdine.
To view a video on how to utilize the Roster tool, please view below.
Displaying Pictures in Roster
1. Log on to Courses with your Pepperdine credentials.
2. Scroll through your left tool bar and select “Roster.”
3. Select either “Official Photos” or “Pictures from Profile” on the top right of your Roster page.
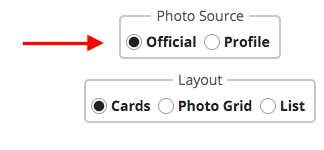
“Official Photos” are usually the default and are photos fed from the University ID card system, assuming that the student has taken an ID Card photo. “Pictures from Profile” are the optional profile photos uploaded directly by the students, if they have done so.
4. You may then scroll down to review the available photos for enrolled users based on your selection.
Managing Participants with “Site Info”
1. Log on to Courses with your Pepperdine credentials.
2. Scroll through your left tool bar and select “Site Info.”
3. Select “Manage Participants” on the top menu bar.

4. To filter site participants, click the “View” drop-down and select the user role to manage the individual’s settings to your liking.

Instructors will also have the option to make changes on the participants table:
- Under “Role,” you can change access privileges that instructors may want to strongly consider before assigning to users. This may be useful for TAs.
- Under “Status,“ you can change a user access to the site; keep in mind, “Inactive” will prevent the user from accessing the site.
- To remove a user from your site, click the “Remove” box corresponding to the use students who are on the course roster (i.e. registered students) cannot be removed manually this way.
5. Select “Update Participants” at the top to process any changes.
6. To add a participant, still under the “Site Info“, click “Add Participants.”

7. To add official Pepperdine University users (faculty, staff, or students) or previously added guests, you may either enter the individuals’s NetworkID username (e.g. jdoe) of formal email address (e.g. First.Last@pepperdine.edu or First.M.Last@pepperdine.edu) in the “Other Official Participants” box.
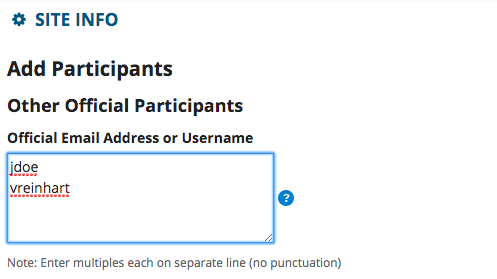
You may add multiple people at once by simply entering each person on a separate line.
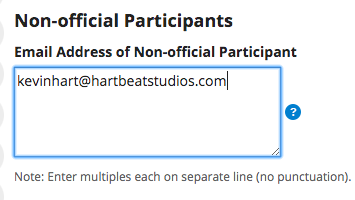
8. To add new, outside users, enter the person’s outside email address in the “Non-official Participants” box.
9. Below, chose whether to “Assign all users to the same role” or “Assign each participant a role individually.”
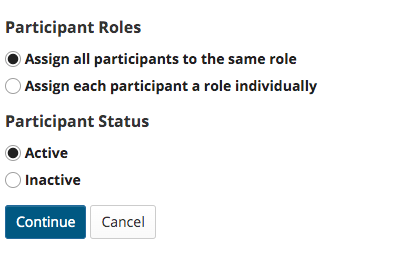
Then, decide whether the new participants will be “Active” (can view the site) or “Inactive” (cannot view the site). Remember, you can change these settings later in “Manage Participants.”
10. Click “Continue.”
11. Now, you may select the role(s) for the participant(s).
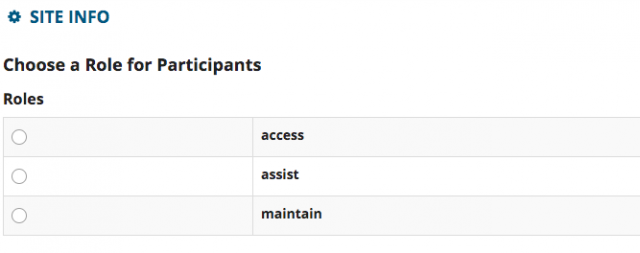
Your options are “Access” (equivalent to Student), “Assist” (equivalent to Teaching Assistant for assigned access to select areas), and “Maintain” (equivalent to Instructor).
12. After choosing roles, click “Continue.”
13. Select whether or not you would like to send an email notice to the added users. If participants are new “outside” users, Courses will automatically send them an activation email to verify their account, enter their details and choose a password.

14. Once your option is selected, click “Continue.”
15. Review the information for accuracy. If you must make any corrections, click on the “Back” option at the bottom.

16. Click “Finish” to add the participants. You may now see the updated participants, as well as see the new students in your “Roster.”
Wondering what else you can do in Courses? For a list of the top 5 Courses tools and information on how to utilize them, click here.
If you have any questions, please feel free to contact Information Services at support@law.pepperdine.edu or (310) 506-7425.
