Universal Design Learning

This post is a student response to Thomas Tobin’s webcast on Universal Design of Learning as well as the UDL Guidelines page from UDL’s website. For more information, please visit those sites.

In his webcast on the basics of UDL, Thomas J. Tobin of the University of Wisconsin-Madison made it clear that we need to re-frame how teaching institutions approach UDL and accessibility. When presented with students who desire accommodations for their learning, instructors, though willing to comply, can often feel frustrated and stressed at the prospect of altering curriculum to fulfill the request.

But, UDL is not only a disability or access services format. Rather, UDL is a proactive way to structure material to help make the interactions the happen at your institution more easily accessible for people on their mobile devices.

What is UDL?

UDL is defined as a framework to improve and optimize teaching and learning for all people based on scientific insights into how humans learn. There are three components:

  1. We need multiple ways to keep learners engaged. This is the “why” of learning. For example, instructors could give a time estimate for an assignment so that students know how to self-regulate their approach to the assignment, and experience autonomy.
  2. We need multiple ways of representing information. This is the “what” of learning. For example, the students can be presented with both audio and visual versions of the content, and choose which style works best for them to retain the information. Providing different options for the information display allows deeper comprehension for the student, as they may understand one form of communication better than another.
  3. We need multiple ways to give people choices for their actions. This is the “how” of learning. For example, as long as learning objectives remain the same, you can offer multiple ways for the student to complete an assignment, perhaps through an essay or visual presentation option. Or, give multiple options for first drafting that point toward the same end result assignment.  

Realistic Implementation

UDL helps to understand what has to happen at the level of course design that makes accommodation less necessary.

UDL is “plus one” learning. If there is a way you interact with students, just make one more way to interact with materials, each other, and the wider world.

Remember that UDL reduces barriers by offering students choices and control. If you offer more ways for students to access material, they are more likely to persist in classes, more likely to be retained in later years, and more likely to be satisfied with their learning experience.

UDL is work, but will alleviate more work and stress that could potentially arise later in the course, as it is a proactive, not reactive format.

Many instructors are familiar with DI, or “differentiated instruction”. DI is customizing the instructor’s response to the student in any way they can. DI occurs in the moment, responding to a specific student situation. It is also reactive, allowing instructors to hear and respond. UDL is the proactive counterpart to DI, and happens on “day 0” to set up for success.

5 strategies for UDL:

  1. Start with text. Use your written content as a script for audio/podcast or video. You can post the text version and video/audio as the alternative (multiple ways to represent information).
  2. Make alternatives. You can offer different formats for print/PDF content, or post take still photos with captions from a video. This reduces cognitive barriers for students. Note: UDL does not aim to water down content, but instead makes it easier for the student to get in and do it.
  3. Let them do it their way. As long as objectives for assignment are the same, could offer video or paper presentations, let the student choose. 
  4. Go step by step. 10:2 ratio. Give info for 10 mins, then ask students to respond for 2 mins. The response does not even need to be related to the info, it is used as a pause to retain info given in the 10 minutes.
  5. Set content free. Publish content on platforms that are mobile accessible. Also, make sure they are not tied to a specific software that the student has to download or buy. 

FAQs

What about the science surrounding different learning styles?
Learning styles, in the conventional sense, (audio verses visual presentation, etc.) don’t exist. At least, not as six characteristics. Our learning preferences change from moment to moment based on the content and circumstances. For example: a man who is taking a class but also has to drop his daughter off at school before work may prefer an audio version of the class content to listen to during his commute, and in that instance, an audio option is much more helpful to him than a PDF.

Retention also varies and is not based on hard principles but based on accessibility; if the student can get to the information, look through it multiple times, and customize how they move through it, they can retain it.
Incorporating CALI Lessons in Your Classroom

CALI (The Center for Computer-Assisted Legal Instruction) is a resource provided by Pepperdine School of Law for students that includes over 1,000+ interactive online tutorials written by law professors, on over 40+ subject areas. This article is a reminder of the incredibly useful resources available in CALI, as well as the suggested use of the program in your classroom. The information provided below is taken from a post by CALI’s executive director, John Mayer.

For notes on CALI for students, such as what the software is and how to find your registration code, please click here.

1. CALI Lessons are interactive, engaging and provide students with variety in learning experiences.
CALI Lessons are written by Law faculty and intend to teach and quiz the students through hypothetical situations. The interactive readings and tests quiz them on genuine understanding to ensure that the students selected correct answers for the right reasons. Modeled on Socratic Dialogue, the questions asked are meant to steer a student’s thinking in a nuanced direction.

2. CALI Lessons are quick and can be used as topic-introductory assignments or fillers within a lecture.
Each lesson is designed to take approximately between 20 and 40 minutes to complete, which is perfect for bite-sized material that allows natural breaks. This allows students to utilize CALI Lessons before class assignments, in preparations for exams, or even when the professor is unavailable to attend class. While students are still exposed to rigorous concepts and nomenclature, they are not meant to overwhelm the student and actually provide immediate feedback to aid in studies.

3. With CALI LessonLink, professors may track student progress and results.
Law faculty has the ability to create unique links to specific CALI Lessons they wish their students to take. Students receive feedback on every question, as well as a final score that informs them on their skill level in a certain legal topic; with LessonLink, faculty has access to all of these personal statistics to access their students knowledge on any given subject.

FOR MORE INFORMATION, PLEASE FEEL FREE TO REACH OUT TO INFORMATION SERVICES AT (310) 506-7425 OR [email protected]. GOOD LUCK!

Metacognition for Students

This presentation will explore Metacognition, or the awareness and understanding of one’s own thought process. In understanding the different approaches to learning, you will be able to enhance your own learning as a student.

This presentation is compiled from the information presented in Sandra McGuire’s best-selling Metacognition book, “Teach Yourself to Learn: Strategies You Can Use to Ace Any Course at Any Level”. You can buy the book here.

In this presentation, we will cover:
Linking Concepts
Bloom’s Taxonomy
The Study Cycle

This image has an empty alt attribute; its file name is Pedagogy-2-640x360.png

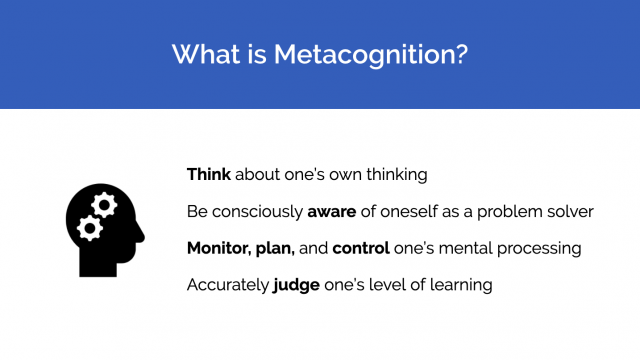
Metacognition, literally “cognition about cognition”, or “thinking about thinking” is the process of understanding how you learn and includes knowledge about when and how to use particular strategies for learning or problem-solving. This understanding can manifest in being aware of oneself, and monitoring or judging one’s level of learning.

This image has an empty alt attribute; its file name is Pedagogy-3-640x358.png

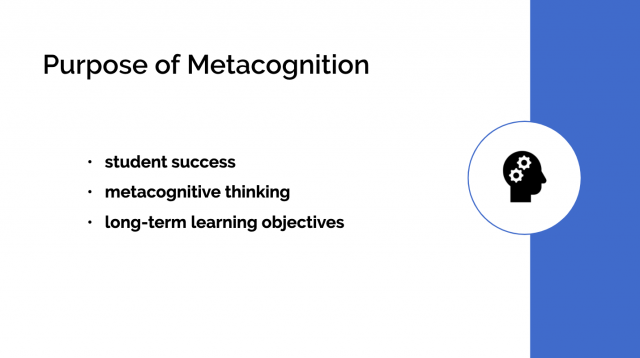
The purpose of this presentation is to explain some strategies and self-evaluation techniques to equip you, as a student, realize your personal learning patterns and objectives.

This image has an empty alt attribute; its file name is Pedagogy-4-640x357.png

Remember: for highest efficiency, choose one or two techniques that you can feasibly implement into a studying routine. There is a lot covered in this presentation; see if there are one or two ways you can implement metacognition in your own academic life.

 Short-term benefits include:

This image has an empty alt attribute; its file name is Pedagogy-6-640x354.png

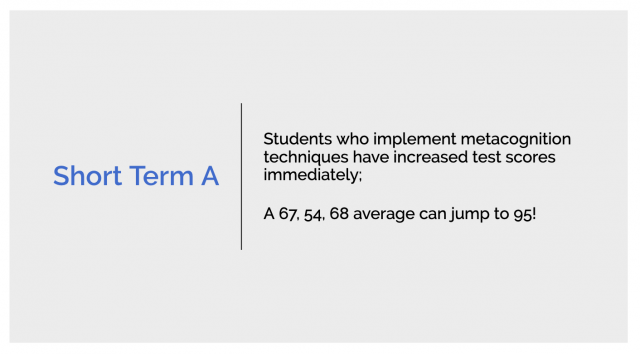
Increased metacognition awareness has been proven to massively improve test scores.

This image has an empty alt attribute; its file name is Pedagogy-7-640x352.png

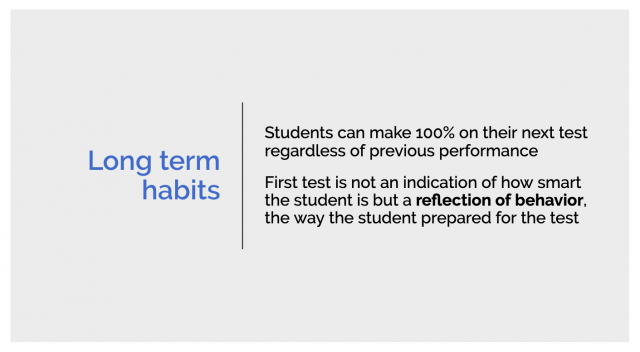
This is not a one-off phenomenon; building strong learning habits is a continuous process that will continue to benefit you long-term.

The first metacognition strategy is linking concepts:

This image has an empty alt attribute; its file name is Pedagogy-9-640x348.png

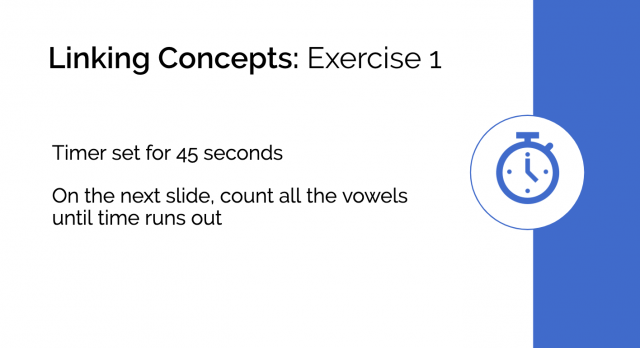
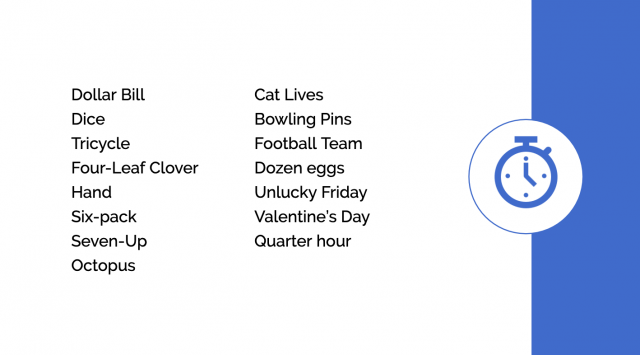
To illustrate this concept, follow this exercise, and have a pen or pencil and paper ready. There will be a timer set for 45 seconds. On the next slide, count all the vowels you see until time runs out.

This image has an empty alt attribute; its file name is Pedagogy-10-640x355.png

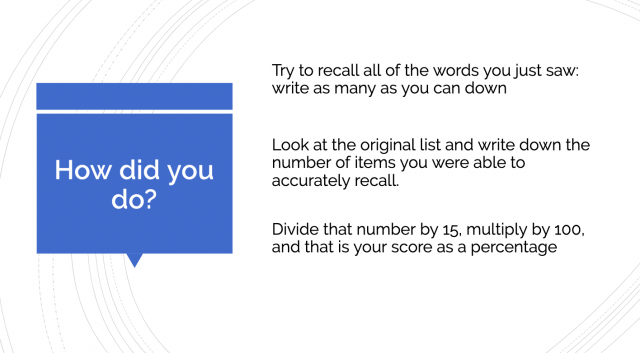
Now, try to write down as many words as you can remember from the previous slide. If you’d like to calculate your score in percentage divide the number you remember by 15, and multiply by 100. The average is 3 phrases remembered, or 20%; did you beat the average?

This image has an empty alt attribute; its file name is Pedagogy-11-640x353.png

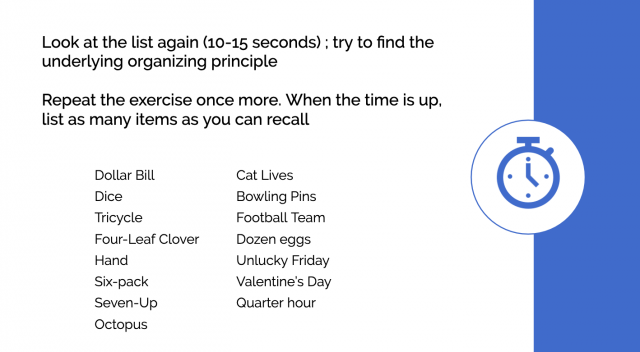
Looking at the list again, try to find the underlying pattern that orders the group.

This image has an empty alt attribute; its file name is Pedagogy-12-640x352.png

Now, repeat the exercise again- you will be given 45 seconds.

This image has an empty alt attribute; its file name is Pedagogy-13-640x348.png

 Did your average improve?

This image has an empty alt attribute; its file name is Pedagogy-14-640x354.png

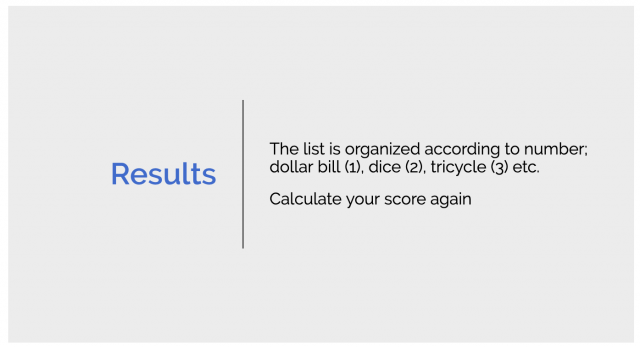
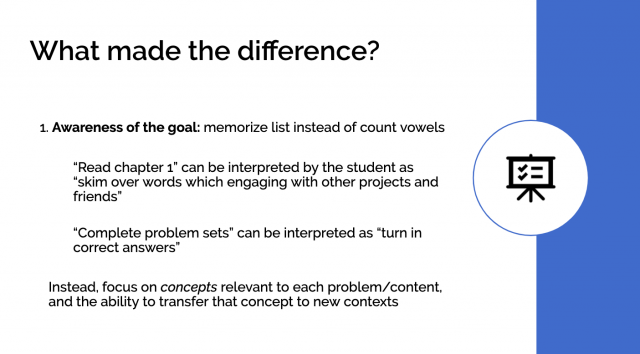
This exercise illustrated the strategy “linking concepts”, in particular focusing on the overall goal. When the goal is clearly set (memorize the list) to match the expected outcome (write as many words as you can recall), the outcome is much improved.

This image has an empty alt attribute; its file name is Pedagogy-15-640x353.png

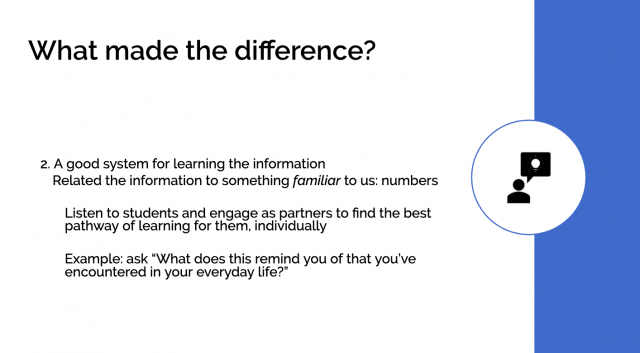
Secondly, and implementing a holistic, pattern-driven strategy helped to make the learning process familiar. By linking the words to numerical order, it was easier to recall the words in the exercise. In academia, the “linking concepts” approach remains relevant; connecting content to the overall goal, and making content relatable to things familiar to the student helps to format the learning experience to the student. 

For example, you may try to link the content or your readings to something you have encountered in everyday life, thus making the learning process tailored to your own experiences.

The second strategy is Bloom’s Taxonomy:

This image has an empty alt attribute; its file name is Pedagogy-17-640x357.png

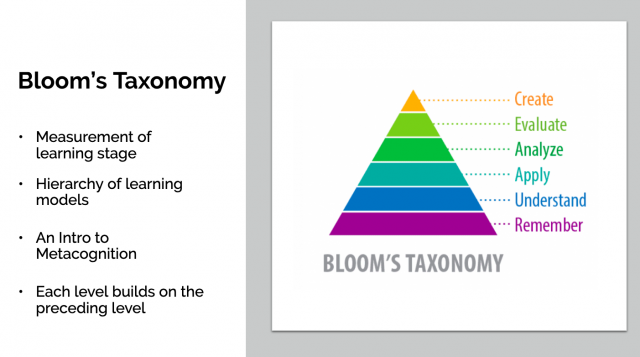
Bloom’s taxonomy is a quantitative, measurable hierarchy. Each level of learning builds on the next, and to understand which level you are at versus which level you need to be at for the goals of the class is vital.

This image has an empty alt attribute; its file name is Pedagogy-18-640x356.png

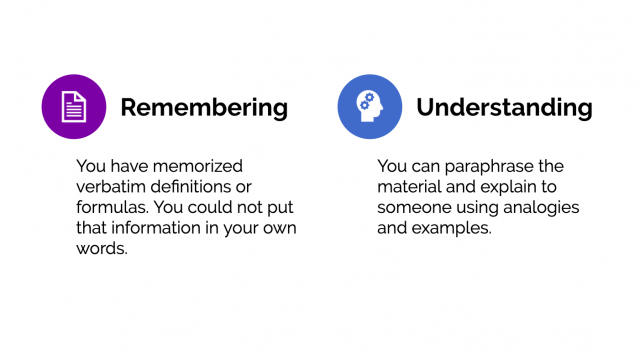
The first stage is remembering, essentially rote memorization. The second is understanding the terms, characterized by the ability to paraphrase the content.

This image has an empty alt attribute; its file name is Pedagogy-19-640x351.png

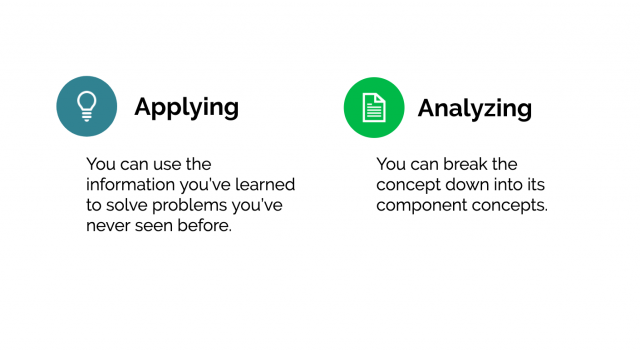
The third is applying, where you can take the information you’ve understood and use it in new contexts that you have not seen before. Fourth is analyzing, where you can break the concept down into parts, and examine the constitution or structure of the concept.

This image has an empty alt attribute; its file name is Pedagogy-20-640x355.png

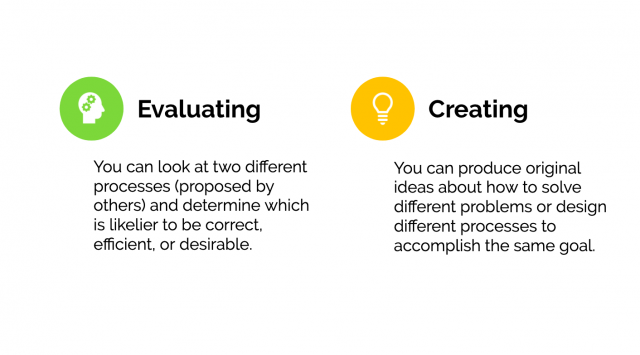
Fifth is evaluating, where you can take the concept you’ve learned and compare, contrast, and judge influences and competing ideals based on your knowledge of the concept. Lastly, sixth creating: in this stage, you are able to solve problems originally, building off of the knowledge of the concept.

This image has an empty alt attribute; its file name is Pedagogy-21-640x354.png

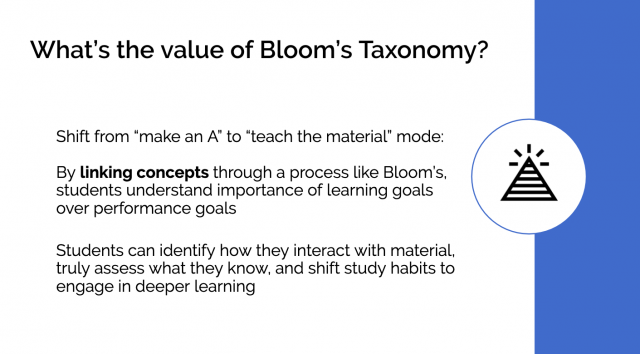
Differing from the buy-in to metacognition, which many view as simply raising grades, Bloom’s taxonomy challenges you to truly understand the material, identify how you, personally, interact with material, assess what you know, and shift study habits to engage in deeper learning.

After evaluating where you are on the taxonomy, how do you move higher, out of levels of memorization and into levels of deep comprehension? Use the study cycle!

This image has an empty alt attribute; its file name is Pedagogy-23-640x355.png

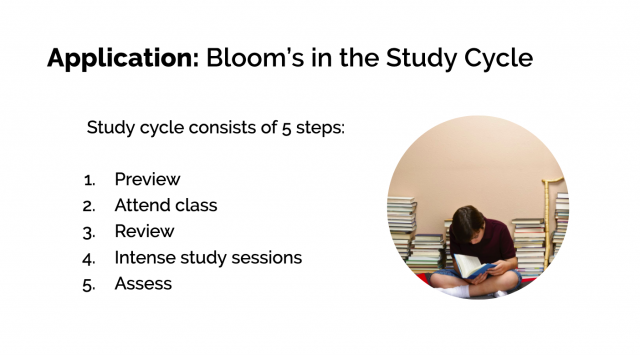
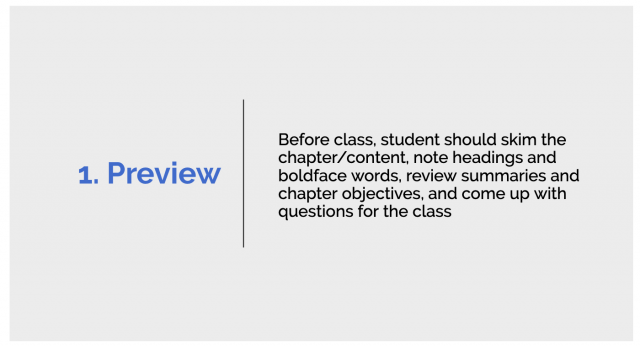
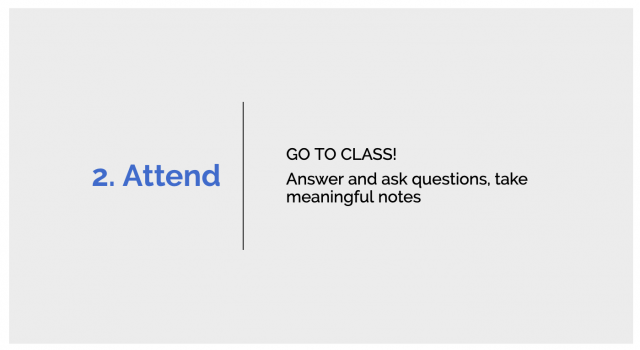
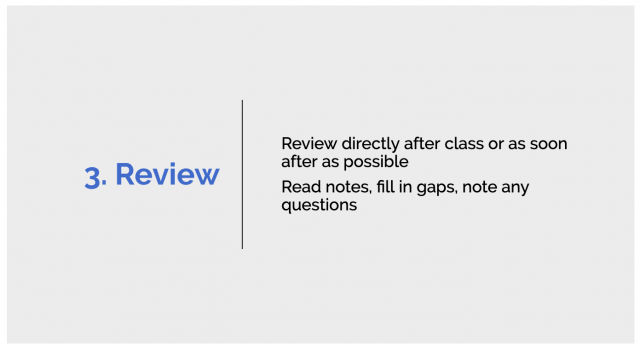
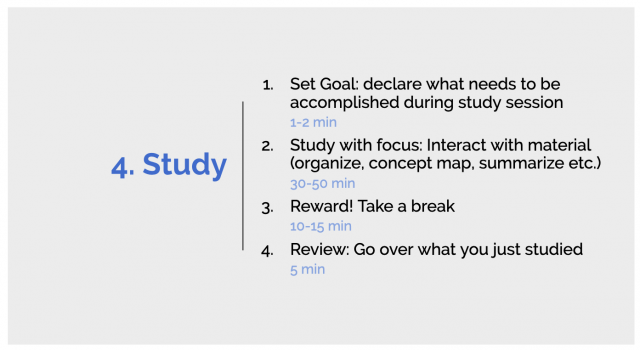
The cycle consists of 5 steps: Preview, attend class, review, intense study sessions, and assessment.

This image has an empty alt attribute; its file name is Pedagogy-24-640x347.png

The preview stage happens before class, where you skim over notes or completed homework to ascertain the learning objectives for class that day, and any questions you may have.

This image has an empty alt attribute; its file name is Pedagogy-25-640x350.png

The second stage is attendance; go to class, no matter what, and taking meaningful notes.

This image has an empty alt attribute; its file name is Pedagogy-26-640x348.png

Directly after class, you should review main concepts learned that day and review by reading over notes and answering questions.

This image has an empty alt attribute; its file name is Pedagogy-27-640x350.png

The fourth step is engaging in short study increments where you implement metacognition techniques.

This image has an empty alt attribute; its file name is Pedagogy-28-640x346.png

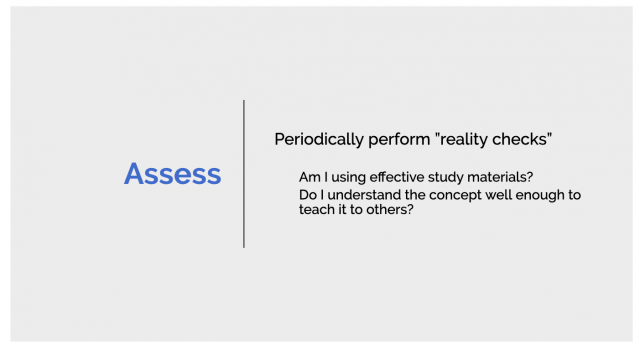
Periodically, you should pause and make sure that you fully understand the material you have studied. You may try assessing their stage in Bloom’s taxonomy; are you simply in the memorizing stage, or higher in the evaluating stage?

This image has an empty alt attribute; its file name is Pedagogy-29-640x354.png

In college, the level of material retention necessary to succeed in a class is higher than in high school. You should be aware of the Bloom’s stage they need to be at to succeed; typically, you should be at the analysis or synthesis stage.

Next is a model of the study cycle when applied to reading.

This image has an empty alt attribute; its file name is Pedagogy-31-640x356.png

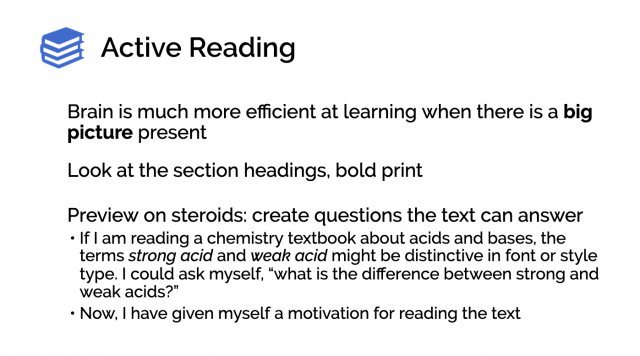
As the student, you should be able to identify the questions the instructor needs to you answer before reading the text; skim the reading broadly first to understand the topics that will be covered in the reading.

This image has an empty alt attribute; its file name is Pedagogy-32-640x352.png

When reading the actual text itself, you should not go straight from beginning to end, instead you should read in chunks to fully digest the information in a feasible manner.

This image has an empty alt attribute; its file name is Pedagogy-33-640x352.png

It is vital that you attend class and take physical, hand-written notes, engaging completely with the material while in class.

This image has an empty alt attribute; its file name is Pedagogy-34-640x350.png

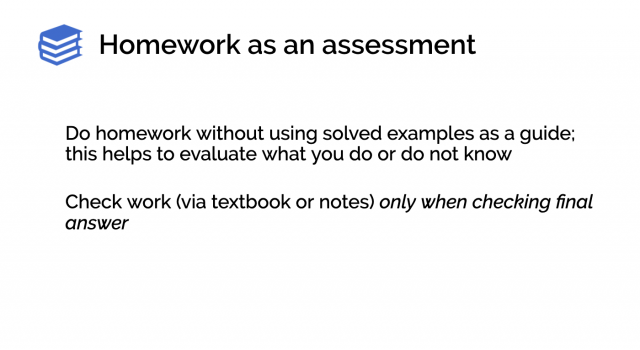
Homework should be done first without notes or a guide, and used as an assessment to see how well you understand the material covered in readings or class.

This image has an empty alt attribute; its file name is Pedagogy-36-640x355.png

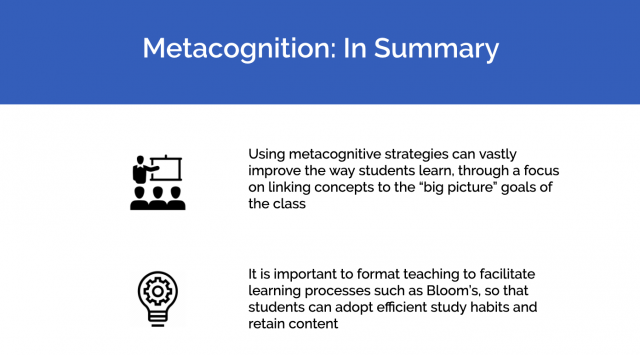
In summary, using metacognitive strategies is deeply beneficial in you understand how you individually learn best, and how to format your study and class practices to master material. 

This image has an empty alt attribute; its file name is Pedagogy-37-640x354.png

Thank you for your interest and attention!

If you have any questions, please feel free to contact Information Services at [email protected] or (310) 506-7425.

How the Brain Works

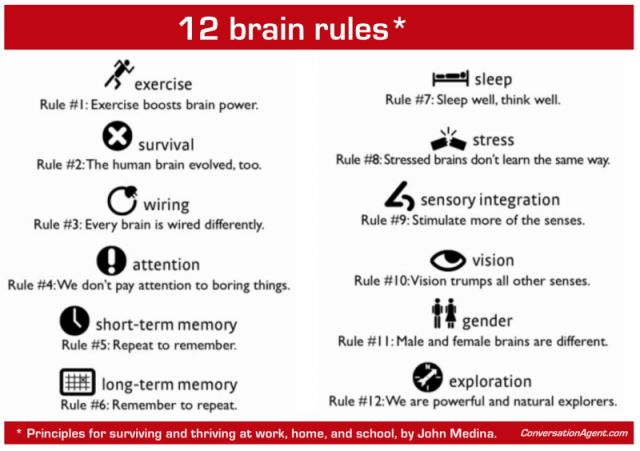
Here, we examine author and molecular biologist Dr. John Medina’s “Brain Rules,” a popular book on implementing brain science to classroom and professional dynamics. Medina lists 12 fundamental “brain rules” (what scientists know for sure about how our brains work), and many presented points are incredibly pertinent to molding the ideal learning environment.

The way our collective brains as a species have evolved is a truly fascinating and ongoing event. Possessing a deeper understanding of the way our minds function on both a mass and individual level allows us to hone our cognitive strengths, as well as revolve our routines to our benefit.

Separating the analysis between students and faculty, below are a few key takeaways for both sides of the classroom that are directly related to fostering a learning space that may maximize educational efficiency and retention.

Key Takeaways for Students

Rule #1: Exercise Boosts Brain Power
Exercise improves cognition for two reasons:
1. Exercise increases oxygen flow into the brain, which reduces brain-bound free radicals. One of the most interesting findings of the past few decades is that an increase in oxygen is always accompanied by an uptick in mental sharpness.2. Exercise acts directly on the molecular machinery of the brain itself. It increases neurons’ creation, survival, and resistance to damage and stress.

Rule #7: Sleep well, think well.
Sleep must be important because we spend 1/3 of our lives doing it! Loss of sleep hurts attention, executive function, working memory, mood, quantitative skills, logical reasoning, and even motor dexterity. Taking a nap might make you more productive. In one study, a 26-minute nap improved NASA pilots’ performance by 34 percent!

Rule #3: Every brain is wired differently.
What YOU do and learn in life physically changes what your brain looks like – it literally rewires it. We used to think there were just 7 categories of intelligence. But categories of intelligence may number more than 7 billion—roughly the population of the world. Learn which learning style is best for you, personally, and customize your studying style to learn effectively.
Rule #5: Repeat to remember.
Improve your memory by elaborately encoding it during its initial moments. Many of us have trouble remembering names. If at a party you need help remembering Mary, it helps to repeat internally more information about her. “Mary is wearing a blue dress and my favorite color is blue.” It may seem counterintuitive at first but study after study shows it improves your memory.

Key Takeaways for Faculty

Rule #4: We Don’t Pay Attention to Boring Things.
For instructors, it’s important to note that boredom is less of a matter of determination, but more of a matter of evolution. The topics and delivery methods that students pay attention to are profoundly influenced by predictive memory. Try to open main ideas and lectures with emotional and relevant anecdotes, or something attention grabbing to capture the students’ interests in seconds. Typically, an individual can maintain attention for only 10 minutes, and then requires a break and second boost of attention to restart the clock.

Rules #5 and #6: Repeat to Remember, Remember to Repeat.
Memories are very volatile. The human brain can only retain around seven pieces of information for less than 30 seconds; this is crucial for powerpoint presentations in terms of not overwhelming your audience with multiple facts on one slide. If an instructor would like to extend information retention to a few minutes or even an hour or two, the information must be consistently re-exposed to students in specifically times intervals through either examples, practice or checkpoint summaries.
Rule #10: Vision Trumps all other Senses.
The book describes the interconnection between sense and memories as a “learning link,” stating that multi-sensory environments will always lead to a better learning outcome. The human brain is incredible at remembering pictures, so to hear information presented alongside a visual stimulant will increase a student’s memory retention by 55 percent. It is also important to note that, during presentations, interpreting pictures is more efficient than interpreting text in terms of brain functionality.
Rule #8: Stressed Brains Do Not Learn the Same Way.
It is important to pay attention to the classroom dynamics that are created amongst peers and between the faculty and students. If an individual does not feel safe–whether that be physically or emotionally–he or she may not perform as well. A student may become isolated if they feel misunderstood by a teacher or disconnected with their teaching methods.

Rule #3: Every Brain is Wired Differently.
Lastly, it is essential to understand that every student enters the classroom with their own personally built set of developmental strengths and stress, short and long term memories, and overall varying levels of cognitive function. Every brain is wired differently, so it may behoove an instructor to attempt to integrate different pedagogical techniques to see what is best for the majority, or place separate, special attention to individuals who may require or seek other methods of learning and engagement.

Thank you for your interest and attention!

If you have any questions, please feel free to contact Information Services at [email protected] or (310) 506-7425.

Why Metacognition? Optimal Learning

This presentation gives a brief overview of the benefits of teaching in a metacognitive style, to create the most effective learning environment for students. To view the complete guide to metacognition, see LawTech’s Metacognition presentation.

In this presentation, we cover:

What faculty can do
What students can do
Brief overview of metacognition strategies

Optimal learning, or the most effective and efficient way a student retains and masters content, is the product of connecting the student’s motivation, emotion, and learning style. Ultimately, teaching in a way that encourages optimal learning is the goal of most every teacher. But how is this accomplished? This presentation will overview the benefits of learning to teach with metacognitive strategies, which allow the teacher and student to work together to facilitate learning.

Optimal learning occurs when the social and emotional environment of a learning space are considered along with the material presented in the classroom. This includes creating safe and stable learning environments, providing equitable and rigorous material, and aiming to meet the needs of diverse learners.

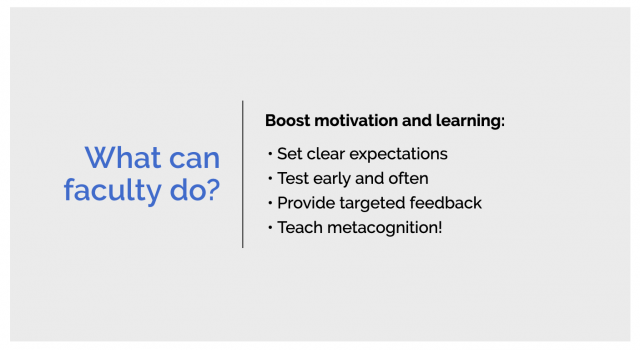
In order to facilitate this style of optimal learning, faculty and students must share responsibility for the learning environment. The faculty should set clear expectations and goals that the students can aim for. This is where metacognition is important!

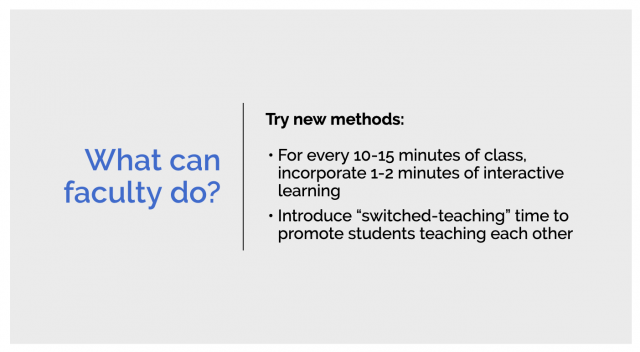
For example, teachers may format their class schedule to accommodate different learning styles and increase engagement by incorporating interactive learning into lecture-based classes. For example, students can talk about a question together, or teach one another the material that was covered in a previous class.

Students can learn metacognition techniques themselves, and master learning models such as Bloom’s taxonomy and the study cycle.

Also, it is important to impress upon students that their performance in class does rely, in part, on their individual contribution to their own learning.

Thus, students need to be able to find balance.

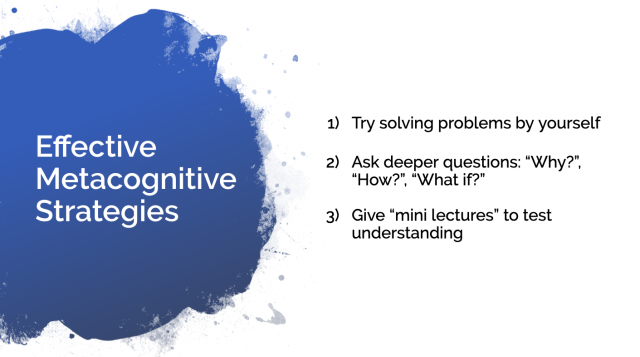
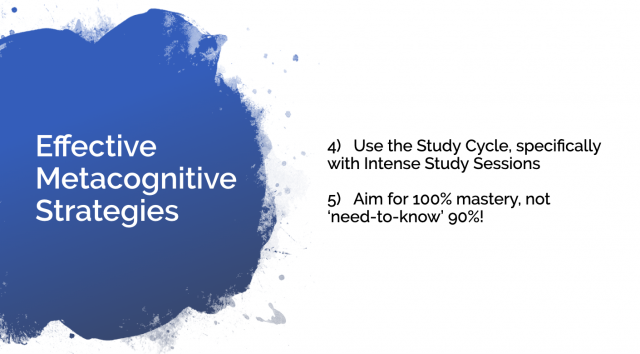
Some effective metacognition strategies to encourage students to try include: knowing the material well enough to teach someone else and asking deeper questions to engage with material on an analysis level.

Teach the study cycle, which emphasizes mastery over memorization.

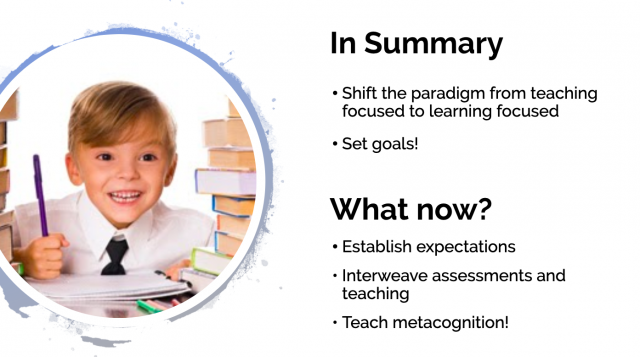
Essentially, it is highly beneficial for teachers to teach metacognitive strategies to students and establish clear learning goals the students can aspire to reach.

Thank you for your interest and attention!

If you have any questions, please feel free to contact Information Services at [email protected] or (310) 506-7425.

Gamifying Your Classroom

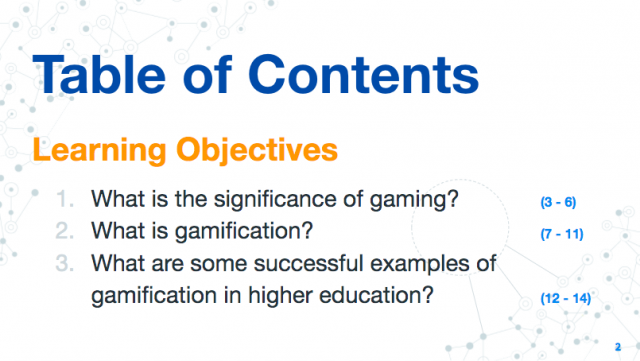
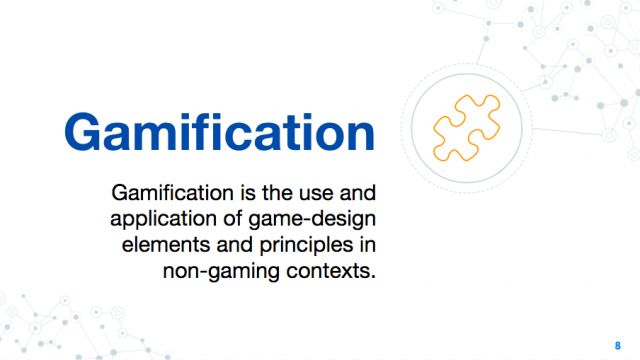
The goal of this presentation is to discuss gamifying education for faculty use in hopes of utilizing efficient pedagogy to make learning more engaging for their students.

In this presentation, we cover:

In this blog post, we will take a deep dive into the educational techniques of gamification, touching on points such as the general overview of gamification and how to implement gamified elements in the classroom. According to EducationDrive, a recent report showed nearly half of GenZ, the incoming generation of higher education, prefer to learn through gameful approaches.

According to game designer, author, and TedTalk speaker Jane McGonigal, gaming is the “most important medium of the twenty-first century.”

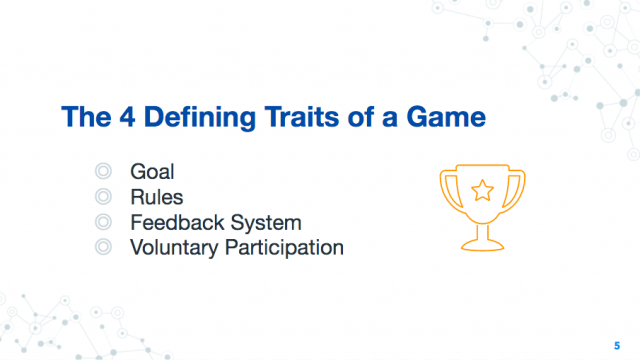
Overall, there are four main defining characteristics of a game:

The goal is a specific outcome that players will work to achieve. The goal of the game not only orients the player’s participation throughout the whole duration of playing, but it also provides the player with a sense of purpose.

Rules are sets of limitations, mainly used to foster creative and strategic thinking.

A feedback system is a motivating factor that allows the player to know how close they are to achieving the goal, as well as acts as a constant reminder that the goal is in fact achievable.

The final trait is voluntary participation, meaning that the player willingly accepts the goals, rules and feedback.

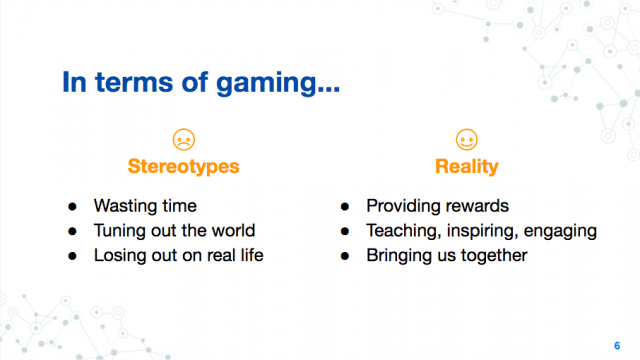
Gaming has always come with a stigma, but in proper moderation, gaming is structured to provide happiness and a positive reward system. The known secrets to making our own happiness, according to McGonigal, are satisfying work, hope of success, social connection and a sense of meaning.

In addition to a higher level of engagement and retention, gamification also provides an encouraging learning environment in which students may take risks and think creatively without simply searching for the “correct answer” or aiming for a higher grade. Placing educational materials in the context of a “game” may mitigate any discouragement of failure or poor habits in shortcutting the learning process.

Gamification may be useful in higher education in mix with a myriad of pedagogic approaches. Game elements show to benefit students in proactive engagement during teaching sessions, with a higher level of motivation and enjoyment. This may assist in creating a more effective teaching method while contributing to the students’ learning outcomes and overall educational experiences.

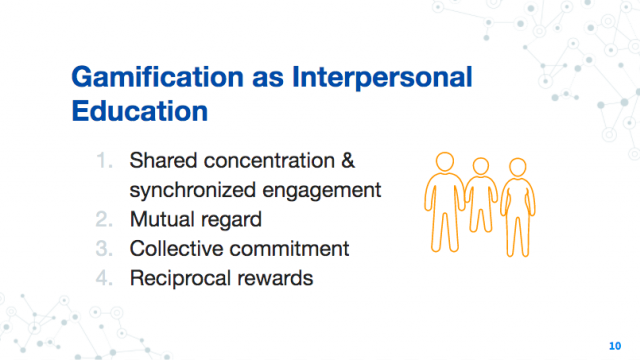
When considering gaming as a collaborative platform, we can look at the beneficial teaching gamified strategies relay on to teams of students. First, there is a shared concentration that allows complete focus on the game and it’s winning objectives. There is a mutual regard between team members that they all should put their best efforts out of respect. This collective commitment then incorporates honor into the action, which is rewarded through either a win or loss. Even in a loss, there is still a sense of fun and hope for a future success.

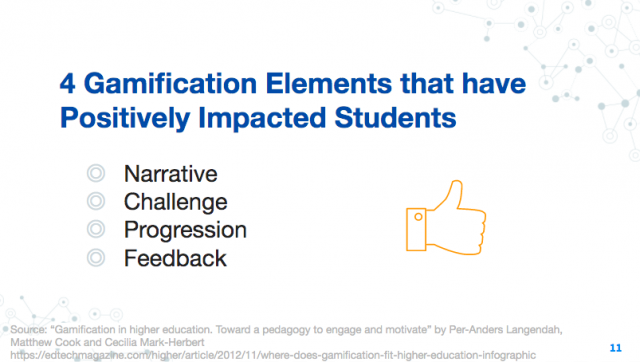
Narrative is the use of stories to engage students in learning, for example, a case study or real-world situation.

Challenge refers to the use of a task that is thought-provoking enough to be difficult, but with a solution that is obtainable enough to be fun.

Progression refers to the flow of tasks or activities that keep consistent engagement and motivation through a learning session.

Feedback is frequent and targeted responses to students’ progressing work that encourages learning.    

Thank you for your interest and attention!

If you have any questions, please feel free to contact Information Services at [email protected] or (310) 506-7425.

Metacognition for Faculty

This presentation is compiled from the information presented in Sandra McGuire’s best-selling Metacognition book, “Teach Students How to Learn: Strategies You Can Incorporate Into Any Course To Improve Student Metacognition, Study Skills, and Motivation”. You can buy the book here.

In this presentation, we cover:

Linking Concepts
Bloom’s Taxonomy
The Study Cycle

Consider encouraging your students to read the Student’s Guide to Metacognition, so that they also understand the benefit of learning how to study and master material efficiently!

This presentation will explore Metacognition, or the awareness and understanding of one’s own thought process. In understanding the different approaches to learning, you will be able to both enhance your learning and cater to students in their personal learning processes.

Metacognition, literally “cognition about cognition”, or “thinking about thinking” is the process of understanding how you learn and includes knowledge about when and how to use particular strategies for learning or problem-solving. This understanding can manifest in being aware of oneself, and monitoring or judging one’s level of learning.

The purpose of this presentation is to explain some strategies and self-evaluation techniques to both enhance teaching for more in-depth student learning, and equip teachers with the knowledge to help students realize their learning patterns and objectives.

For highest efficiency, choose one or two techniques that you, or the student, can feasibly implement into a teaching or studying routine.

 Short-term benefits include:

Increased metacognition awareness has been proven to massively improve test scores.

This is not a one-off phenomenon; building strong learning habits is a continuous process that will continue to benefit the student long-term.

The first metacognition strategy is linking concepts:

To illustrate this concept, follow this exercise, and have a pen or pencil and paper ready. There will be a timer set for 45 seconds. On the next slide, count all the vowels you see until time runs out.

Now, try to write down as many words as you can remember from the previous slide. If you’d like to calculate your score in percentage divide the number you remember by 15, and multiply by 100. The average is 3 phrases remembered, or 20%; did you beat the average?

Looking at the list again, try to find the underlying pattern that orders the group.

Now, repeat the exercise again- you will be given 45 seconds.

 Did your average improve?

This exercise illustrated the strategy “linking concepts”, in particular focusing on the overall goal. When the goal is clearly set (memorize the list) to match the expected outcome (write as many words as you can recall), the outcome is much improved.

Secondly, and implementing a holistic, pattern-driven strategy helped to make the learning process familiar. By linking the words to numerical order, it was easier to recall the words in the exercise. In academia, the “linking concepts” approach remains relevant; connecting content to the overall goal, and making content relatable to things familiar to the student helps to format the learning experience to the student. 

For example, you may ask the student to link the content or their readings to something they’ve encountered in everyday life, thus making the learning process tailored to their experiences.

The second strategy is Bloom’s Taxonomy:

Bloom’s taxonomy is a quantitative, measurable hierarchy. Each level of learning builds on the next, and to understand which level you are at versus which level you need to be at for the goals of the class is vital.

The first stage is remembering, essentially rote memorization. The second is understanding the terms, characterized by the ability to paraphrase the content.

The third is applying, where you can take the information you’ve understood and use it in new contexts that you have not seen before. Fourth is analyzing, where you can break the concept down into parts, and examine the constitution or structure of the concept.

Fifth is evaluating, where you can take the concept you’ve learned and compare, contrast, and judge influences and competing ideals based on your knowledge of the concept. Lastly, sixth creating: in this stage, you are able to solve problems originally, building off of the knowledge of the concept.

Differing from the buy-in to metacognition, which many view as simply raising grades, bloom’s taxonomy challenges the student to truly understand the material, identify how they interact with material, assess what they know, and shift study habits to engage in deeper learning.

After evaluating where the student is on the taxonomy, how do they move higher, out of levels of memorization and into levels of deep comprehension? Use the study cycle! This is a cycle an instructor can introduce to students for their use.

The cycle consists of 5 steps: Preview, attend class, review, intense study sessions, and assessment.

The preview stage happens before class, where the student skims over notes or completed homework to ascertain the learning objectives for class that day, and any questions they may have.

The second stage is attendance; stress the importance of going to class, no matter what, and taking meaningful notes.

Directly after class, the student should review main concepts learned that day and review by reading over notes and answering questions.

The fourth step is engaging in short study increments where you implement metacognition techniques.

Periodically, the student should pause and make sure that they fully understand the material you have studied. A student may try assessing their stage in Bloom’s taxonomy; are they simply in the memorizing stage, or higher in the evaluating stage?

In college, the level of material retention necessary to succeed in a class is higher than in high school. Students should be aware of the Bloom’s stage they need to be at to succeed; typically, they should be at the analysis or synthesis stage.

Next is a model of the study cycle when applied to reading.

The student should be able to identify the questions they are trying to answer by reading the text; encourage broad skim reading first to understand the topics that will be covered in the reading.

When reading the actual text itself, students should not go straight from beginning to end, instead they should read in chunks to fully digest the information in a feasible manner.

The student needs to be attending class and taking physical, hand-written notes, engaging completely with the material while in class.

Homework should be done first without notes or a guide, and used as an assessment to see how well the student understands the material covered in readings or class.

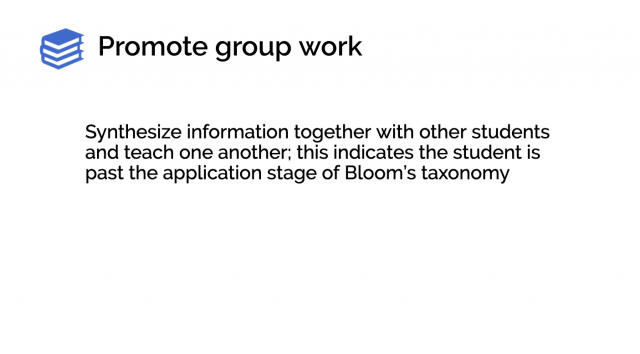
Group work is a fantastic way to implement Bloom’s taxonomy learning, as the students will need to master the material to be able to teach it to each other, fill in learning gaps, and produce a final project or assignment.

In summary, using metacognitive strategies is deeply beneficial in helping students understand how they individually learn best, and how to format their study and class practices to master material. 

It is also incredibly important for teachers, to be able to format their teaching styles to facilitate the most effective student learning.

Thank you for your interest and attention!

If you have any questions, please feel free to contact Information Services at [email protected] or (310) 506-7425.

Courses by Sakai: Roster Tool

The Roster tool displays the names and pictures of site participants, in this case, your class section students. The Roster tool is a helpful way to learn students names, take attendance, and verify identities during class assignments and assessments.

Please keep in mind that you do not need to add officially enrolled students to a class site; all registered students are automatically enrolled each business day.

Also, please note that the Roster tool does not allow an instructor to add or remove participants from a site; therefore, faculty must use Site Info to do this. For detailed steps and more information, read under the coinciding subheading in this article.

If you would like to know how to merge or combine course sections, please click here to be redirected to Community Pepperdine.

To view a video on how to utilize the Roster tool, please view below.

Displaying Pictures in Roster

1. Log on to Courses with your Pepperdine credentials.

2. Scroll through your left tool bar and select “Roster.”

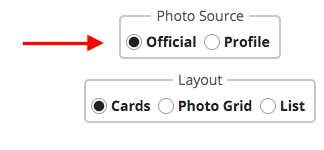
3. Select either “Official Photos” or “Pictures from Profile” on the top right of your Roster page.

“Official Photos” are usually the default and are photos fed from the University ID card system, assuming that the student has taken an ID Card photo. “Pictures from Profile” are the optional profile photos uploaded directly by the students, if they have done so.

4. You may then scroll down to review the available photos for enrolled users based on your selection.

Managing Participants with “Site Info”

1. Log on to Courses with your Pepperdine credentials.

2. Scroll through your left tool bar and select “Site Info.”

3. Select “Manage Participants” on the top menu bar.

4. To filter site participants, click the “View” drop-down and select the user role to manage the individual’s settings to your liking.

Instructors will also have the option to make changes on the participants table:

  • Under “Role,” you can change access privileges that instructors may want to strongly consider before assigning to users. This may be useful for TAs.
  • Under “Status, you can change a user access to the site; keep in mind, “Inactive” will prevent the user from accessing the site.
  • To remove a user from your site, click the “Remove” box corresponding to the use students who are on the course roster (i.e. registered students) cannot be removed manually this way.

5. Select “Update Participants” at the top to process any changes.

6. To add a participant, still under the “Site Info“, click “Add Participants.”

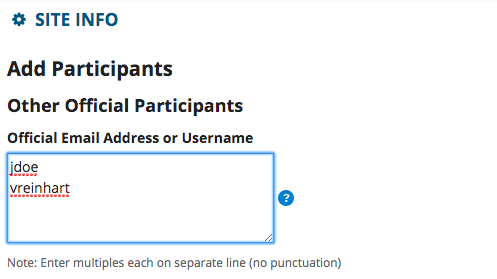
7. To add official Pepperdine University users (faculty, staff, or students) or previously added guests, you may either enter the individuals’s NetworkID username (e.g. jdoe) of formal email address (e.g. [email protected] or [email protected]) in the “Other Official Participants” box.

You may add multiple people at once by simply entering each person on a separate line.

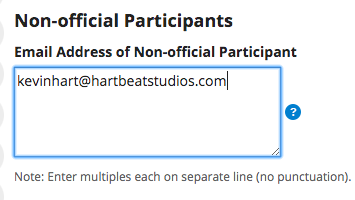
8. To add new, outside users, enter the person’s outside email address in the “Non-official Participants” box.

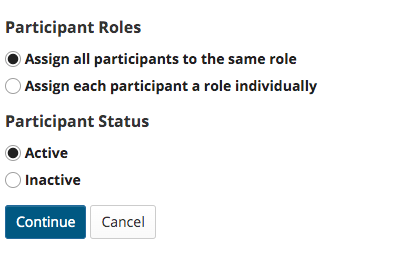
9. Below, chose whether to “Assign all users to the same role” or “Assign each participant a role individually.”

Then, decide whether the new participants will be “Active” (can view the site) or “Inactive” (cannot view the site). Remember, you can change these settings later in “Manage Participants.”

10. Click “Continue.”

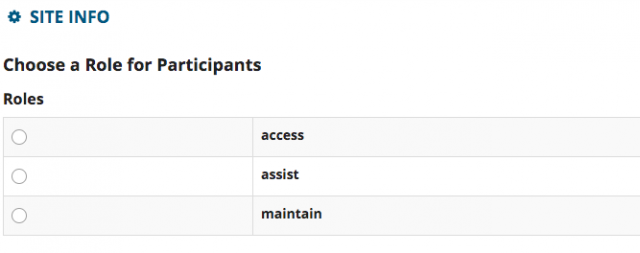
11. Now, you may select the role(s) for the participant(s).

Your options are “Access” (equivalent to Student), “Assist” (equivalent to Teaching Assistant for assigned access to select areas), and “Maintain” (equivalent to Instructor).

12. After choosing roles, click “Continue.”

13. Select whether or not you would like to send an email notice to the added users. If participants are new “outside” users, Courses will automatically send them an activation email to verify their account, enter their details and choose a password.

14. Once your option is selected, click “Continue.”

15. Review the information for accuracy. If you must make any corrections, click on the “Back” option at the bottom.

16. Click “Finish” to add the participants. You may now see the updated participants, as well as see the new students in your “Roster.”

Wondering what else you can do in Courses? For a list of the top 5 Courses tools and information on how to utilize them, click here.

If you have any questions, please feel free to contact Information Services at [email protected] or (310) 506-7425.

Courses by Sakai: Messages Tool

The Messages tool allows you to send and receive messages to students in your course or project site. On this tab, you may view your received, sent, deleted and drafted messages. For step by step instructions on how to send a message and select recipients, as well as a video on how to utilize the tool, please read below.

1. Log on to Courses with your Pepperdine credentials.

2. Scroll through your left tool bar and select “Messages.”

3. Select “Compose Message.”

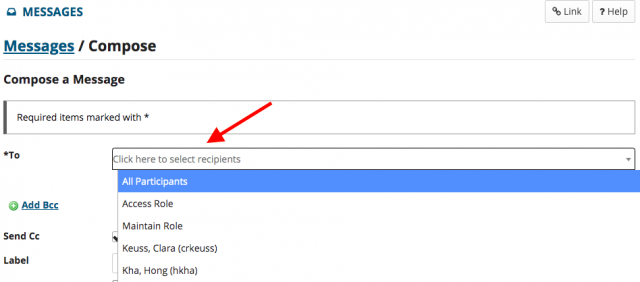
4. Click on the box associated with “*To” and a drop-down menu will appear with your recipient selection. You may choose which specific individuals to message, or select “All Participants.”

5. If not already checked, make sure to select”Send a copy of this message to the recipients’ email address(es),” as this option sends a message to the student’s Pepperdine University email account, not just as a message in the Courses site.

6. Create your email by filling out your “Subject” and “Message.”

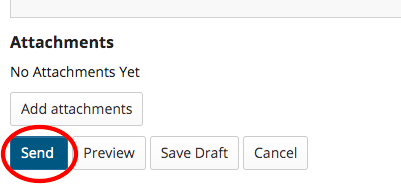
7. Once you are finished with your email, select “Send” on the bottom left.

Wondering what else you can do in Courses? For a list of the top 5 Courses tools and information on how to utilize them, click here.

If you have any questions, please feel free to contact Information Services at [email protected] or (310) 506-7425.

Courses by Sakai: Resources Tool

The Resources tool allows faculty to compile and categorize important information to share with your students in an organized and central manner. Through the Resources tool, you can: share files or website links; post lecture notes, PDF documents, or presentations; release resources based on Gradebook conditions or to specific groups.

Please note that Resources has a 2GB storage maximum, so if you would like to store more than what is allowed, try integrating Google Drive with your Resources tool through a simple web link.

To view an informational video on how to utilize the Resources tool, please view below.

1. Log on to Courses with your Pepperdine credentials.

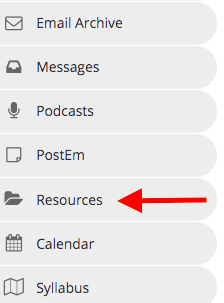
2. Scroll through your left tool bar and select “Resources.”

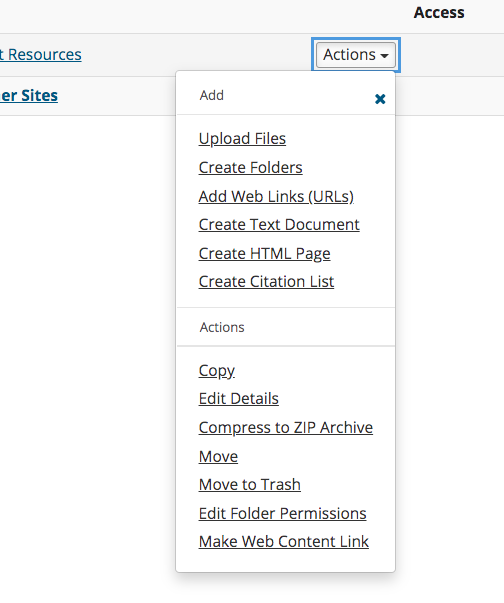
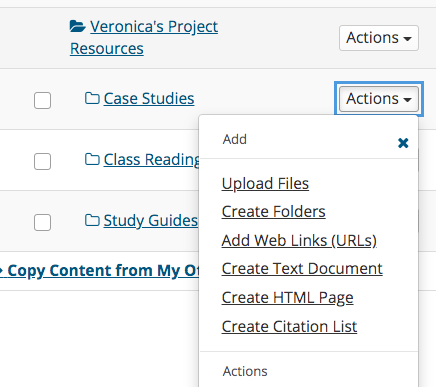
3. Look to the right of your site title under the Resources tab and click on “Actions.” A drop-down menu with numerous options will appear.

The details on what each option allows you to do, as well as the coinciding steps to utilizing the three most popular options, may be found below:

“Upload Files”

You can upload a document (such as a PDF, Word, PowerPoint, etc.) by browsing your computer.

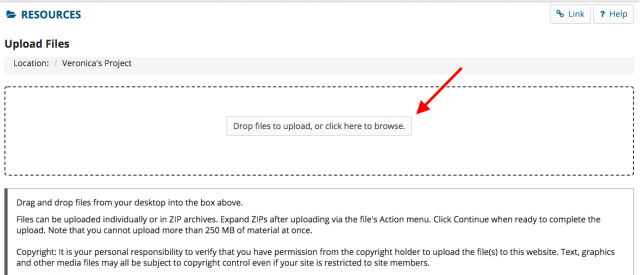
1. To upload a file, from the “Actions” drop-down menu, click “Upload Files.”

2. Simply drag and drop your desired file, or select “Drop files to upload, or click here to browse” to open the file browser window.

3. For the pop-up browser window, select the desired file on your computer and click “Open.”

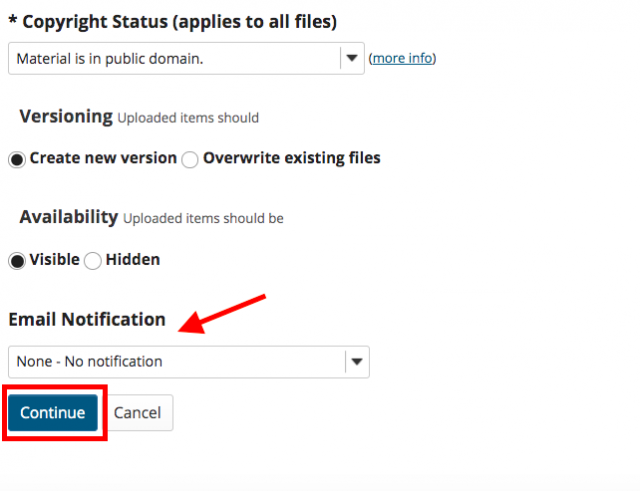
4. To add another file, repeat the process. To finish, click “Continue.”

Under “Email Notifications,” you may select whether or not to email your students with a notification when uploading this file.

“Create Folders” 

Through creating a folder, you can organize your content by uploading categorized, specific files into each of them.

1. From the “Actions” menu, click “Create Folders.”

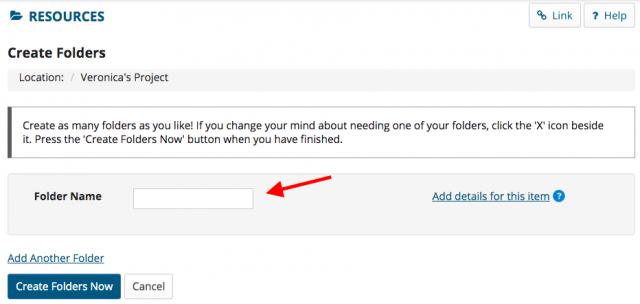
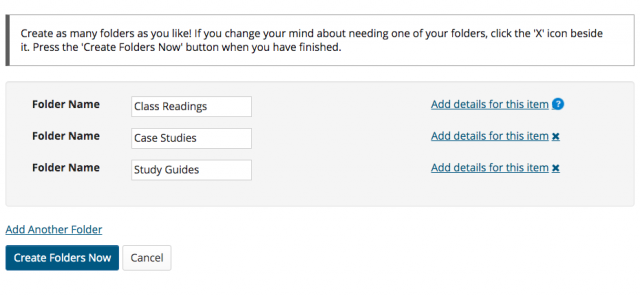
2. You will now be redirected to the “Create Folders” page. Enter a “Folder Name” for your desired folder creation.

3. If you would like to leave the folder named and as is to later populate or create sub-folders, you may go to step 6.

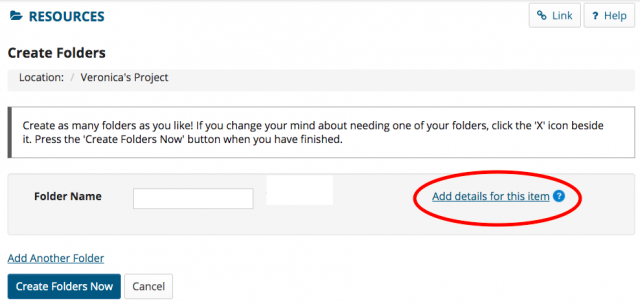
However, if you would like to enter a description, add date restrictions, or set other features, click “Add details for this item.”

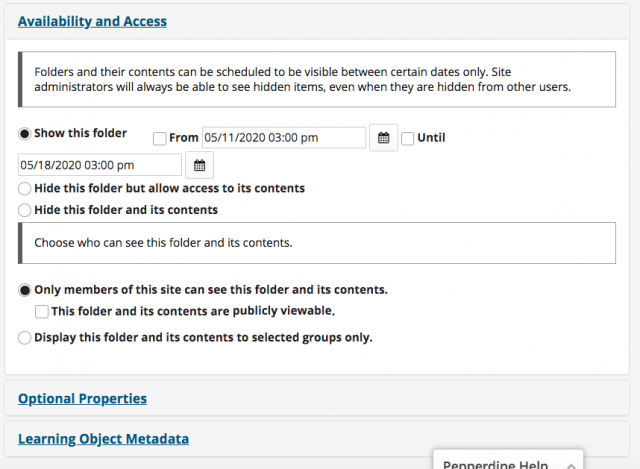
You will now be shown more options. At the top, you may enter a folder description if you wish.

If you scroll down, there will be three drop-down option menus that will allow you to create a folder with features detailed to your liking.

5. Note that you may create as many folders as you like, either individually or at once as shown below.

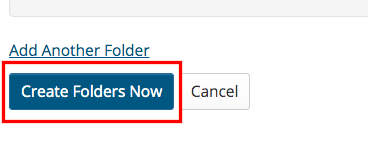
6. Once you have created your folder(s) with or without your preferred details, click “Create Folders Now” on the bottom left to finish.

7. Notice that, once the folder creation is completed, you may select the “Action” button for each coinciding folder and be presented with the same option choices you are now familiar with to populate the folder with the content of your choice.

“Add Web Links (URLs)” 

By adding this, you can share links to relevant websites.

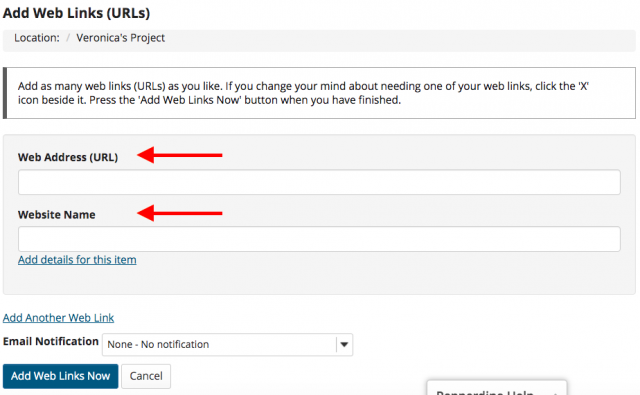
1. From the “Actions” menu, click “Add Web Links (URLs).”

2. Enter your desired website address in the “Web Address (URL)” field (e.g. http://www.pepperdine.edu).

Enter a title for the link in the box labeled “Website Name“. As stated on University Community, the system will populate the web address by default, but you can add any description you prefer (e.g. Visit Pepperdine University’s website).

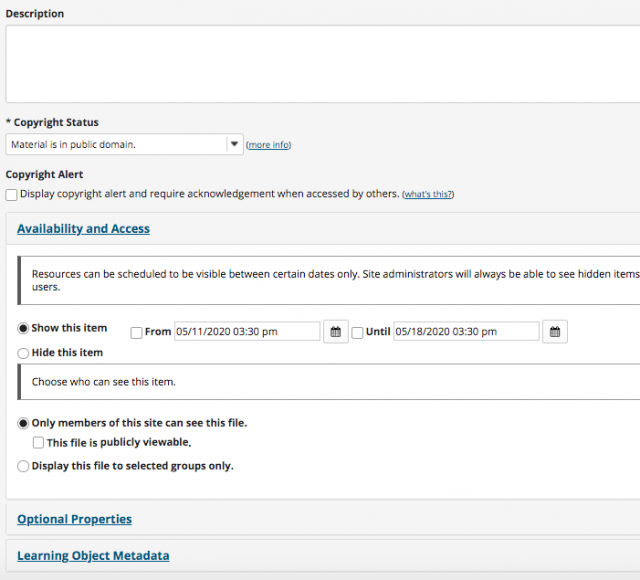
3. Similar to creating folders, click “Add details for this item” to enter a description, add date restrictions, or set other features. If you scroll down, there will be three drop-down option menus that will allow you to create a folder with features detailed to your liking.

4. Note that you may create as many Web Links as you like, either individually or at once as shown below.

5. Once you have created your Web Link(s) with or without your preferred details, click “Add Web Links Now” to finish.

“Create Text Document”

Here, you may create a text (.txt) document.

“Create HTML Page” 

This allows you to create a web page with the built-in rich text editor.

“Create Citation List”

This option allows you to share bibliographic details for multiple references in a list format.

Wondering what else you can do in Courses? For a list of the top 5 Courses tools and information on how to utilize them, click here.

If you have any questions, please feel free to contact Information Services at [email protected] or (310) 506-7425.