Zoom recordings are generally stored in the Cloud, which does not have infinite storage. To preserve room for new incoming recordings, Pepperdine is implementing a six month Zoom retention period.
This retention period is important to ensure that enough cloud storage space remains available for our community during an active academic term. It will also promote good stewardship of University data and resources by encouraging the review and transfer of any critical meeting or lecture recordings to Pepperdine’s longer-term video storage locations.
This will begin January 4, 2021. Please see this timeline to understand when recordings will be deleted:.

What does this mean?
- Pepperdine’s cloud server will refresh every six months. This means that new Zoom cloud recordings will be available for six months before being automatically moved to Zoom trash.
- Once moved to trash, meeting hosts (professors) will have 30 additional days to access the recording from trash before permanent deletion.
What to do before January 4th?
- Review your old Zoom recordings, and determine which ones you wish to keep long term.
- Download any recordings you wish to keep, and archive in either Panopto or Google Drive. See the steps below for how to archive Zoom recordings.
Archive Zoom Recordings to Google Drive
To archive Zoom recordings to Google Drive, follow the steps below.
- Begin by navigating to your online Pepperdine Zoom account, by logging in through https://pepperdine.zoom.us/. For more information on how to access your Zoom account, see Lawtech’s general Zoom page.
- Click Recordings from the left-hand tool column.
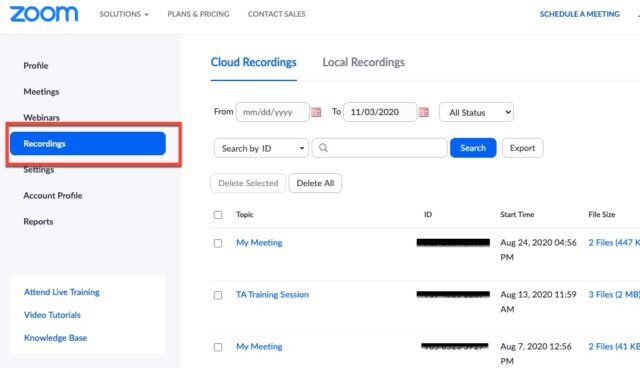
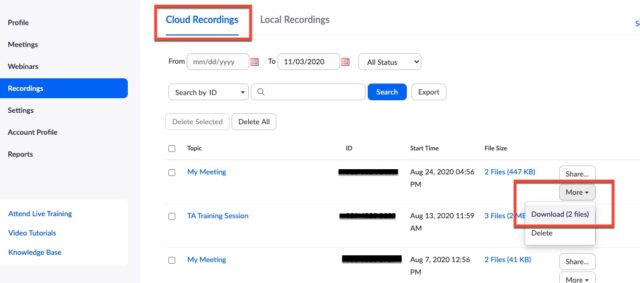
3. Next, under the Cloud Recordings tab at the top of your page, scroll through your meetings until you find the recording you wish to preserve. Click the More button at the far right of the recording, then from the drop-down menu click Download.
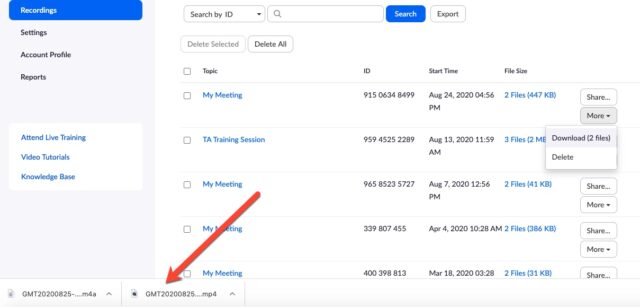
4. You will see the downloaded recording(s) appear at the bottom of your browser, or saved to your downloads wherever they are kept.
5. Now, navigate to Google Drive and log in using your Pepperdine email.
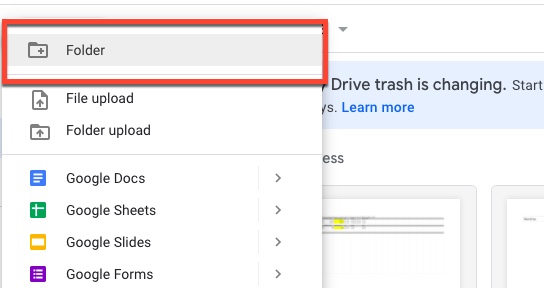
For archiving purposes, we recommend that you create a new folder. To do this, begin by clicking New and then Folder.
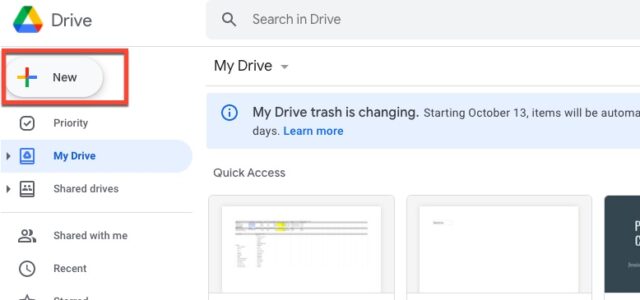
6. Name the folder accordingly.
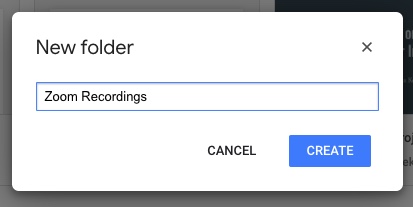
Once you click Create, you will be directed into the folder itself.
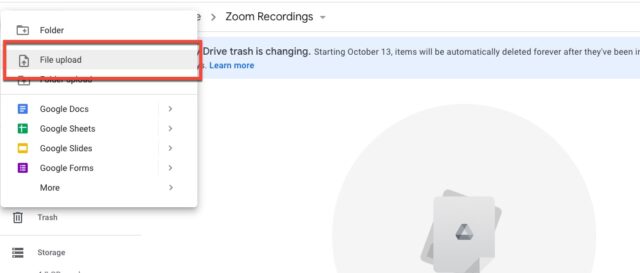
7. To upload your recently downloaded Zoom recording, click New (again) from the upper left hand corner, and then File Upload.
8. You will be directed to your files, where you will navigate to Downloads and then select the recording you wish to archive. Select Open.
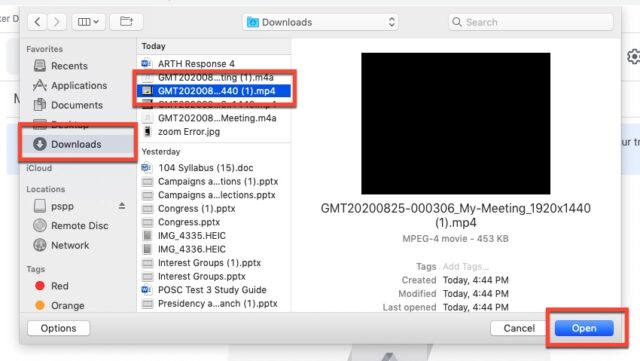
9. Success! Your recording will upload to your new Google Drive folder, to be archived long-term.
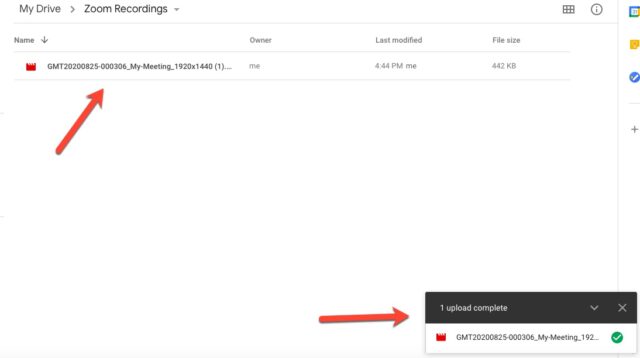
If you would like to mass archive many recordings at once, the process is exactly the same. Just download them all from Zoom, and choose all of the downloaded recordings to be uploaded to your Drive from step 8, instead of one recording only.
For more information, see Pepperdine’s web page on Zoom Cloud Storage Retention.
If you have any questions, please feel free to contact Information Services at support@law.pepperdine.edu or (310) 506-7425.
