In case you are dropped from your Zoom meeting there are some back-up teaching procedures you should know–with the possibility of blackouts, brownouts, or sluggish internet, it’s good to have a backup plan.
Shut down and re-start your computer
The first action you should take if you are unable to join your meeting is to re-start your computer. Quit all applications and shut down your computer, wait one minute and turn it back on. Only open applications you will be screen sharing with your Zoom participants before launching your Zoom session.
Use a phone line
This next advice is only recommended for faculty use. To help students adhere to the attendance policy, they must attend the class via Zoom with their names properly represented on the chat and participant gallery as well as have their video on. With that in mind, please don’t share these phone numbers with your students.
When you create a Zoom session, it gives you the option to use a phone line. If your internet is out, you may use Zoom’s automatically generated phone line number to call and enter into the session to let your students know your status. You can follow the steps below anytime to keep a copy of the phone number on hand in case your internet goes out. If you did not turn this feature on, you can follow the steps below to turn on the telephone and computer audio feature.
Please note, the phone numbers are not published in Courses. Because of this, you can only find the phone number by logging into zoom.pepperdine.edu Then, find your course meeting session in the Meetings and click on the Copy Invitation button. This will show you all of the information relevant to your meeting, along with the phone lines for each time zone.
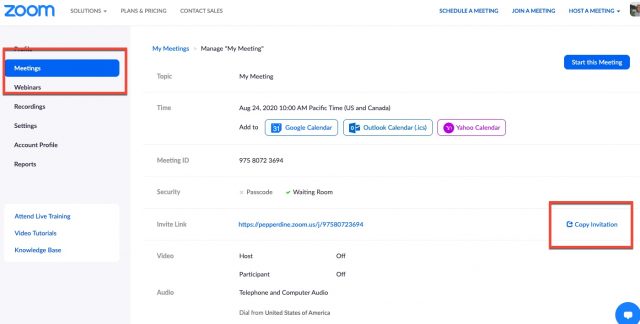

In this case, if a student experiences internet connection issues, it is recommended to instruct them to call their classmate and listen over the phone through their friend’s computer, as well as use speakerphone to talk through their friend’s mic.
Asynchronous: Recording a lecture in Zoom (with slides)
You also have the option to record your lecture, with PowerPoint slides and all, in Zoom. You can distribute this presentation-style recording to students to view asynchronously, in the case of a blackout or network issue. (See this article by Zoom to learn the tools you can use in this feature.)
1. First, to ensure that your Zoom account is updated to the latest version, navigate into your Zoom application and under your profile, find check for updates.
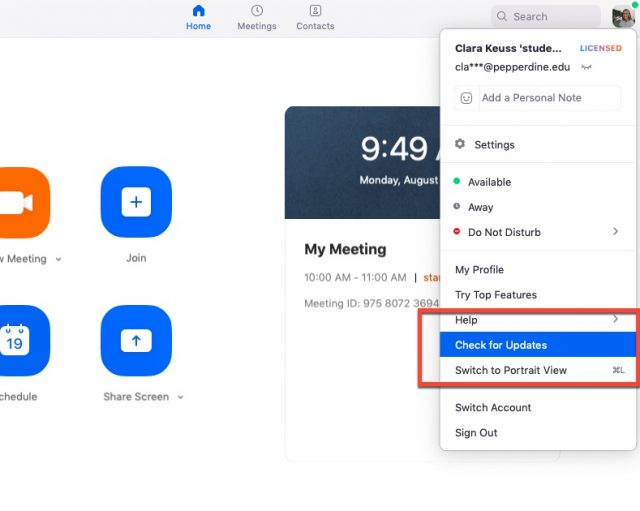
You may also click here to be redirected to a page that will show Zoom’s latest version, as well as provide links and instructions for download.
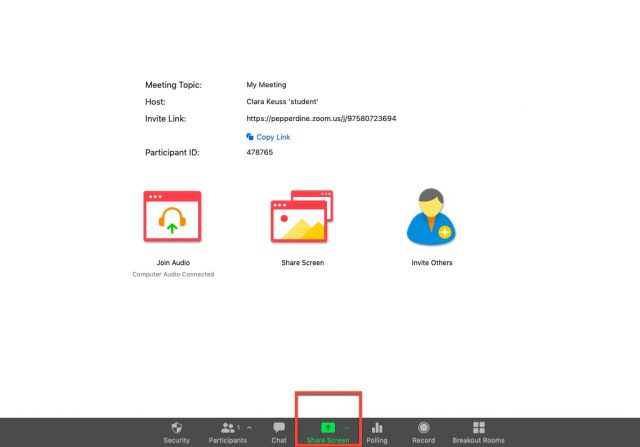
2. Next, begin your meeting and click on the Share Screen icon (green arrow).
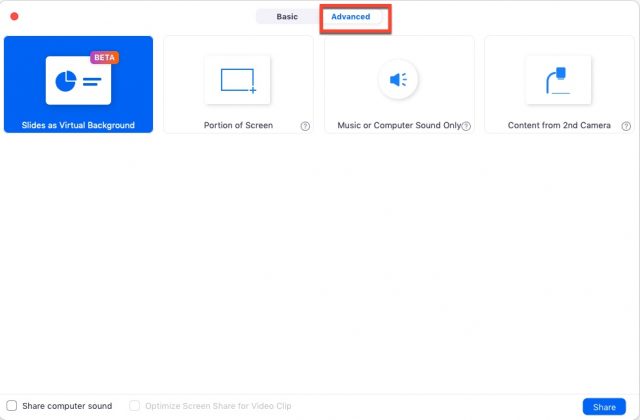
3. Then, click Advanced on from the two options on the toggle at the top of the page. Select Slide as Virtual Background.
4. Click Share.
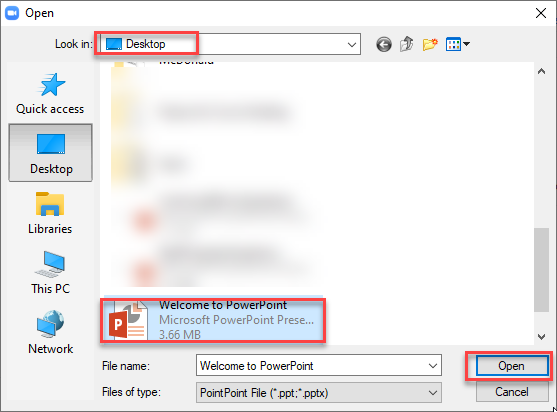
5. From here, you will be directed into your files where you can choose the PowerPoint you wish to present. You will then be superimposed over the slides (which will be your new background) and it will emulate teaching in front of slides in a class or lecture setting. Find the presentation you wish to use and click Open.
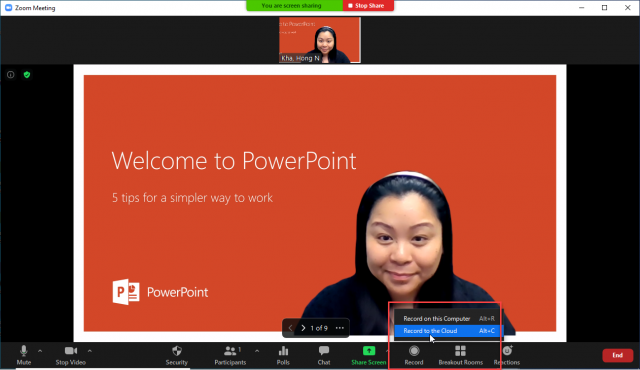
6. You should see yourself mirrored over your presentation via Screen Share.
7. Next, click the circular record button in your bottom toolbar to begin recording, and select record to the Cloud.
Again, see the Zoom article on sharing slides as a virtual background to learn the navigation, positioning your video, and more. For learning more about recording in Zoom, see this article.
For more information on Zoom for faculty, please click here. If you have any questions, please feel free to contact Information Services at support@law.pepperdine.edu or (310) 506-7425.

