The Resources tool allows faculty to compile and categorize important information to share with your students in an organized and central manner. Through the Resources tool, you can: share files or website links; post lecture notes, PDF documents, or presentations; release resources based on Gradebook conditions or to specific groups.
Please note that Resources has a 2GB storage maximum, so if you would like to store more than what is allowed, try integrating Google Drive with your Resources tool through a simple web link.
To view an informational video on how to utilize the Resources tool, please view below.
1. Log on to Courses with your Pepperdine credentials.
2. Scroll through your left tool bar and select “Resources.”
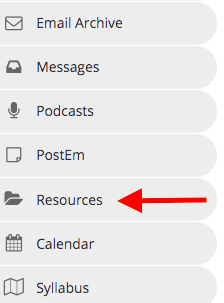
3. Look to the right of your site title under the Resources tab and click on “Actions.” A drop-down menu with numerous options will appear.
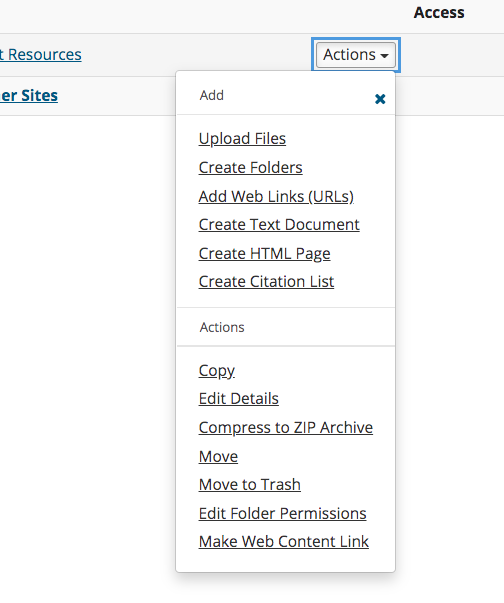
The details on what each option allows you to do, as well as the coinciding steps to utilizing the three most popular options, may be found below:
“Upload Files”
You can upload a document (such as a PDF, Word, PowerPoint, etc.) by browsing your computer.
1. To upload a file, from the “Actions” drop-down menu, click “Upload Files.”
2. Simply drag and drop your desired file, or select “Drop files to upload, or click here to browse” to open the file browser window.
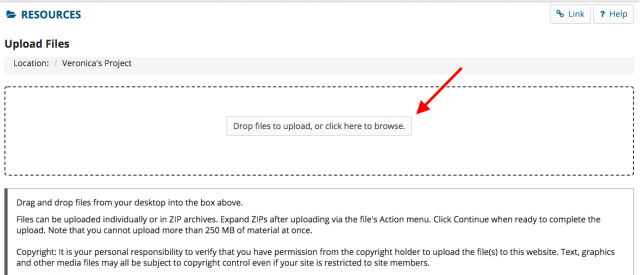
3. For the pop-up browser window, select the desired file on your computer and click “Open.”

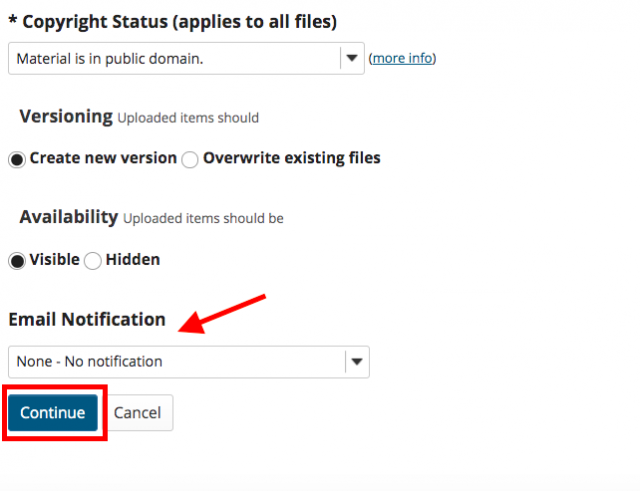
4. To add another file, repeat the process. To finish, click “Continue.”
Under “Email Notifications,” you may select whether or not to email your students with a notification when uploading this file.
“Create Folders”
Through creating a folder, you can organize your content by uploading categorized, specific files into each of them.
1. From the “Actions” menu, click “Create Folders.”
2. You will now be redirected to the “Create Folders” page. Enter a “Folder Name” for your desired folder creation.
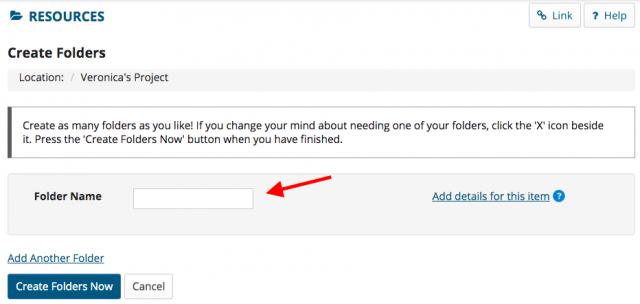
3. If you would like to leave the folder named and as is to later populate or create sub-folders, you may go to step 6.
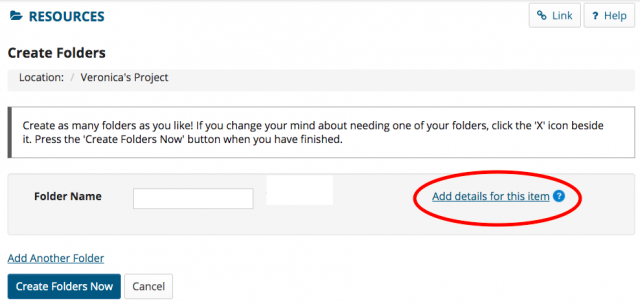
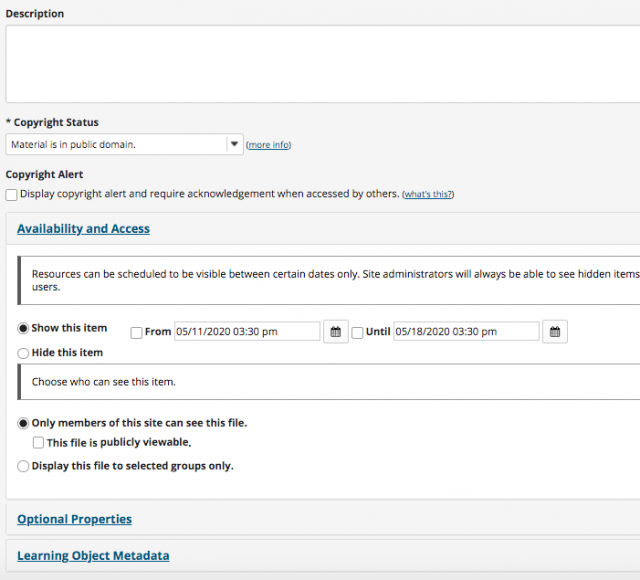
However, if you would like to enter a description, add date restrictions, or set other features, click “Add details for this item.”
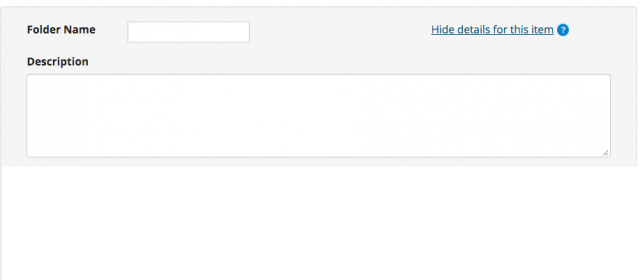
You will now be shown more options. At the top, you may enter a folder description if you wish.
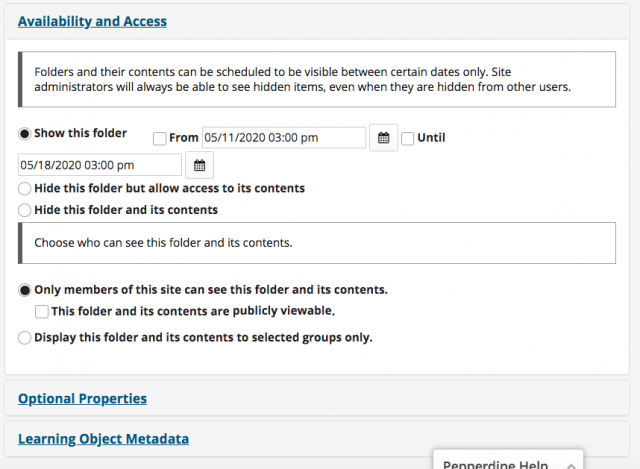
If you scroll down, there will be three drop-down option menus that will allow you to create a folder with features detailed to your liking.
5. Note that you may create as many folders as you like, either individually or at once as shown below.
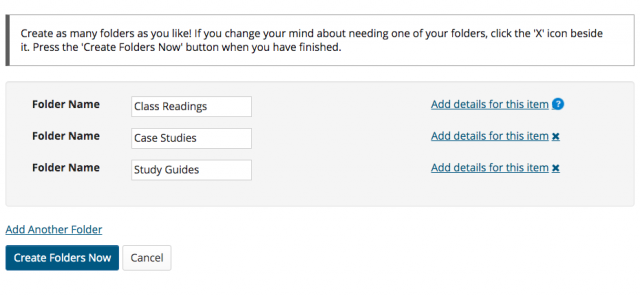
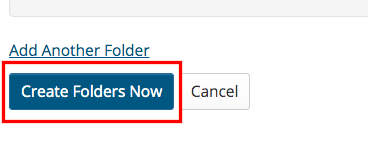
6. Once you have created your folder(s) with or without your preferred details, click “Create Folders Now” on the bottom left to finish.
7. Notice that, once the folder creation is completed, you may select the “Action” button for each coinciding folder and be presented with the same option choices you are now familiar with to populate the folder with the content of your choice.
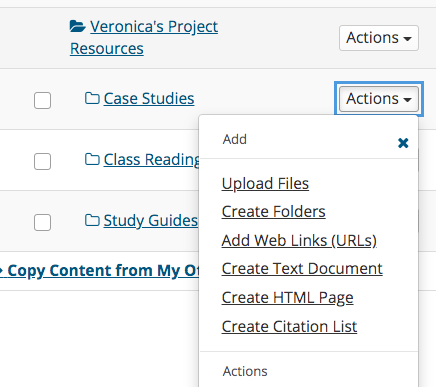
“Add Web Links (URLs)”
By adding this, you can share links to relevant websites.
1. From the “Actions” menu, click “Add Web Links (URLs).”
2. Enter your desired website address in the “Web Address (URL)” field (e.g. http://www.pepperdine.edu).
Enter a title for the link in the box labeled “Website Name“. As stated on University Community, the system will populate the web address by default, but you can add any description you prefer (e.g. Visit Pepperdine University’s website).
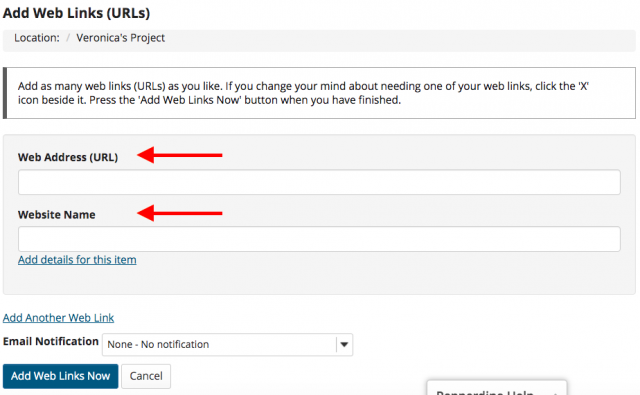
3. Similar to creating folders, click “Add details for this item” to enter a description, add date restrictions, or set other features. If you scroll down, there will be three drop-down option menus that will allow you to create a folder with features detailed to your liking.
4. Note that you may create as many Web Links as you like, either individually or at once as shown below.

5. Once you have created your Web Link(s) with or without your preferred details, click “Add Web Links Now” to finish.

“Create Text Document”
Here, you may create a text (.txt) document.
“Create HTML Page”
This allows you to create a web page with the built-in rich text editor.
“Create Citation List”
This option allows you to share bibliographic details for multiple references in a list format.
Wondering what else you can do in Courses? For a list of the top 5 Courses tools and information on how to utilize them, click here.
If you have any questions, please feel free to contact Information Services at support@law.pepperdine.edu or (310) 506-7425.
