Zoom releases updates fairly frequently. Some of those updates contain significant changes to the functionality of your Zoom installation. All provide a better overall experience because the Zoom engineers improve security and stability with nearly every update.
With the power outages affecting our students, faculty, and staff, the IS team recommends using an Uninterruptable Power Supply, UPS, to protect your electronics and keep you working.
A UPS is a battery backup for your electronics. Depending on the size of the UPS, they can provide a few extra minutes of power to safely turn off your computer or a few extra hours to keep working on your project.
No matter the battery size, please purchase one with Automatic Volt Regulation, AVR. This will protect your electronics from voltage issues, like brownouts, and will keep the UPS battery healthy.
Please contact the IS team at 310-506-7425 if you have any questions.
As the Spring 2021 semester draws near, faculty may want to copy information from one class site to another. Copying from one site to another is easy and can save time.
You can find more information about this at the TechLearn page found here.
How to Copy Course Information
Click the tab for the course or project site, or click the “Sites” menu at the top right and click the desired site. NOTE: You must be in the new course site. Do not go to the old course site.
2. Enable the same tools from your old site in your new site. You may not see content to copy if you have not added the same tools
3. In the new site, click “Site Info” in the left menu.
4. Click “Import from Site.”
5. Select the best option:
“I would like to replace my data.” – Be careful! This will overwrite all information in the current site and replace it with the information from the selected site. If you want to copy gradebook items, this is the choice. However, be sure you are in the correct site! Also, be sure you haven’t added anything into the current site yet since it will be overwritten. If you erase the existing site contents, that action is permanent and cannot be undone.
“I would like to merge my data.” – RECOMMENDED! This simply copies information from a previous site into your new site. It does not overwrite any content you have already added into your new site. This choice is recommended in most cases.
“I would like to merge my user(s).” – Be careful! This option only copies users and only those users that have been manually added into a previous class site. NOTE: This process will not copy roster-provided users. For official class sites, see how to merge or combine course sections into your site.
6. Choose a past course site to copy materials from and click “Continue.”
7. Select the desired tools that contain the content you wish to copy. If you do not see a tool, look at your left tool menu. Remember, you must first enable the tool in your new site before you can import materials into it.
8. Click “Finish.”
Note: Announcements that instructors chose to generate “on-the-fly” when assignments were created or updated in a prior term will not import to another site. This is a good thing, as those announcements were tied to specific due dates and changes for the respective term, and would no longer have any relevance to the new term.
For information on how to enable closed captions for your meeting/class/event as a host please see this page.
Desktop Client
Sign in to the Zoom desktop client.
Join a meeting or webinar.
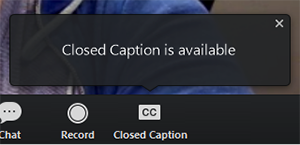
When closed captioning beings, you will see a notification above Closed Caption in the meeting controls.
4. Click Closed Caption to start viewing closed captioning. Tip: Click and drag the closed captioning to move its position in the meeting window.
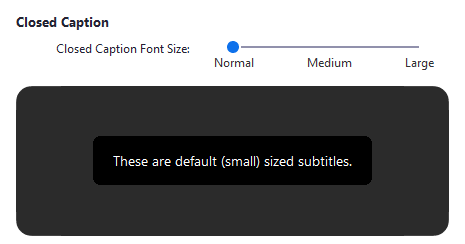
(Optional) To adjust the caption size:
Click the upward arrow next to Start Video/ Stop Video.
Click Video Settings the Accessibility.
Move the slider to adjust the caption size.
Mobile Application
Sign in to the Zoom mobile app
Tap the Settings icon.
3. Tap Meeting. 4. Toggle Closed Captioning to on. When you are in a meeting where closed captioning is available, they will automatically appear on the bottom of the screen.
Pulled from Zoom's support page: https://support.zoom.us/hc/en-us/articles/207279736-Managing-and-viewing-closed-captioning
If you have any questions, please feel free to contact Information Services at support@law.pepperdine.edu or (310) 506-7425.
Zoom recordings are generally stored in the Cloud, which does not have infinite storage. To preserve room for new incoming recordings, Pepperdine is implementing a six month Zoom retention period.
This retention period is important to ensure that enough cloud storage space remains available for our community during an active academic term. It will also promote good stewardship of University data and resources by encouraging the review and transfer of any critical meeting or lecture recordings to Pepperdine’s longer-term video storage locations.
This will begin January 4, 2021. Please see this timeline to understand when recordings will be deleted:.
What does this mean?
Pepperdine’s cloud server will refresh every six months. This means that new Zoom cloud recordings will be available for six months before being automatically moved to Zoom trash.
Once moved to trash, meeting hosts (professors) will have 30 additional days to access the recording from trash before permanent deletion.
What to do before January 4th?
Review your old Zoom recordings, and determine which ones you wish to keep long term.
Download any recordings you wish to keep, and archive in either Panopto or Google Drive. See the steps below for how to archive Zoom recordings.
Archive Zoom Recordings to Google Drive
To archive Zoom recordings to Google Drive, follow the steps below.
Begin by navigating to your online Pepperdine Zoom account, by logging in through https://pepperdine.zoom.us/. For more information on how to access your Zoom account, see Lawtech’s general Zoom page.
Click Recordings from the left-hand tool column.
3. Next, under the Cloud Recordings tab at the top of your page, scroll through your meetings until you find the recording you wish to preserve. Click the More button at the far right of the recording, then from the drop-down menu click Download.
4. You will see the downloaded recording(s) appear at the bottom of your browser, or saved to your downloads wherever they are kept.
5. Now, navigate to Google Drive and log in using your Pepperdine email.
For archiving purposes, we recommend that you create a new folder. To do this, begin by clicking New and then Folder.
6. Name the folder accordingly.
Once you click Create, you will be directed into the folder itself.
7. To upload your recently downloaded Zoom recording, click New (again) from the upper left hand corner, and then File Upload.
8. You will be directed to your files, where you will navigate to Downloads and then select the recording you wish to archive. Select Open.
9. Success! Your recording will upload to your new Google Drive folder, to be archived long-term.
If you would like to mass archive many recordings at once, the process is exactly the same. Just download them all from Zoom, and choose all of the downloaded recordings to be uploaded to your Drive from step 8, instead of one recording only.
For more information, see Pepperdine’s web page on Zoom Cloud Storage Retention.
If you have any questions, please feel free to contact Information Services at support@law.pepperdine.edu or (310) 506-7425.
Your browser saves time by navigating through shortcuts to saved or cached information. This means that if a website is changed or upgraded, your browser may rely on saved or cached information to load the page. This can occasionally cause some discrepancies between an older version of a webpage and a newer one.
You can manually force your browser to reach out to the most recent version of a website by clearing your cache and browser data. Find out how to clear your browser data for each browser listed below. Also, see this page for more information on the steps listed below.
Chrome
Open Chrome. At the top right corner of your screen, hit more (the three gray buttons). Then from the drop-down menu, click history, and history again.
2. On the left, click clear browsing data. From the drop-down menu, you will be able to select how much you would like to delete. To delete all, select All Time.
Apple Safari
Open Safari. Choose history, then clear history. Then select from the drop-down menu how far back you would like to clear.
Mozilla Firefox
Open Firefox. Then click the library tab, and then history and clear recent history.
You will be presented with a dialogue box where you can choose the time range you would like to clear.
Microsoft Edge
Open Microsoft Edge. Select Settings and More and then history, then manage history. Alternatively, you may paste this link: edge://settings/privacy into your browser).
Under clear browsing data, choose the time frame you would like to clear.
If you have any questions, please feel free to contact Information Services at support@law.pepperdine.edu or (310) 506-7425.
Zoom is an online meeting platform and the University’s web conferencing software that will be used for holding classes online. Alternative hosts possess the same abilities as co-hosts (managing participants, admission, recordings, etc.), but also have the additional privilege of starting the meeting on the host’s behalf. Some professors may find it beneficial to make their TA’s alternative hosts. Here, you will be guided through instructions on how to add an alternative host to your meeting sessions.
2. Click on “Zoom Pro” tool on the left navigation.
3. Click on the blue link of your session name under the “Topic” column.
4. Scroll down to the bottom of the page, click on “Edit this Meeting.”
5. Scroll down to the bottom of the page again and type in the email of your desired individual into the “Alternative Host” box. Last, click the “Save” button.
There are instances in which a professor would prefer to disable the chat feature in Zoom meetings, whether that be to prevent notifications or to discourage potentially distracting engagements. To do so, please view the instructions below for this quick process.
1. Note that you can only change this setting after you have begun your class session. Once you start your Zoom session, click the chat icon on the bottom tool bar.
2. Then, click on the three dots to the right of the text box and select “No One.”
3. You may now exit out of the chat window, as the updates will automatically save once your selection is checked.