Similar to TWEN and other course management systems, faculty may use Course’s by Sakai’s Syllabus tool to post a syllabus for students to easily access in their Course site. This article goes in detail on the different options of creating and/or uploading your syllabus, as well as the specific steps regarding the processes.
For more information, please watch the video and read the information presented bellow.
Syllabus Options
Faculty can include a syllabus to their site in four different ways:
File Attachment. Faculty may add a document (ex, .pdf, .docx) as an attachment to the Syllabus tool in Courses. If uploaded like this, students can download, open, and print the file at their convenience. However, in order to make a syllabus edit, the instructor will must edit the original document and re-upload the new version as a replacement or follow-up revisal. (This is the most common option.)
Webpage from Document. You can also create a webpage syllabus from a text document using the Text Editor within the Syllabus tool by either copying and pasting your syllabus or writing the information directly in the text box. Students may still view and print the syllabus at their convenience, and the instructor may edit the syllabus directly through the same site’s Text Editor.
Multi-Part Syllabus. Instructors can create a multi-part syllabus by adding one syllabus item at a time, with the option of reordering or removing individual items in the syllabus editor. (This is a good option to use if the instructor likes to organize the syllabus by weeks or class meetings.)
Point to Webpage. This option is best used if the faculty has a syllabus posted on a webpage, so the instructor may direct, or link, the Syllabus tool to that syllabus.
Steps on How to Add Your Syllabus
For instructions on how to add a Syllabus, please read below.
1. Log on to Courses with your Pepperdine credentials.
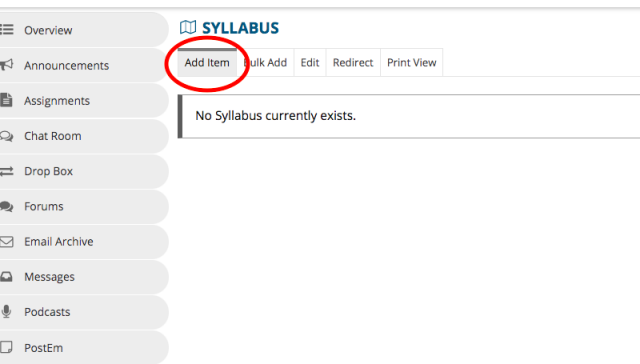
2. Scroll through your left tool bar and select “Syllabus.”
3. Under the Syllabus title, click “Add Item” in the tabs presented.

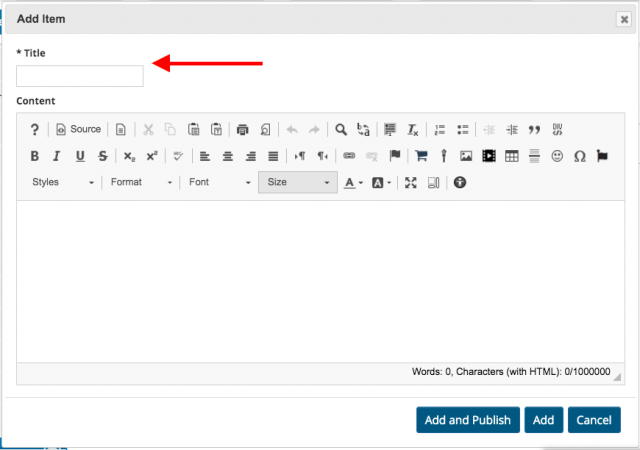
4. A required dialog box will then appear. Proceed to first enter a title for your syllabus item (e.x. “Fall 2020 Syllabus”).

For attaching a syllabus
- After entering the title of your syllabus, you may leave the content part blank. Click “Add and Publish,” and skip to step 5.
For other syllabus options
- You may copy and paste your syllabus information into the Content area, write new information, and/or link to other websites or resources to your syllabus.
- If you would like to create multiple items, create the titles as your syllabus section titles and type or link the coinciding content with that section. Repeat these steps for each section until you have a complete syllabus. This will allow you to create an online syllabus that does not require an additional application for viewing.
5. To attach a document, click “+Add Attachments.” From here, you may upload file(s) from your computer, point to an outside website link (URL), or select an existing document from the “Resources” tool.
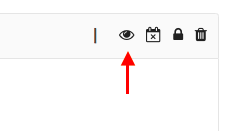
6. If you do not yet wish to have your syllabus viewed by your students, you may hide your syllabus by selecting the “eye” icon on the left side of your published syllabus. To verify that it is hidden, the eye should not have a line across, and a “Saved!” pop-up message should appear near the Syllabus title. To unhide, simply select the “eye” once more.

Wondering what else can you do in Courses? For a list of the top 5 Courses tools and information on how to utilize them, click here.
If you have any questions, please feel free to contact Information Services at [email protected] or (310) 506-7425.