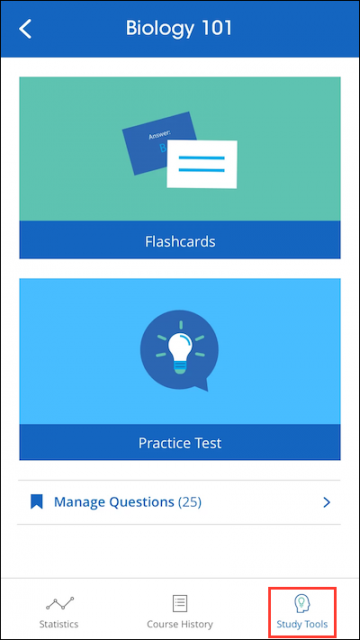
How to Use iClicker’s Study Tools

Photo by iClicker.com

With exams coming up, iClicker may pose to be a beneficial study tool for your class. Saving and tracking your progress in class polls and quizzes, iClicker allows you to flag specific questions and create flashcards and practice tests.

For instructions and more information on how to use iClicker’s study tools in the iClicker Reef app, please click here to be redirected to their knowledge base document.

When you have finished a session using iClicker, select ‘Course History’ from the toolbar region above. This will bring you to a list showing your activities and attendance throughout your time in the course, and should look something like this:
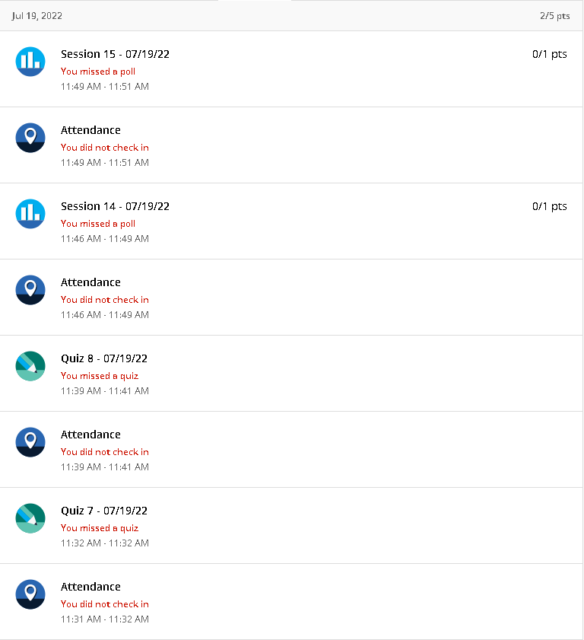
Select the chosen session that you wish to review. From there it will bring you to a page showing all of the questions that appeared during that session.
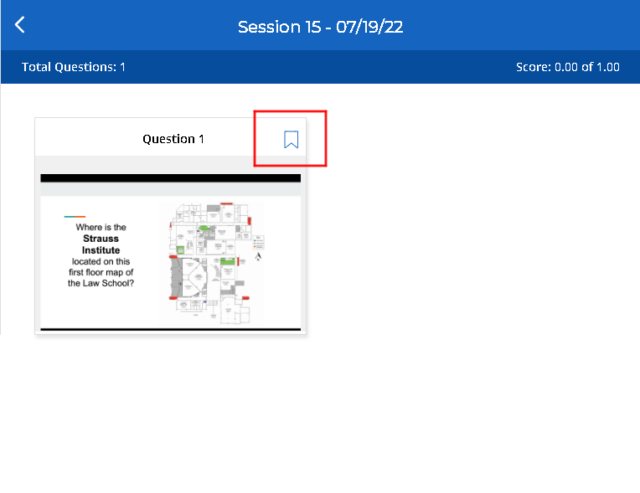
Notice the flag at the top right of the question. By clicking (or tapping) the flag you can review the question later in ‘Study Tools.’ If you don’t select any flags, the ‘Study Tools’ tab will simply say: “You don’t have any questions yet.”
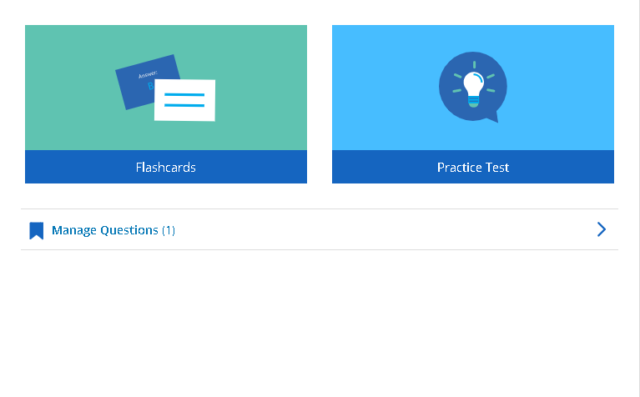
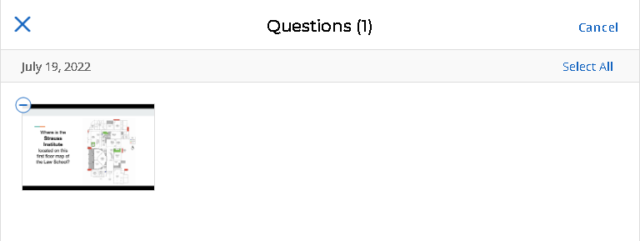
Within the ‘Study Tools’ tab, you can review questions in two ways: Flashcards, or Practice Test. Flashcards allow you to review every question you have flagged in that format. A Practice Test will take all of your graded questions and format it into a test. If it does not allow you to make a practice test it is likely you do not have any graded questions flagged. Finally, the ‘Manage Questions’ link will bring you to a page with all of your questions together. This can make it easy to remove questions that you have flagged without having to go back and find them in old sessions. This is done by selecting edit in the top right corner:
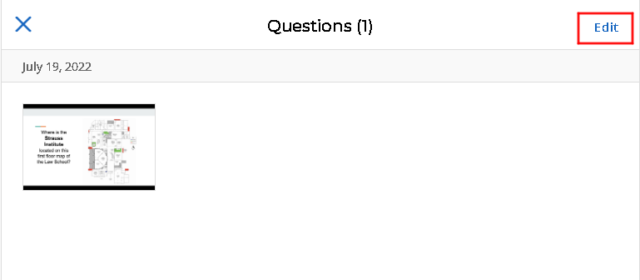
Select them individually, or as a whole by clicking (or tapping) ‘Select All.’
For more information on iClicker for students, please click here.

If you have any questions, please feel free to contact Information Services at [email protected] or (310) 506-7425.

iClicker for Students

Welcome to iClicker for students! For an extensive tutorial on creating an account and utilizing the features iClicker has to offer our law students, please see the video below.

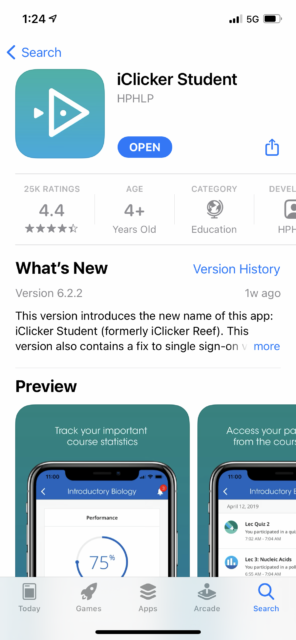
Note for returning students: the former “iClicker REEF for students is now named iClicker Student.”

1. Create a student account.

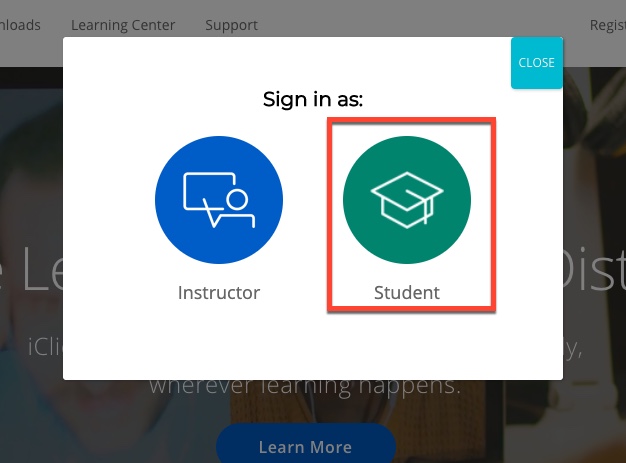
In a browser, go to the iClicker website and choose Sign In from the top right corner and then Student.

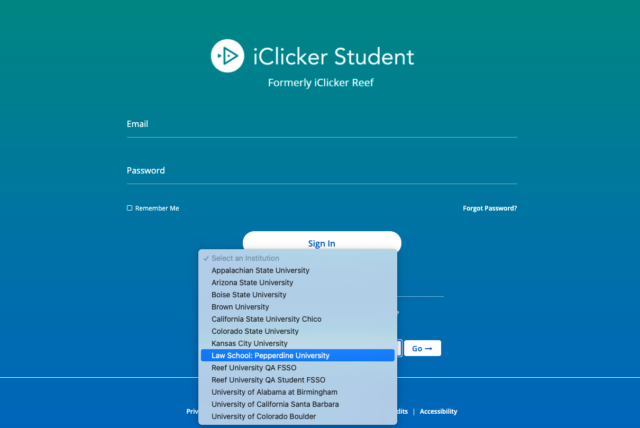
2. At the bottom of the screen, select Law School: Pepperdine University from the institution options and then select Go.

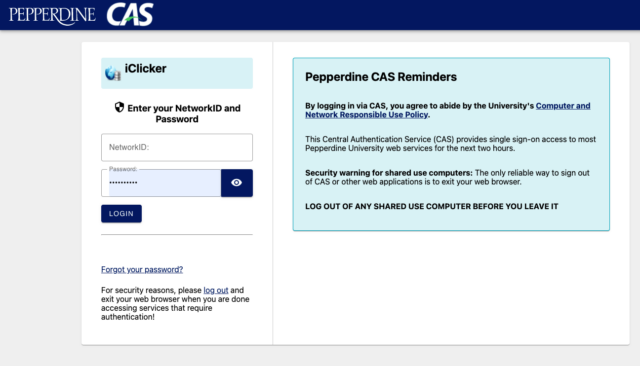
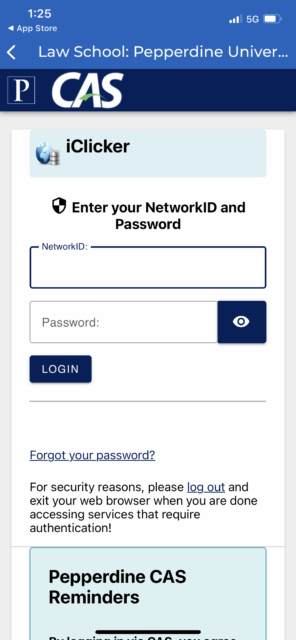
3. You will then be directed to the CAS campus portal. Log in using your CAS Login username and password.

4. You’ll then be directed back to iClicker student account setup page. If you already have a student account, you will be prompted to enter your iClicker password again (same as Wavenet password) to link the accounts.

Adding a Course

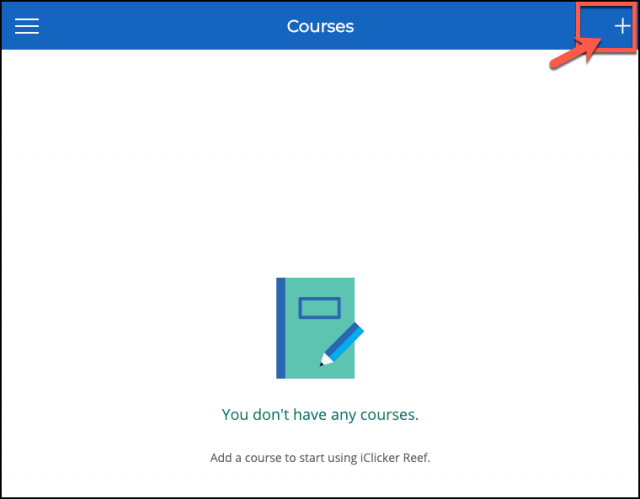
1. Click the plus sign at the top right corner of your iClicker Student account

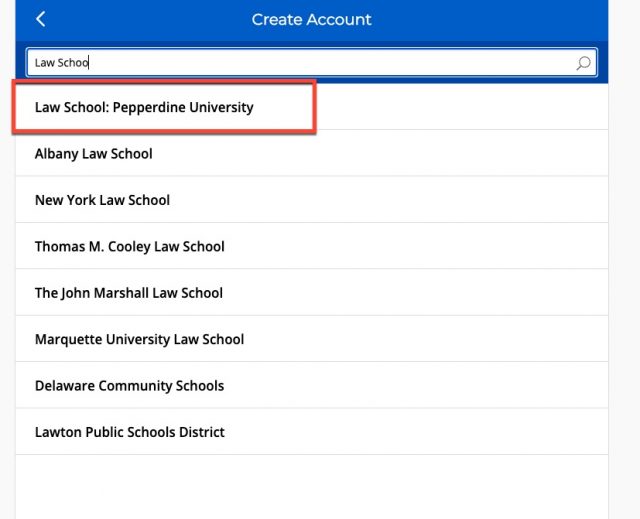
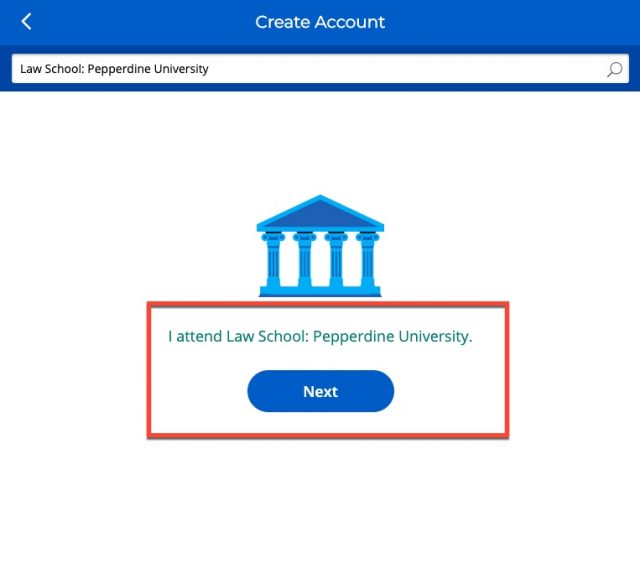
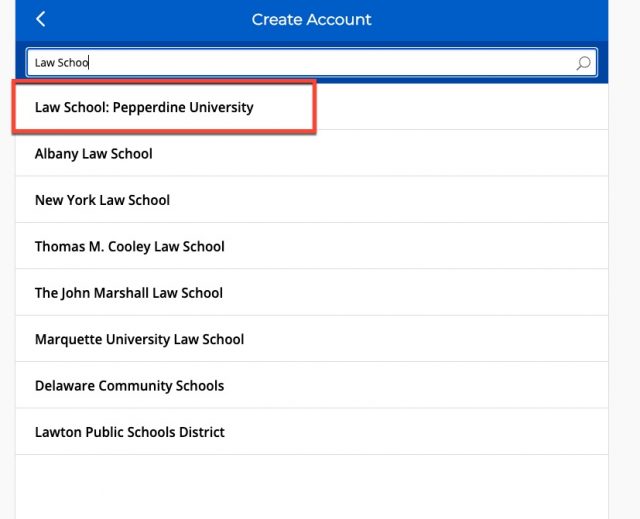
2. When prompted for an institution, type Law School: Pepperdine University. Ensure that you do not choose simply “Pepperdine University” as that is not the version used by Caruso School of Law.

3. Click “Next” to confirm. The prompt should indicate that you attend Law School: Pepperdine University.

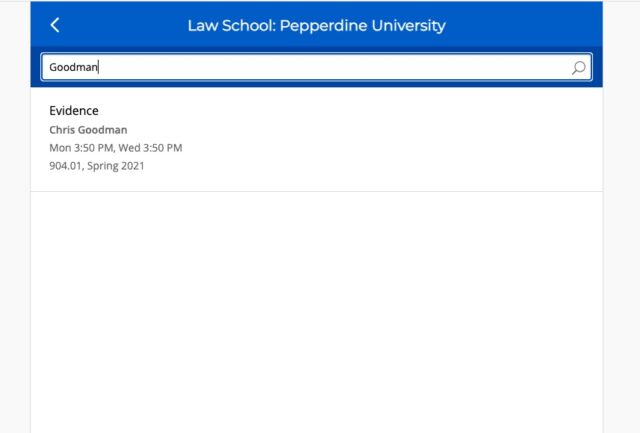
4. Next, type in either the name of your course or your instructor. Note: if the course does not appear, reach out to your instructor as they may have created the course in “Pepperdine University” instead of “Law School: Pepperdine University”.

5. Finally, confirm that the course is correct, and then click Add this Course.

iClicker on your Mobile Device

Download the iClicker Student app from the app store to your mobile device.

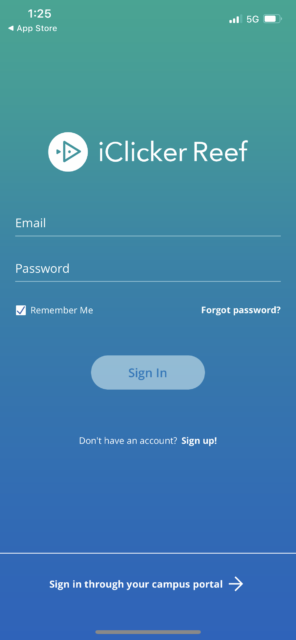
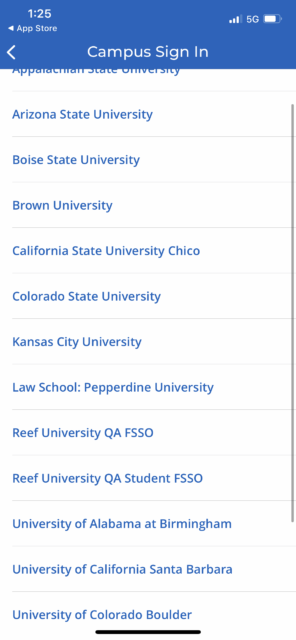
At the bottom of the login page, choose “Sign in through your campus portal

Select Law School: Pepperdine University

Login with your Wavenet account at the CAS screen.

Add a course by clicking the plus sign in the top right of your screen.

9. Under “Find your institution”, find Law School: Pepperdine University.

10. Find your course by typing in the course name OR professor name. It will show up when you start typing. Then select it from the options listed.

11. Check to see the information is correct, then add the course.

12. Now, under course lists, your class should appear.

13. Note the major benefit of using iClicker: study tools. Once you enter a class, on the top toolbar region will be listed course history, statistics, and study tools to aid in tracking your progression!

If you have any questions, please feel free to contact Information Services at [email protected] or (310) 506-7425.